Warm Texas Trash Dip (The Ultimate Cheap Bean Dip)
Warm Texas Trash Dip (The Ultimate Cheap Bean Dip)
Get ready to wow your crowd with this incredibly easy and unbelievably delicious Warm Texas Trash Dip! It’s the ultimate budget-friendly appetizer that comes together in a flash, perfect for game nights, potlucks, or just a cozy family evening. Prepare for rave reviews and empty bowls!
10 minutes
20-25 minutes
30-35 minutes
8-10 servings
Appetizer
Baked
Tex-Mex
Vegetarian
Oh my goodness, friends, do I have a treat for you today! If you’re anything like me, you’re always on the hunt for that perfect appetizer that’s both ridiculously easy to make and an absolute crowd-pleaser. Well, let me tell you, you’ve just hit the jackpot with this Warm Texas Trash Dip! Don’t let the quirky name fool you – there’s nothing trashy about this dip except how quickly it disappears from the bowl!
This recipe is a true lifesaver for busy moms, hostesses on a budget, or anyone who just loves good food without all the fuss. We’re talking about a warm, cheesy, bean-filled dream that’s packed with flavor and comes together with minimal effort. Imagine a cozy gathering, laughter filling the air, and everyone gathered around a bubbling, golden-brown dip, scooping up every last bit with their favorite chips. That’s the magic of Texas Trash Dip!
It’s the kind of dish that brings people together, sparks conversations, and leaves everyone feeling happy and satisfied. Plus, it’s incredibly versatile, so you can easily tweak it to fit your family’s tastes. Whether you’re hosting a big game day party, a casual get-together with neighbors, or just looking for a fun snack for movie night, this dip is about to become your new go-to. Trust me, once you try it, you’ll understand why it’s earned its legendary status!

History & Origins
The exact origins of ‘Texas Trash Dip’ are a bit of a culinary mystery, much like many beloved potluck dishes! It’s one of those recipes that seems to have been passed down through generations, evolving slightly with each family’s touch. The ‘trash’ in the name isn’t a reflection of its quality, but rather a playful nod to the fact that it often incorporates a delightful mix of ingredients, sometimes whatever you have on hand, all baked together into something truly wonderful. It’s a testament to the resourcefulness and creativity often found in Southern cooking, where simple, affordable ingredients are transformed into something extraordinary.
While similar bean dips have existed in various forms across the Southwest and Mexico for ages, the specific combination of refried beans, cream cheese, sour cream, and various Tex-Mex seasonings, all baked until bubbly, really cemented its place in American party food culture. It became particularly popular at casual gatherings, tailgates, and holiday potlucks, especially in Texas and neighboring states, where hearty, flavorful, and easy-to-share dishes are always a hit. It’s a comfort food classic that embodies the spirit of communal eating and good times.
Why This Recipe Works
This dip is a culinary marvel because it hits all the right notes for a truly satisfying appetizer. First, the base of refried beans provides a wonderfully creamy and earthy foundation. When combined with the tang of sour cream and the rich, smooth texture of cream cheese, you get an incredibly luxurious mouthfeel that’s hard to resist. The dairy components also help to mellow out the spices, creating a balanced flavor profile.
The addition of diced green chilies brings a subtle heat and a lovely, bright counterpoint to the richness, while the Tex-Mex seasonings (like cumin, chili powder, and garlic powder) infuse the entire dip with that irresistible savory, slightly smoky flavor we all crave. Baking the dip is key – it allows all the flavors to meld beautifully, warms everything through, and creates that irresistible bubbly, golden-brown cheese crust on top. The heat also helps to soften and integrate the ingredients, making it perfectly scoopable. It’s a symphony of textures and flavors that makes every bite a delight!
Why You’ll Love This Recipe
- ✓Super easy to prepare, perfect for last-minute gatherings.
- ✓Budget-friendly ingredients that won’t break the bank.
- ✓Warm, cheesy, and incredibly satisfying comfort food.
- ✓Customizable to your family’s spice preference.
- ✓A guaranteed crowd-pleaser for any party or game day.
- ✓Minimal cleanup for maximum enjoyment.
Equipment You’ll Need
- ✓9×13 inch baking dish
- ✓Large mixing bowl
- ✓Electric mixer (optional, for easier mixing)
- ✓Spatula or spoon
- ✓Measuring cups and spoons
- ✓Can opener
Ingredients
- ✓2 (16-ounce) cans refried beans (traditional or vegetarian)
- ✓1 (8-ounce) package cream cheese, softened
- ✓1 cup sour cream
- ✓1 (4-ounce) can diced green chilies, undrained
- ✓1 teaspoon cumin
- ✓1/2 teaspoon chili powder
- ✓1/2 teaspoon garlic powder
- ✓1/4 teaspoon onion powder
- ✓1/4 teaspoon salt (or to taste)
- ✓1/8 teaspoon black pepper (or to taste)
- ✓2 cups shredded cheddar cheese, divided
- ✓1/2 cup shredded Monterey Jack cheese (optional, for extra melty goodness)
- ✓Optional toppings: sliced jalapeños, chopped fresh cilantro, diced tomatoes, green onions
Instructions
- Preheat Oven: Preheat your oven to 375°F (190°C). Lightly grease a 9×13 inch baking dish.
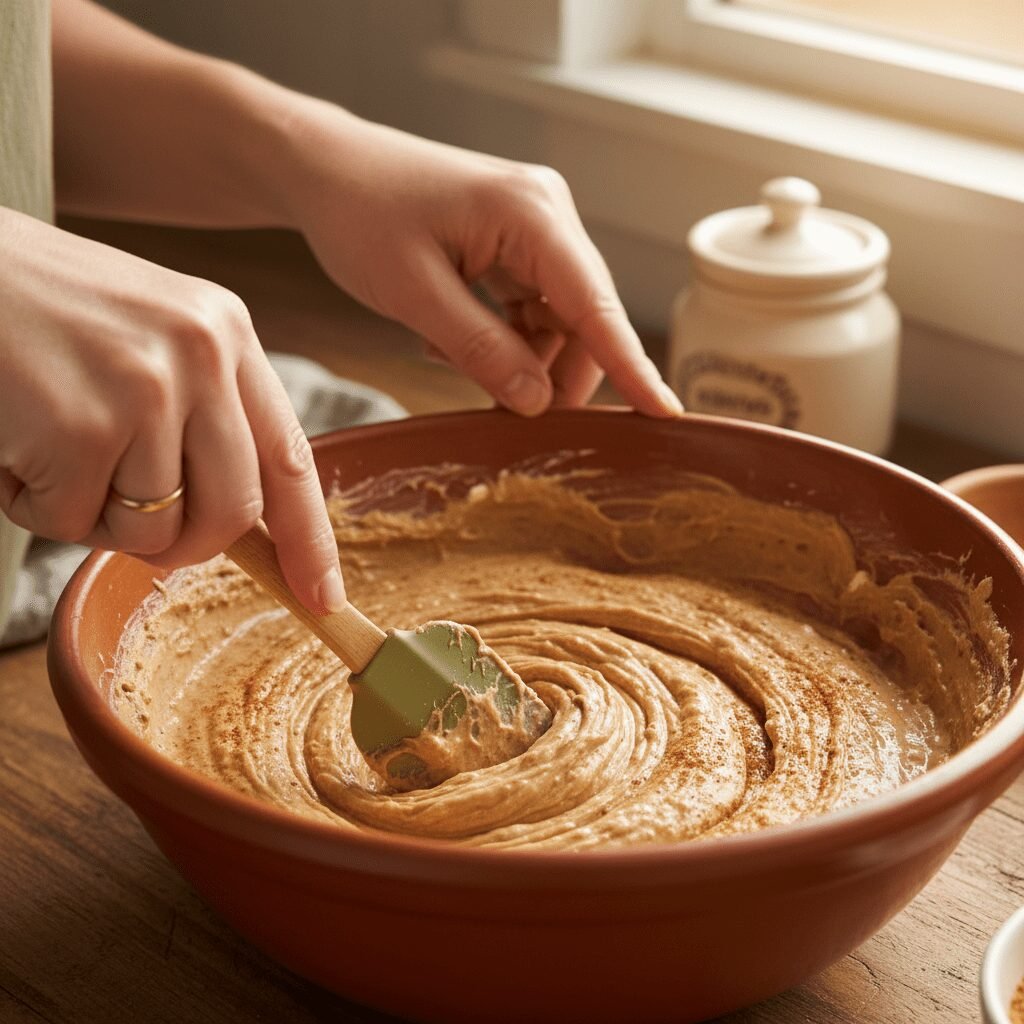
- Combine Wet Ingredients: In a large mixing bowl, combine the softened cream cheese and sour cream. Beat with an electric mixer or whisk until smooth and well combined. This step ensures a super creamy base!
- Add Beans and Chilies: Stir in the refried beans and the undrained diced green chilies. Mix until everything is thoroughly incorporated.
- Season the Dip: Add the cumin, chili powder, garlic powder, onion powder, salt, and black pepper to the bean mixture. Stir well to distribute the seasonings evenly. Taste and adjust seasonings if needed – this is your chance to make it perfect!
- Add Cheese: Fold in 1.5 cups of the shredded cheddar cheese (and Monterey Jack, if using) into the bean mixture. Reserve the remaining 1/2 cup of cheddar cheese for the topping.
- Transfer to Dish: Spread the bean mixture evenly into the prepared 9×13 inch baking dish.
- Top with Cheese: Sprinkle the remaining 1/2 cup of shredded cheddar cheese over the top of the dip.
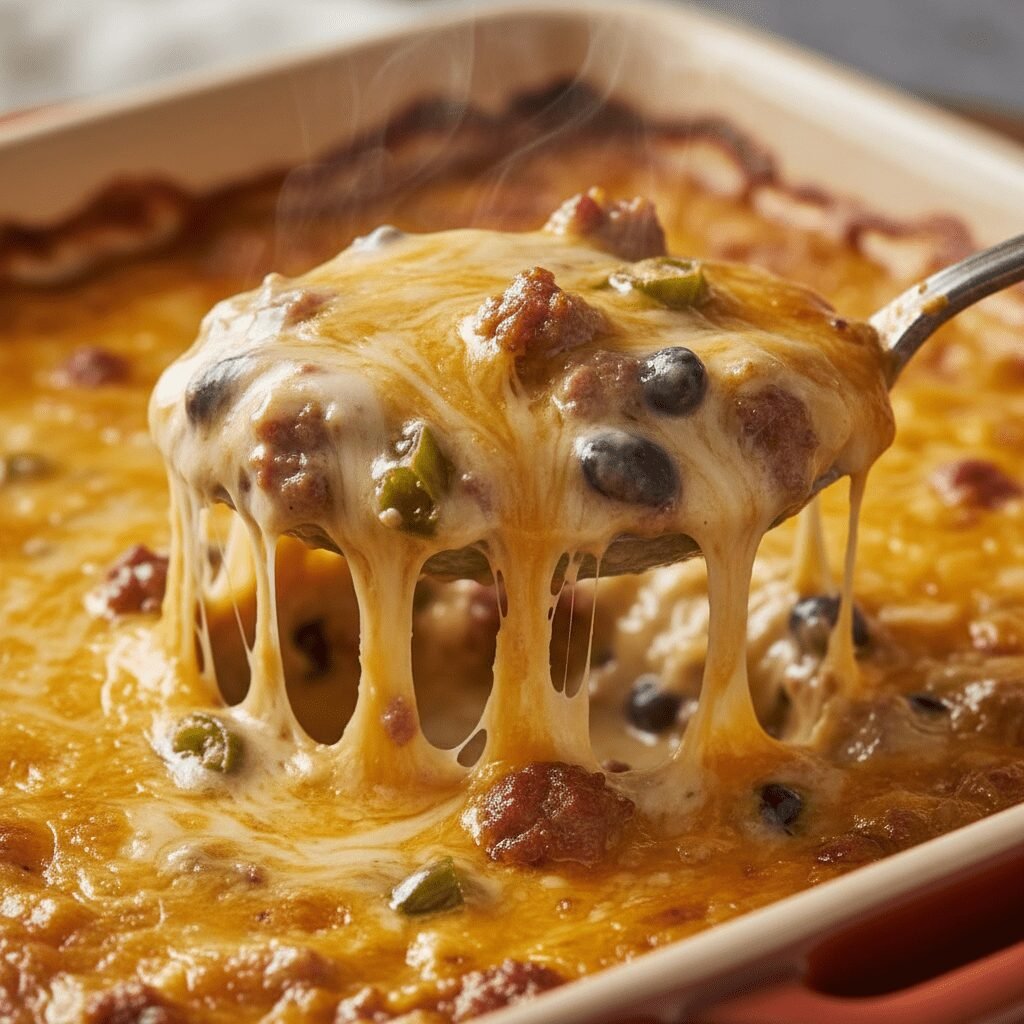
- Bake: Bake for 20-25 minutes, or until the dip is bubbly around the edges and the cheese on top is melted and lightly golden brown. Oh, the aroma will be heavenly!
- Serve Warm: Remove from the oven and let it cool for a few minutes before serving. This helps it set up just a tiny bit. Serve warm with your favorite tortilla chips, Fritos, or veggie sticks. Enjoy the deliciousness!
Expert Cooking Tips
- ✓Soften Cream Cheese: For the smoothest dip, make sure your cream cheese is at room temperature. This makes it much easier to blend with the sour cream and prevents lumps.
- ✓Don’t Drain Chilies: The liquid from the diced green chilies adds extra flavor and moisture to the dip, so don’t drain them!
- ✓Taste and Adjust: Always taste your dip mixture before baking. This allows you to adjust the salt, pepper, or other seasonings to your personal preference. Want more spice? Add a pinch of cayenne!
- ✓Cheese Choice: While cheddar is classic, feel free to experiment with other good melting cheeses like Colby Jack, Pepper Jack (for a kick!), or a Mexican blend.
- ✓Cover if Browning Too Fast: If the cheese on top starts to brown too quickly before the dip is bubbly, you can loosely tent the dish with aluminum foil for the last few minutes of baking.
Substitutions and Variations
One of the best things about Warm Texas Trash Dip is how adaptable it is! If you’re looking to shake things up or cater to different dietary needs, here are some fantastic substitutions:
- Beans: While refried beans are traditional, you could experiment with a mix of mashed black beans and pinto beans for a slightly different texture and flavor profile. Just make sure they’re well mashed for that creamy consistency.
- Dairy-Free: For a dairy-free version, use plant-based cream cheese, sour cream alternatives, and shredded dairy-free cheese. The texture might be slightly different, but the flavor can still be fantastic!
- Spice Level: If you love heat, add a pinch of cayenne pepper, a dash of hot sauce, or some finely diced fresh jalapeños (seeded for less heat, or with seeds for more fire!) to the mixture. For a milder dip, you can reduce the chili powder.
- Meat Lovers: While this is a vegetarian dip, you can easily add cooked and crumbled ground beef, chorizo, or shredded chicken for a heartier version. Just be sure to drain any excess fat from the meat before adding it to the dip mixture.
- Cheese Varieties: Don’t be afraid to mix and match your cheeses! Colby Jack, Pepper Jack, or even a little smoked Gouda could add interesting twists.
- Extra Veggies: Finely diced bell peppers or onions could be sautéed and added to the mix for extra flavor and nutrients.
The key is to have fun and make it your own! This dip is very forgiving, so feel free to get creative in the kitchen.
Common Mistakes to Avoid
Even the simplest recipes can have a few pitfalls! Here are some common mistakes to avoid when making your Warm Texas Trash Dip to ensure it turns out perfectly every time:
- Not Softening Cream Cheese: Trying to mix cold, hard cream cheese will result in a lumpy dip. Always let it come to room temperature for a smooth, creamy base.
- Over-Baking: While you want it bubbly and golden, over-baking can dry out the dip and make it less creamy. Keep an eye on it and remove it once the edges are bubbly and the cheese is melted and lightly browned.
- Under-Seasoning: A bland dip is a sad dip! Don’t be shy with the seasonings. Taste the mixture before baking and adjust as needed. Remember, the flavors will meld and intensify a bit in the oven, but a good base flavor is crucial.
- Draining Green Chilies: As mentioned in the tips, the liquid from the canned green chilies adds flavor and moisture. Draining them can make the dip a bit drier than intended.
- Using Low-Fat Dairy Without Adjusting: While you can use low-fat cream cheese and sour cream, they can sometimes make the dip a bit thinner or less rich. If you do use them, you might want to add a tiny bit more cheese or reduce the amount of chili liquid to maintain consistency.
- Not Letting it Rest: Giving the dip a few minutes to rest after coming out of the oven allows it to set slightly, making it easier to scoop and less likely to be runny.
Avoiding these common blunders will ensure your Texas Trash Dip is a smashing success!
Serving Suggestions
This dip is a star on its own, but how you serve it can really elevate the experience! Here are some of my favorite ways to present and enjoy Warm Texas Trash Dip:
- Classic Chips: The absolute go-to! Serve with sturdy tortilla chips (scoop-style are perfect!), Fritos corn chips, or even a mix of both for variety.
- Veggie Power: For a lighter option or to add some crunch, offer an array of fresh veggie sticks like carrot sticks, celery sticks, bell pepper strips (red, yellow, orange), cucumber slices, or even blanched broccoli florets.
- Bread Dippers: Toasted baguette slices, pita bread wedges (toasted or soft), or even warm flour tortillas cut into wedges make excellent dippers.
- As a Topping: Get creative! This dip makes a fantastic topping for baked potatoes, nachos, quesadillas, or even as a spread for burritos and tacos.
- Garnish Galore: Don’t forget the garnishes! A sprinkle of fresh chopped cilantro, diced red onion, a dollop of extra sour cream, sliced jalapeños (fresh or pickled), or a few diced tomatoes can add a pop of color and freshness.
- Party Platter: Arrange your dip in the center of a large platter and surround it with all the dippers and garnishes for an impressive and inviting spread.
However you choose to serve it, make sure it’s warm and ready for scooping!
Storage and Reheating Tips
Leftovers? What are those?! Just kidding, sometimes there’s a little bit left, and you’ll definitely want to save every last scoop of this deliciousness! Here’s how to store your Warm Texas Trash Dip:
- Refrigeration: Allow the dip to cool completely to room temperature. Transfer it to an airtight container and store it in the refrigerator for up to 3-4 days.
- Reheating: To reheat, you can either pop individual servings in the microwave until warm and bubbly, or for a larger portion, transfer it back to an oven-safe dish, cover it loosely with foil, and bake at 300°F (150°C) for 15-20 minutes, or until heated through. You might want to add a splash of milk or broth if it seems a little dry when reheating in the oven.
- Freezing: While technically possible, freezing is not recommended for this dip. The dairy components (cream cheese, sour cream) can sometimes separate or become grainy after freezing and thawing, affecting the creamy texture we love. It’s best enjoyed fresh or within a few days from the fridge.
Honestly, though, this dip is so good, you probably won’t have to worry about storing much!
Nutrition Facts (Estimated)
| Serving Size | 1/2 cup |
| Calories | 280 |
| Fat | 18g |
| Saturated Fat | 10g |
| Unsaturated Fat | 7g |
| Trans Fat | 0.5g |
| Cholesterol | 45mg |
| Sodium | 580mg |
| Carbohydrates | 20g |
| Fiber | 5g |
| Sugar | 3g |
| Protein | 10g |
Frequently Asked Questions
Can I make Texas Trash Dip ahead of time?
Absolutely! You can prepare the dip mixture (steps 1-5) up to 24 hours in advance. Store it covered in the refrigerator. When you’re ready to bake, just transfer it to your baking dish, sprinkle with the remaining cheese, and bake as directed, adding a few extra minutes to the baking time since it will be cold from the fridge.
What kind of refried beans should I use?
You can use traditional refried beans or vegetarian refried beans, depending on your preference. Both work wonderfully! Just make sure they are the ‘refried’ variety for that classic creamy texture, not whole beans.
Is this dip spicy?
As written, this recipe has a mild, pleasant warmth from the green chilies and chili powder. It’s generally not considered spicy. If you prefer more heat, you can add a pinch of cayenne pepper, a dash of hot sauce, or some finely diced fresh jalapeños to the mixture.
Can I use different cheeses?
Yes, absolutely! While cheddar is classic, feel free to experiment. Colby Jack, Monterey Jack, Pepper Jack (for a spicier kick), or a Mexican blend would all be delicious. Just make sure they are good melting cheeses.
What are the best dippers for Texas Trash Dip?
Sturdy tortilla chips (especially scoop-style), Fritos corn chips, and warm flour tortilla wedges are all fantastic. For a healthier option, try carrot sticks, celery sticks, bell pepper strips, or cucumber slices.
Why is it called ‘Texas Trash Dip’?
The name is a playful nod to the fact that it’s a delicious mix of various ingredients, often whatever you have on hand, all baked together into something wonderful. It doesn’t refer to the quality of the dip, which is anything but trashy!
Can I make this in a slow cooker?
Yes, you can! After mixing all the ingredients (except the top layer of cheese), transfer them to a slow cooker. Cook on low for 2-3 hours or on high for 1-1.5 hours, stirring occasionally, until heated through and bubbly. Add the remaining cheese on top during the last 30 minutes of cooking, or sprinkle it on just before serving and let it melt.
How can I make this dip healthier?
To make it a bit lighter, you can use low-fat cream cheese and sour cream. You can also increase the fiber by using refried black beans or adding a can of drained, rinsed black beans to the mixture. Serve with plenty of fresh vegetable sticks for dipping.
Conclusion
And there you have it, my sweet friends – the recipe for Warm Texas Trash Dip, a true gem that’s sure to become a staple in your recipe collection! It’s more than just a dip; it’s an invitation to gather, to share, and to create those wonderful, lasting memories around good food. Whether you’re whipping it up for a big game day, a casual family dinner, or a festive holiday party, this dip delivers on flavor, ease, and pure comfort.
I truly hope you give this recipe a try and experience the magic for yourselves. Don’t be surprised if it becomes the most requested dish at all your future get-togethers! Happy cooking, and happy dipping!