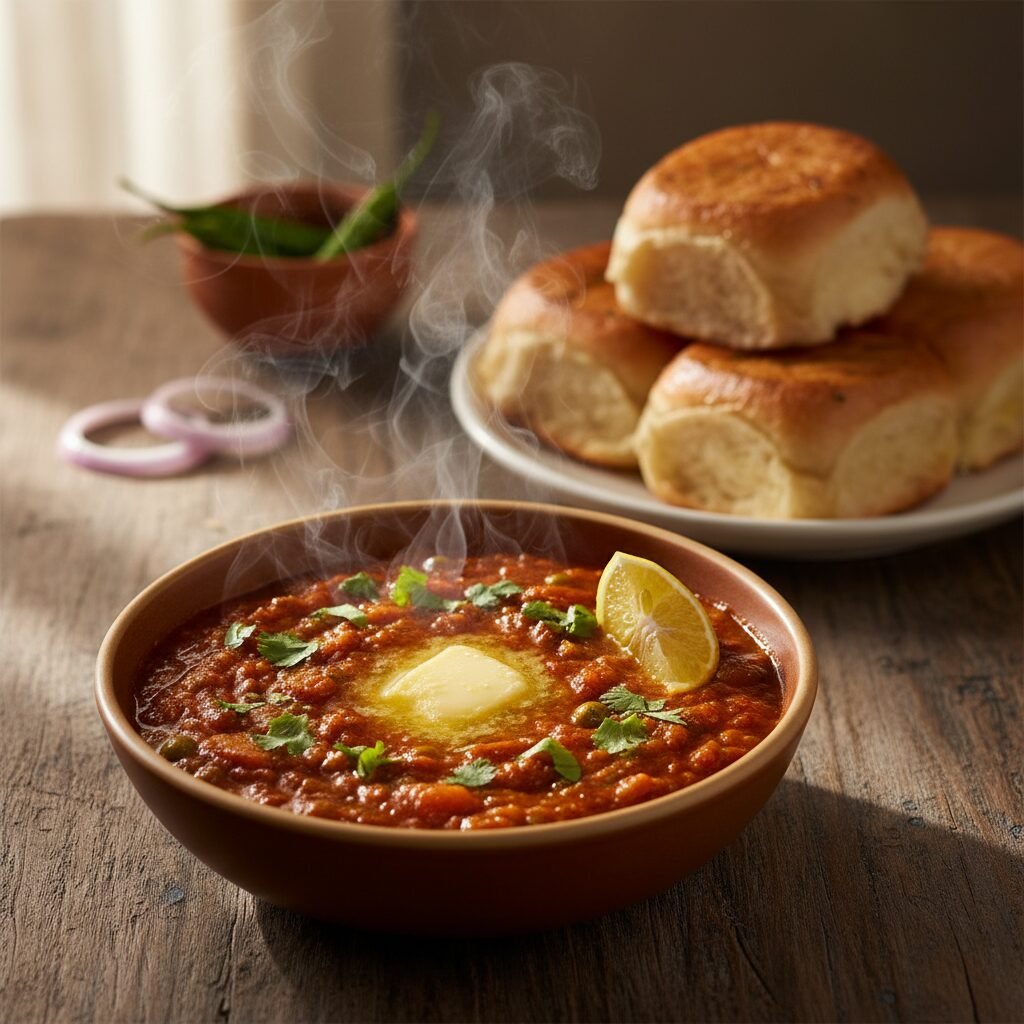
Mumbai Street Food at Home: Buttery Pav Bhaji Veggie Mash
Mumbai Street Food At Home: Buttery Pav Bhaji Veggie Mash
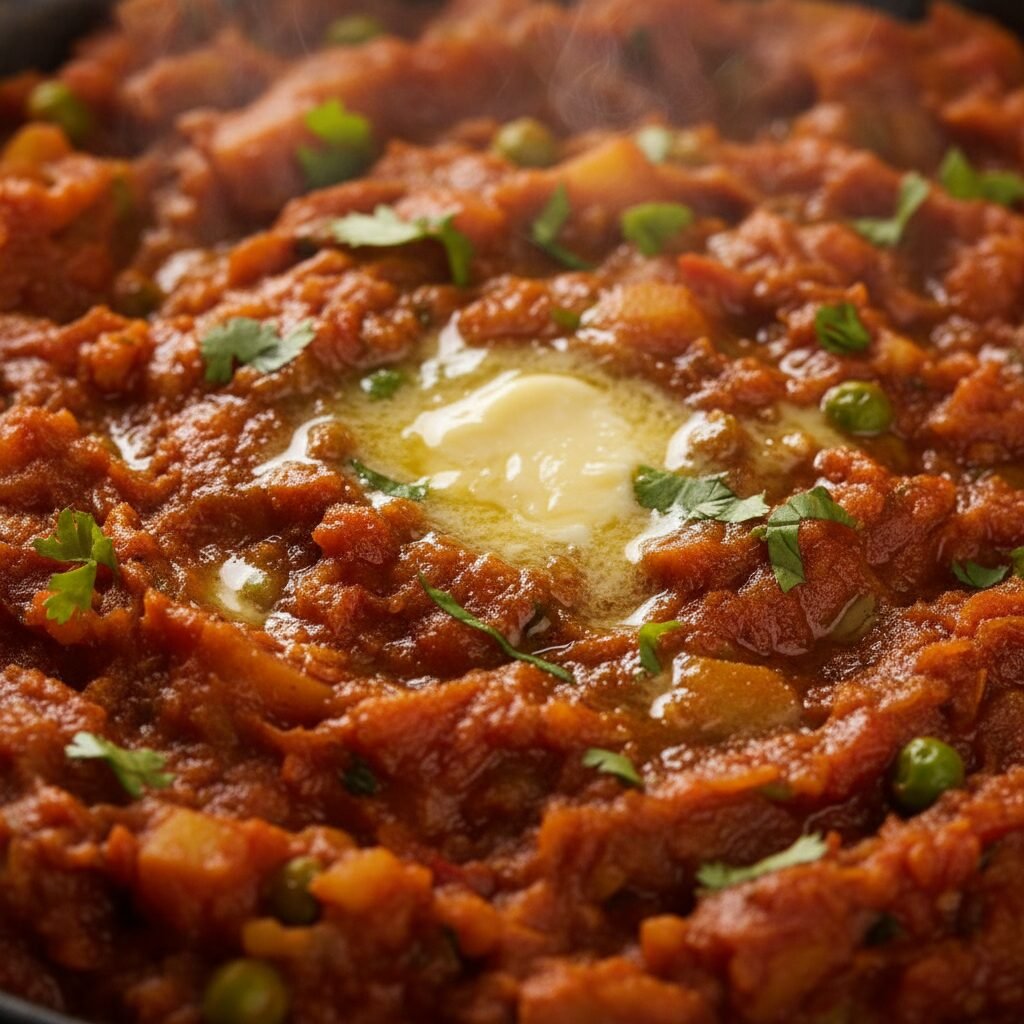
Get ready to bring the vibrant flavors of Mumbai’s streets right into your kitchen with this incredible homemade Pav Bhaji! This buttery veggie mash is a symphony of spices and textures, perfect for a cozy family meal or a fun gathering. It’s surprisingly simple to make and utterly delicious!
20 minutes
40 minutes
1 hour
4-6 servings
Main Course
Stovetop
Indian
Vegetarian
Oh, mamas, do I have a treat for you today! If you’ve ever dreamt of whisking your taste buds away to the bustling, colorful streets of Mumbai, then you are in for an absolute delight. Today, we’re diving headfirst into the magic of Pav Bhaji, a dish that’s not just food, but an experience! Imagine a vibrant, spicy, and utterly comforting vegetable mash, simmered to perfection with a medley of aromatic spices, and then generously slathered with butter. Now, picture scooping up every delicious bite with a soft, toasted, buttery bun. Pure bliss, right?
This isn’t just any recipe; it’s a journey to culinary happiness, a way to bring that incredible street food vibe into your very own kitchen. I know life gets busy, and sometimes cooking feels like another chore, but trust me, this Pav Bhaji is worth every moment. It’s hearty, it’s wholesome (hello, hidden veggies!), and it’s a guaranteed crowd-pleaser. Your family will be asking for seconds, and you’ll feel like a culinary superstar. So, let’s tie on those aprons, put on some happy music, and get ready to create some delicious memories together!
History & Origins
The story of Pav Bhaji is as rich and flavorful as the dish itself! It all began in the mid-19th century in Mumbai (then Bombay), not as a fancy restaurant dish, but as a quick, hearty, and economical meal for textile mill workers. These hardworking folks needed something fast and filling during their short lunch breaks, and Pav Bhaji fit the bill perfectly. Vendors would set up their large tawas (flat griddles) outside the mills, mashing up leftover vegetables with spices and serving them with buttered pav (soft bread rolls).
Over time, this humble worker’s meal transcended its origins and became a beloved street food staple, not just in Mumbai, but across India and even globally. Each vendor, each family, has their own special touch, their secret blend of spices, but the essence remains the same: a comforting, spicy, buttery hug in a bowl. It’s a testament to how simple ingredients, combined with love and a dash of ingenuity, can create something truly iconic.
Why This Recipe Works
From a culinary perspective, Pav Bhaji is a masterpiece of flavor and texture engineering! The magic lies in the mashing technique. By mashing the vegetables, we break down their cell walls, releasing their natural sugars and starches, which creates a wonderfully thick, cohesive, and deeply flavorful base. This also allows the spices to fully meld and infuse every single morsel, creating that signature complex taste.
The generous use of butter isn’t just for richness; it plays a crucial role in carrying and enhancing the fat-soluble flavors of the spices, making them more vibrant and aromatic. The high heat of the tawa (or a large pan) also contributes to a slight caramelization of the vegetables and spices, adding layers of depth. Finally, the combination of a variety of vegetables ensures a balanced nutritional profile and a delightful interplay of sweet, savory, and earthy notes, all brought together by the tangy tomato base and the warmth of the Pav Bhaji masala. It’s a symphony of senses, designed to satisfy and delight!
Why You’ll Love This Recipe
- ✓A vibrant, flavorful, and comforting Indian street food classic made easy at home.
- ✓Packed with wholesome vegetables, making it a delicious way to sneak in extra goodness.
- ✓The perfect balance of spicy, tangy, and buttery notes that will tantalize your taste buds.
- ✓An incredibly satisfying meal that’s perfect for family dinners or entertaining friends.
- ✓Customizable to your spice preference and what veggies you have on hand.
- ✓Comes together quicker than you think for such an impressive dish!
Equipment You’ll Need
- ✓Large deep pan or Dutch oven
- ✓Potato masher
- ✓Cutting board
- ✓Sharp knife
- ✓Measuring cups and spoons
- ✓Small bowl for spice mix
- ✓Griddle or flat pan for toasting pav
Ingredients
- ✓For the Bhaji:
- ✓2 tablespoons butter (plus more for serving)
- ✓1 tablespoon oil (vegetable or canola)
- ✓1 large onion, finely chopped
- ✓1 teaspoon ginger-garlic paste
- ✓1 large bell pepper (any color), finely chopped
- ✓1 cup chopped cauliflower florets
- ✓1 cup chopped carrots
- ✓1 cup chopped potatoes (peeled)
- ✓1/2 cup green peas (fresh or frozen)
- ✓3 large tomatoes, finely chopped or pureed
- ✓1/2 cup tomato paste (optional, for deeper color/flavor)
- ✓2-3 tablespoons Pav Bhaji Masala (adjust to taste)
- ✓1 teaspoon red chili powder (Kashmiri for color, or regular for heat)
- ✓1/2 teaspoon turmeric powder
- ✓1/2 teaspoon cumin powder
- ✓Salt to taste
- ✓1/2 cup water (or vegetable broth, as needed)
- ✓Juice of 1/2 lemon
- ✓Fresh cilantro, chopped, for garnish
- ✓For the Pav:
- ✓8-12 Pav buns (or dinner rolls)
- ✓Plenty of butter for toasting
Instructions
-
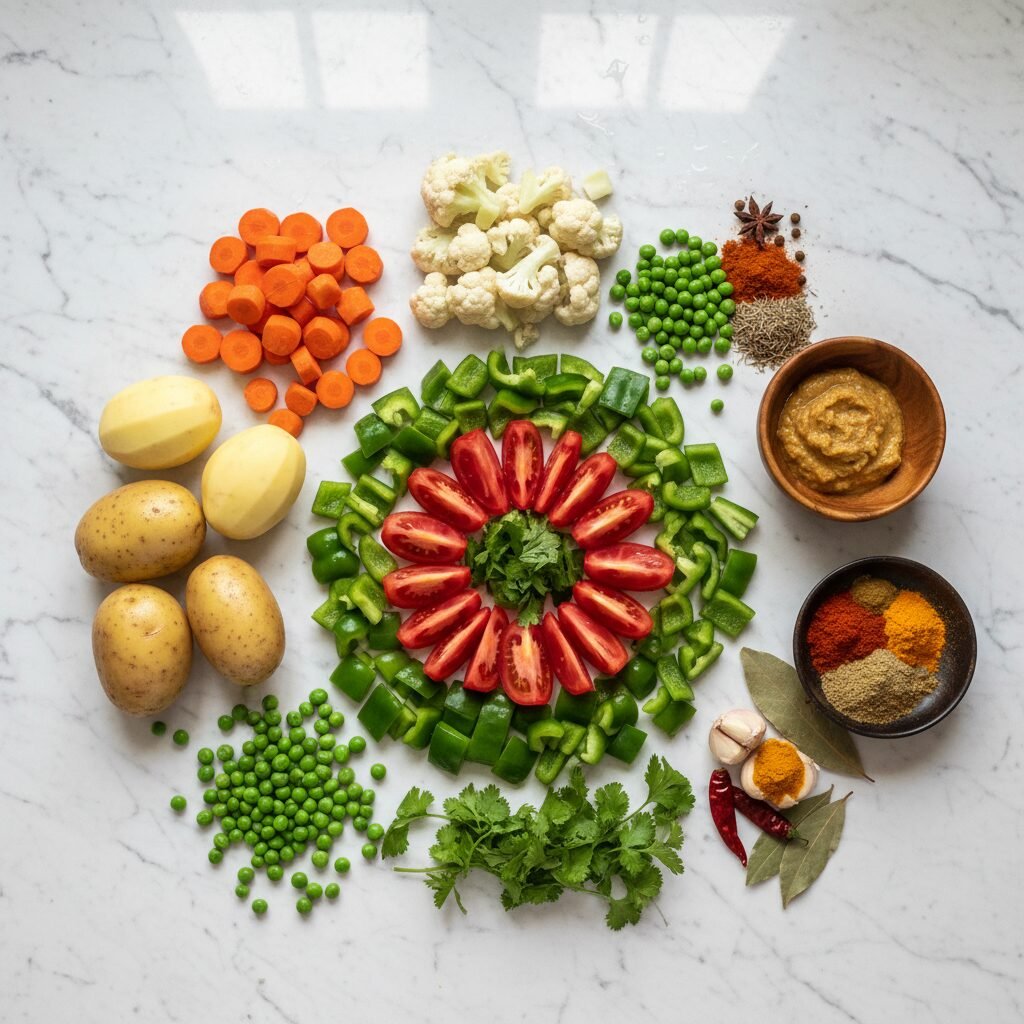
Step 1: Prepare the Vegetables
- Chop all your vegetables finely. For the potatoes, carrots, and cauliflower, you can steam or boil them partially until fork-tender before adding to the pan, or cook them directly in the pan for longer. I usually boil them for about 10 minutes to speed things up!
-
Step 2: Sauté Aromatics
- In a large deep pan or Dutch oven, melt 2 tablespoons of butter with 1 tablespoon of oil over medium heat. Once hot, add the finely chopped onion and sauté until it turns translucent and lightly golden, about 5-7 minutes.
- Add the ginger-garlic paste and sauté for another minute until fragrant.
-
Step 3: Cook the Veggies and Spices
- Stir in the finely chopped bell pepper, cauliflower, carrots, and potatoes. Cook for 5-7 minutes, stirring occasionally, until they start to soften.
- Add the green peas, chopped tomatoes (or puree), and tomato paste (if using). Mix well.
- Now for the magic! Add the Pav Bhaji Masala, red chili powder, turmeric powder, and cumin powder. Season with salt. Stir everything together, ensuring the spices coat all the vegetables. Cook for 2-3 minutes, allowing the spices to bloom.
-
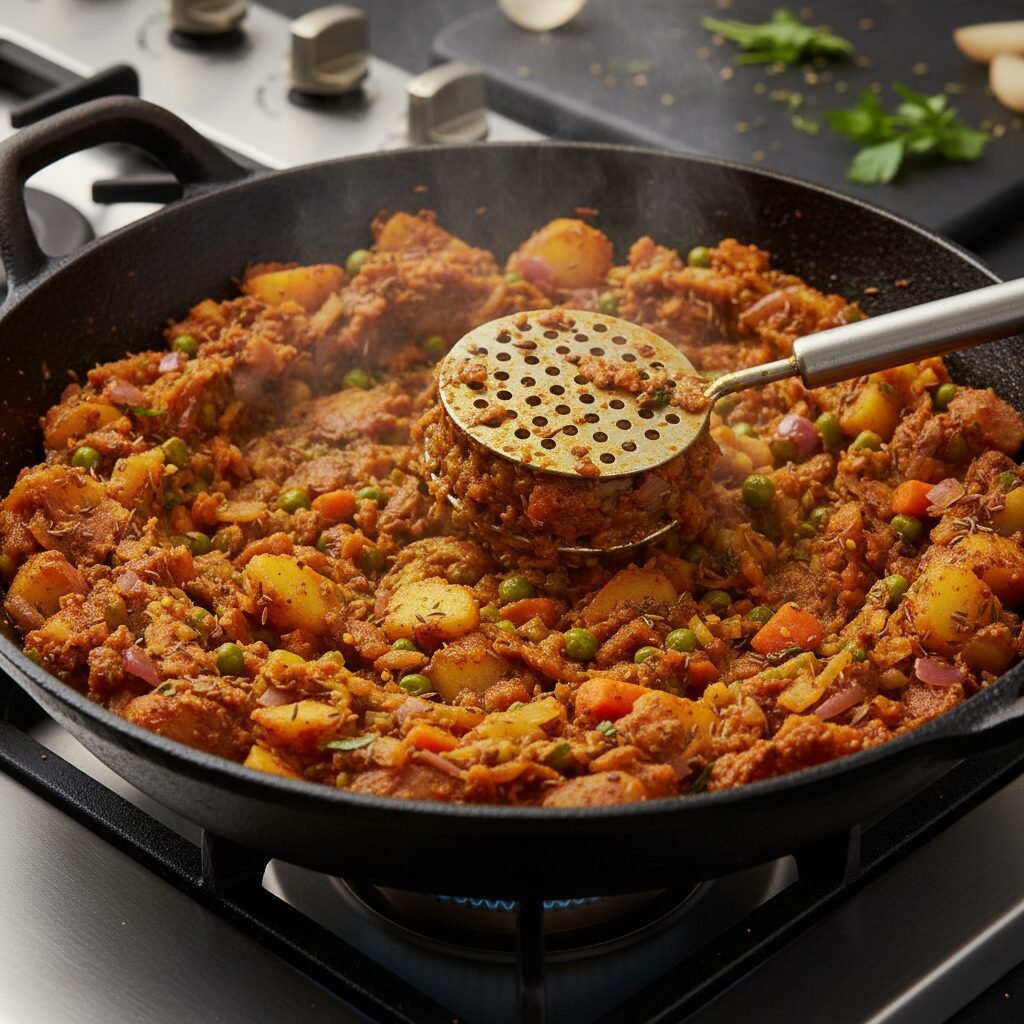
Step 4: Simmer and Mash
- Pour in about 1/2 cup of water (or broth). Bring the mixture to a gentle simmer, then cover the pan and let it cook for 15-20 minutes, or until all the vegetables are very soft and easily mashable. Stir occasionally to prevent sticking.
- Once the vegetables are tender, remove the lid and use a potato masher to thoroughly mash the mixture directly in the pan. Mash until it reaches your desired consistency – some like it smoother, others prefer a few chunks. Don’t be shy with the mashing!
- If the bhaji looks too thick, add a little more water, a tablespoon at a time, until it reaches a thick, gravy-like consistency. Let it simmer uncovered for a few more minutes to allow flavors to deepen.
-
Step 5: Finish with Butter and Garnish
- Stir in a generous knob of butter (at least 1-2 tablespoons) and the fresh lemon juice. This adds incredible richness and tang! Taste and adjust salt or spices if needed.
- Garnish generously with fresh chopped cilantro.
-
Step 6: Prepare the Pav
- Heat a griddle or flat pan over medium heat. Slice the pav buns horizontally, almost all the way through.
- Melt a good amount of butter on the hot griddle. Place the cut side of the pav buns onto the butter and toast until golden brown and slightly crispy. You can also sprinkle a pinch of Pav Bhaji Masala on the buttered pav for extra flavor!
-
Step 7: Serve and Enjoy!
- Serve the hot, buttery Pav Bhaji immediately with the toasted pav, a side of chopped raw onion, extra lemon wedges, and a sprinkle of fresh cilantro. Get ready for a flavor explosion!
Expert Cooking Tips
- ✓Don’t skimp on the butter! It’s called “Buttery Pav Bhaji” for a reason. Butter adds incredible flavor and richness.
- ✓Mash, mash, mash! The key to authentic Pav Bhaji is a well-mashed, cohesive vegetable mixture. Invest in a good potato masher.
- ✓Adjust spice levels: If you prefer less heat, use less red chili powder. For more, add a bit more! Kashmiri chili powder gives great color without too much heat.
- ✓Fresh ingredients make a difference: While frozen peas are fine, fresh ginger-garlic paste and vibrant vegetables will elevate the flavor.
- ✓Let it simmer: Allowing the bhaji to simmer for a bit after mashing helps the flavors meld beautifully.
- ✓Taste and adjust: Always taste before serving and adjust salt, lemon juice, or spices as needed.
Substitutions and Variations
Feeling flexible? Pav Bhaji is wonderfully adaptable! If you don’t have all the veggies listed, feel free to swap them out. You can use green beans, zucchini, cabbage, or even sweet potatoes. Just ensure they are cooked until very soft for mashing. For a vegan version, simply use plant-based butter and oil. If you can’t find Pav Bhaji Masala, you can create a similar flavor profile with a mix of garam masala, cumin powder, coriander powder, and a pinch of amchur (dry mango powder) for tang, though the specific blend of Pav Bhaji Masala is truly unique.
Common Mistakes to Avoid
One of the biggest mistakes is not mashing the vegetables enough. You want a smooth, almost paste-like consistency, not chunky stew. Another common error is not using enough butter – it’s essential for that authentic street food richness. Also, under-seasoning can lead to a bland bhaji; don’t be afraid to taste and adjust the salt and spices. Finally, overcooking the pav can make them dry and hard, so toast them just until golden and soft.
Serving Suggestions
Pav Bhaji is traditionally served piping hot with buttered and toasted pav buns. But don’t stop there! A small bowl of finely chopped raw red onion, a wedge of fresh lemon, and a sprinkle of extra cilantro on top are absolute must-haves. For a complete meal, you could serve it alongside a simple green salad or a cooling raita (yogurt dip) to balance the spices. It’s also fantastic for a fun brunch or a casual dinner party!
Storage and Reheating Tips
Leftover Pav Bhaji is a dream! It actually tastes even better the next day as the flavors have more time to meld. Store the bhaji in an airtight container in the refrigerator for up to 3-4 days. When reheating, you might need to add a splash of water or broth to loosen it up, and don’t forget another knob of butter for that fresh taste! You can also freeze the bhaji for up to 2-3 months. Thaw overnight in the fridge and reheat gently on the stovetop.
Nutrition Facts (Estimated)
| Serving Size | 1 cup bhaji with 2 pav |
| Calories | 450 kcal |
| Fat | 25g |
| Saturated Fat | 12g |
| Unsaturated Fat | 10g |
| Trans Fat | 0.5g |
| Cholesterol | 30mg |
| Sodium | 780mg |
| Carbohydrates | 45g |
| Fiber | 7g |
| Sugar | 8g |
| Protein | 12g |
Frequently Asked Questions
Can I make Pav Bhaji ahead of time?
Absolutely! Pav Bhaji is one of those magical dishes that tastes even better the next day. You can prepare the bhaji a day or two in advance and store it in an airtight container in the refrigerator. Just reheat gently on the stovetop, adding a splash of water or broth if needed, and a fresh knob of butter before serving.
What kind of pav buns should I use?
Traditionally, soft, fluffy white dinner rolls (often called ‘pav’ in Indian stores) are used. Look for ones that are slightly sweet and very soft. If you can’t find specific ‘pav,’ any soft white dinner roll or even brioche buns will work wonderfully.
Is Pav Bhaji very spicy?
The spice level is completely customizable! The recipe calls for red chili powder, which you can adjust to your preference. If you use Kashmiri red chili powder, it provides a beautiful red color with less heat. For more heat, use regular chili powder or add a finely chopped green chili to the initial sauté.
What if I don’t have a potato masher?
No worries! You can use the back of a sturdy spoon, a fork, or even an immersion blender (be careful not to over-blend into a completely smooth soup, you still want some texture). The goal is to break down the vegetables into a cohesive mash.
Can I add other vegetables?
Yes, please do! Pav Bhaji is very forgiving. Green beans, zucchini, cabbage, or even a small amount of beetroot (for color and sweetness) can be added. Just ensure they are cooked until very tender before mashing.
What is Pav Bhaji Masala?
Pav Bhaji Masala is a special blend of spices specifically formulated for this dish. It typically includes coriander, cumin, red chili, black pepper, dry mango powder (amchur), black salt, and other aromatic spices. It’s readily available in Indian grocery stores and online, and it’s key to the authentic flavor.
Can I make this vegan?
Absolutely! Simply substitute the dairy butter with your favorite plant-based butter or margarine. The rest of the ingredients are naturally vegan. It will be just as delicious and satisfying!
Why is my Pav Bhaji not red enough?
The vibrant red color often comes from a combination of fresh tomatoes, tomato paste, and Kashmiri red chili powder. If your bhaji isn’t as red as you’d like, try adding a bit more tomato paste or a larger quantity of Kashmiri red chili powder (which is milder in heat but rich in color).
Conclusion
And there you have it, my dear friends! A taste of Mumbai’s bustling streets, right in the comfort of your own home. This Buttery Pav Bhaji Veggie Mash isn’t just a meal; it’s an experience, a celebration of flavors, and a testament to the joy of homemade goodness. I truly hope this recipe brings warmth, smiles, and delicious memories to your kitchen, just as it does to mine. Don’t be intimidated by the list of ingredients; once you get started, you’ll see how wonderfully it all comes together. So go ahead, whip up a batch, gather your loved ones, and savor every single buttery, spicy, comforting bite. Happy cooking, mamas!