How To Make Viral Japanese Omurice With Ingredients You Already Have
How To Make Viral Japanese Omurice With Ingredients You Already Have
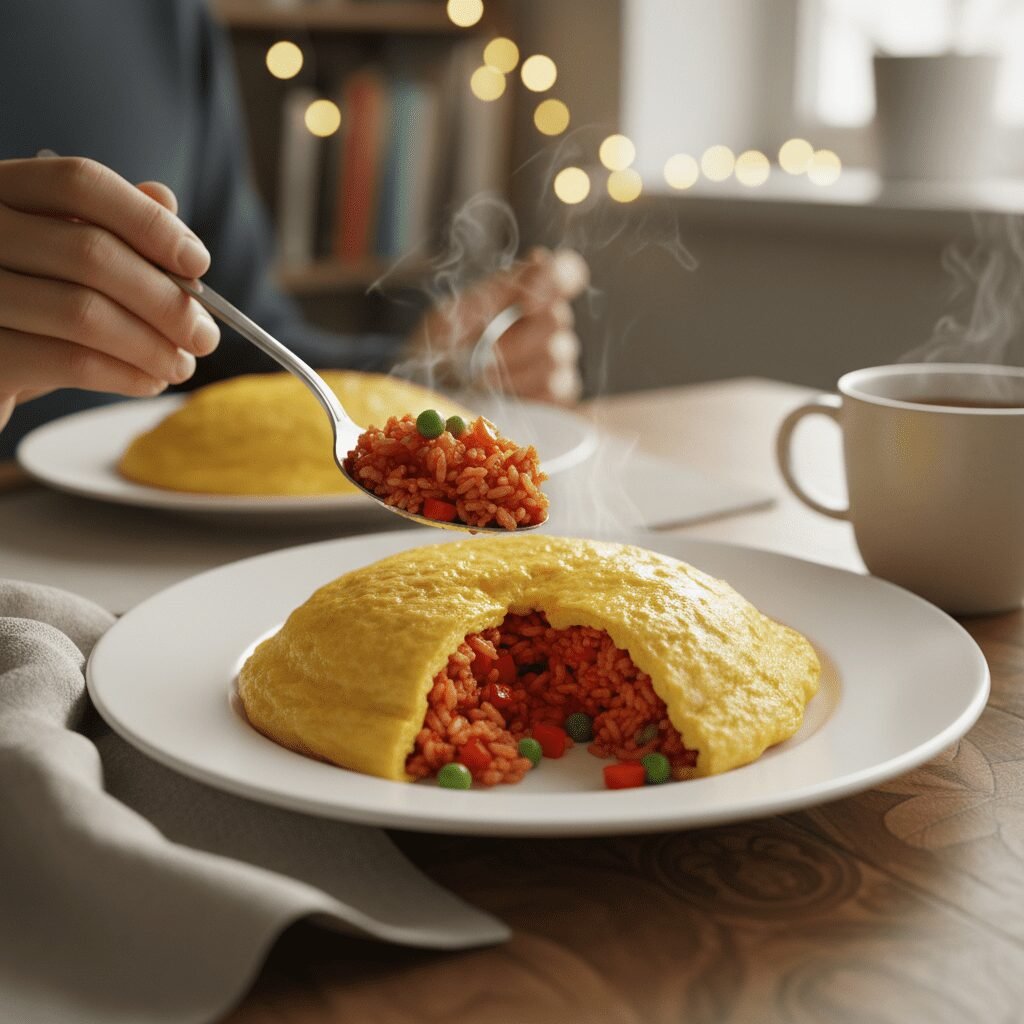
Turn your leftover rice into the internet-famous, creamy, and comforting Japanese Omelette Rice! This simplified version uses pantry staples to recreate that viral, fluffy egg sensation right in your own kitchen.
15 minutes
15 minutes
30 minutes
2 Servings
Main Course
Stovetop
Japanese (Yoshoku)
Gluten Free
Hey friends! If you have spent even five minutes scrolling through TikTok or Pinterest lately, you have definitely seen that video. You know the one—where a chef slices open a fluffy, football-shaped omelette, and it dramatically cascades over a mound of steaming fried rice like a creamy, golden blanket. It is mesmerizing, isn’t it? That, my dears, is Omurice.
For the longest time, I watched those videos and thought, "There is absolutely no way I can pull that off on a Tuesday night." It looked like it required a culinary degree, a specific copper pan, and a secret sauce that takes three days to simmer. But here is the secret: at its heart, Omurice is actually Japanese comfort food designed for home cooks! It is essentially the most delicious way to use up leftovers.
Today, I am going to show you how to make a viral-worthy Japanese Omurice using ingredients you already have in your pantry and fridge. We are talking ketchup, eggs, onions, and that day-old rice sitting in your Tupperware. We are going to make a savory, sweet chicken fried rice and top it with a silky, soft-scrambled egg drape that will have your family thinking you ordered takeout from a fancy bistro. Let’s get cooking!
History & Origins
Omurice (a portmanteau of "Omelette" and "Rice") is a classic example of Yoshoku—Western-influenced Japanese cuisine that emerged during the turn of the 20th century. It originated around the early 1900s at a western-style restaurant in Tokyo, likely Rengatei in Ginza.
Originally, it was designed to be a quick, filling meal that combined the Western practice of making omelettes with the Japanese staple of rice. Over the decades, it evolved from a simple thin egg wrap into the various styles we see today, including the famous "tampopo" style (the flowering cut-open style) popularized by the movie Tampopo and viral chef Kichi Kichi. While the viral videos show the high-skill version, Japanese moms have been making the cozy, ketchup-topped version for their kids for generations!
Why This Recipe Works
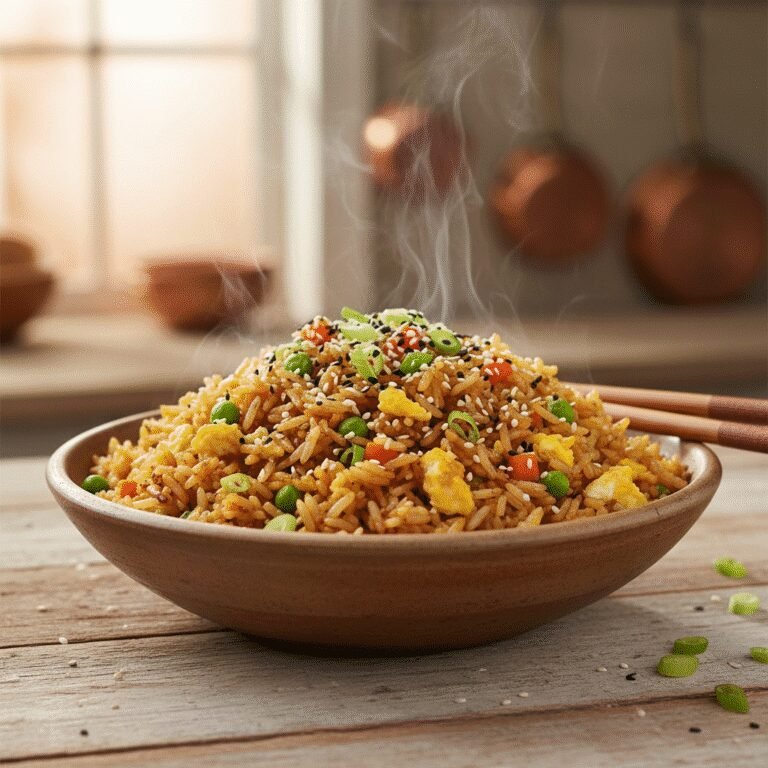
This recipe works because it balances sweet, savory, and tangy flavors with contrasting textures. The fried rice is seasoned primarily with ketchup, which caramelizes in the pan to create a depth of flavor that isn’t just "tomato-y" but rich and umami-packed (especially when combined with soy sauce and chicken).
The egg provides a creamy, neutral counterpoint to the bold rice. By using a "drape" technique rather than the difficult "cut-open" technique, we achieve that same luxurious, silky mouthfeel without the high risk of failure. It turns humble ingredients into a dish that feels incredibly indulgent.
Why You’ll Love This Recipe
- ✓Uses leftover rice (perfect for fridge clean-out)
- ✓Ready in under 30 minutes
- ✓Kid-friendly sweet and savory flavors
- ✓No fancy equipment needed
- ✓Looks impressive but is surprisingly forgiving
Equipment You’ll Need
- ✓8-inch Non-stick Frying Pan (Crucial for the egg)
- ✓Chef’s Knife
- ✓Cutting Board
- ✓Spatula or Chopsticks
- ✓Small Bowl (for molding rice)
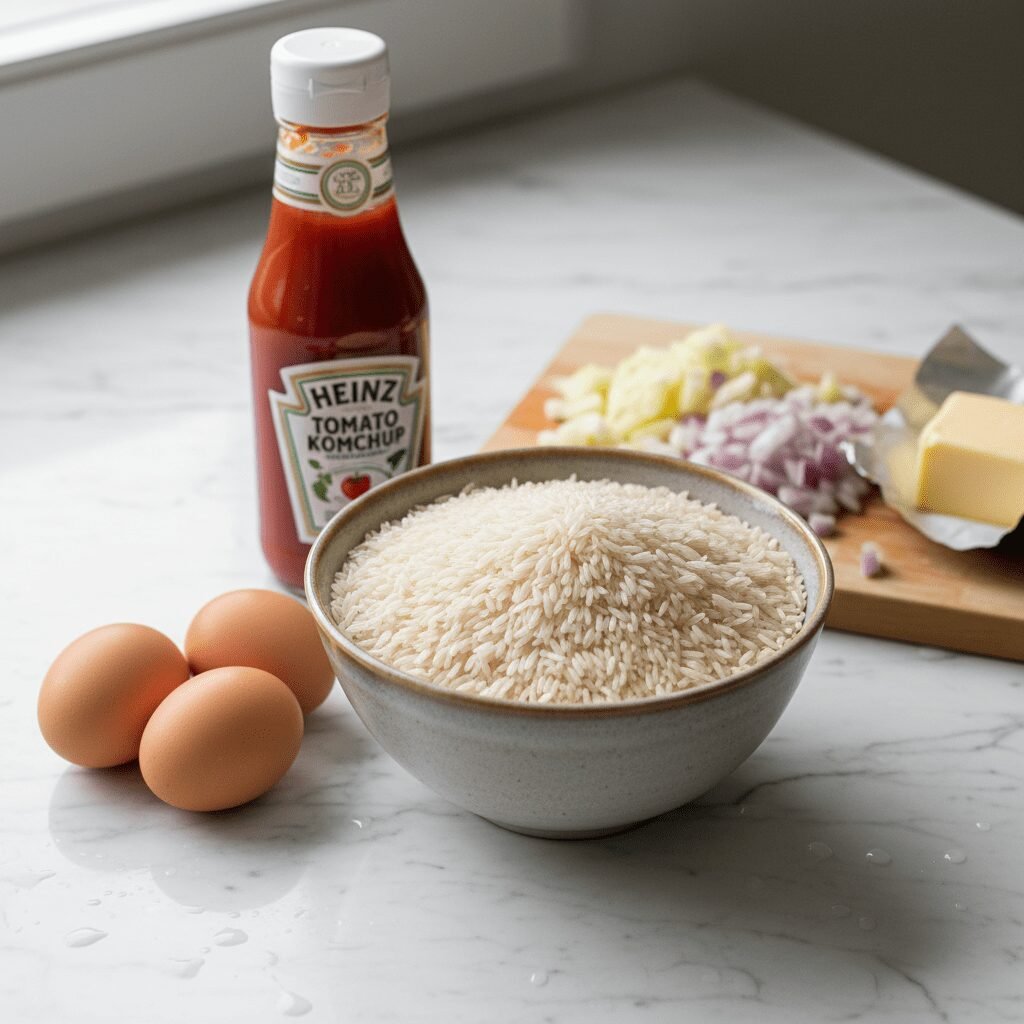
Ingredients
- ✓For the Fried Rice:
- ✓2 cups cooked white rice (day-old is best)
- ✓1/2 cup chicken breast or thigh, diced small (can substitute ham or sausage)
- ✓1/2 small onion, finely diced
- ✓1/4 cup frozen peas and carrots (optional, but classic)
- ✓3 tablespoons Ketchup
- ✓1 teaspoon Soy Sauce
- ✓1 tablespoon butter or neutral oil
- ✓Salt and pepper to taste
- ✓For the Egg (Per Serving):
- ✓2-3 large eggs
- ✓1 tablespoon milk or cream
- ✓Pinch of salt
- ✓1 tablespoon butter
- ✓For the Simple Sauce:
- ✓2 tablespoons Ketchup
- ✓1 teaspoon Worcestershire sauce
- ✓1 teaspoon Sugar
- ✓1 tablespoon Water
Instructions
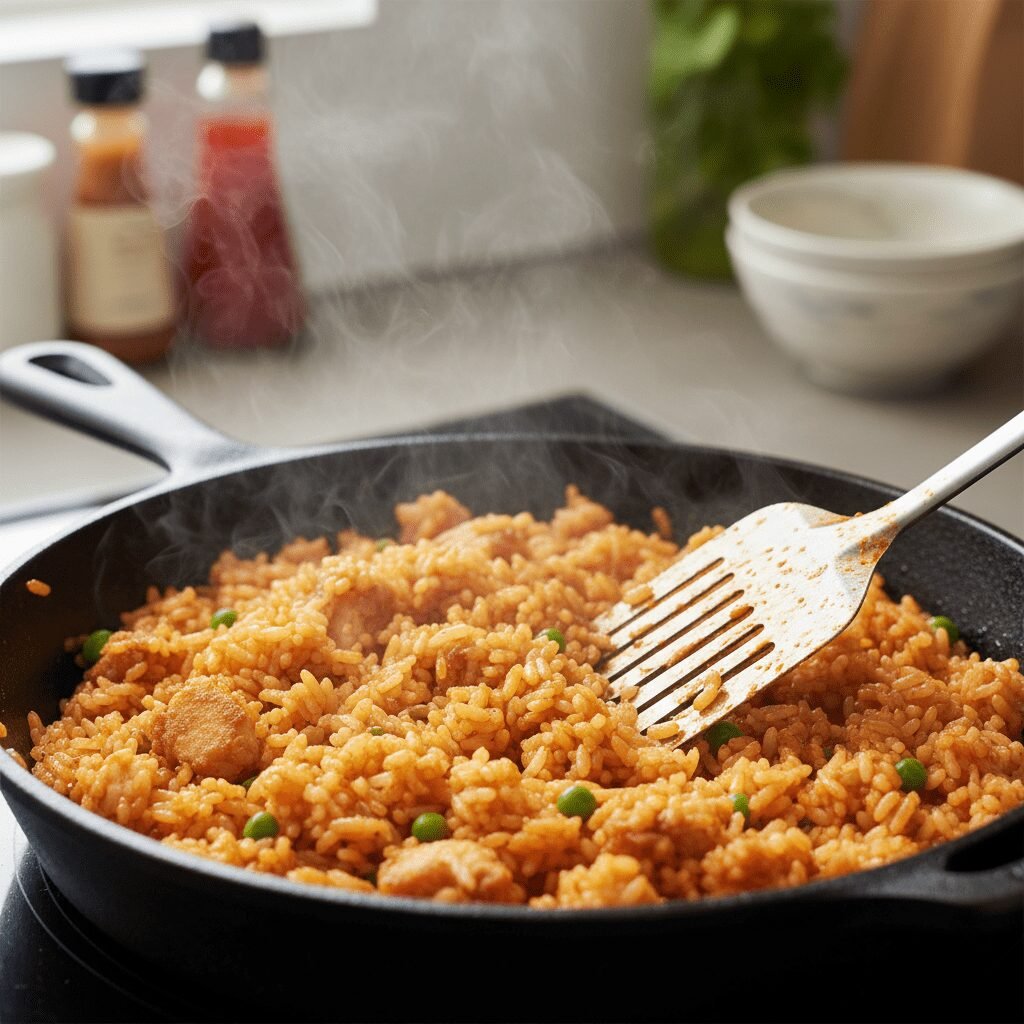
- Step 1: Prep the Rice Base
Heat 1 tablespoon of oil or butter in a large pan over medium heat. Add the diced onion and chicken (or ham). Sauté until the onions are translucent and the chicken is cooked through, about 5 minutes. - Step 2: Season the Base
Add the frozen peas and carrots and cook for another minute. Now, here is the trick: add the ketchup and soy sauce before the rice. Stir it into the meat and veggies and let it bubble for 30 seconds. This caramelizes the sugars in the ketchup and removes the sour, raw tomato taste. - Step 3: Fry the Rice
Add your cold, day-old rice to the pan. Break up any clumps with your spatula. Toss everything together until every grain of rice is coated in that beautiful red sauce. Season with black pepper. Remove from heat. - Step 4: Mold the Rice
Pack the fried rice into a small cereal bowl or a specialized rice mold. Place your serving plate upside down over the bowl, then flip them both over together. Gently lift the bowl to reveal a perfect dome of rice. - Step 5: Make the Sauce
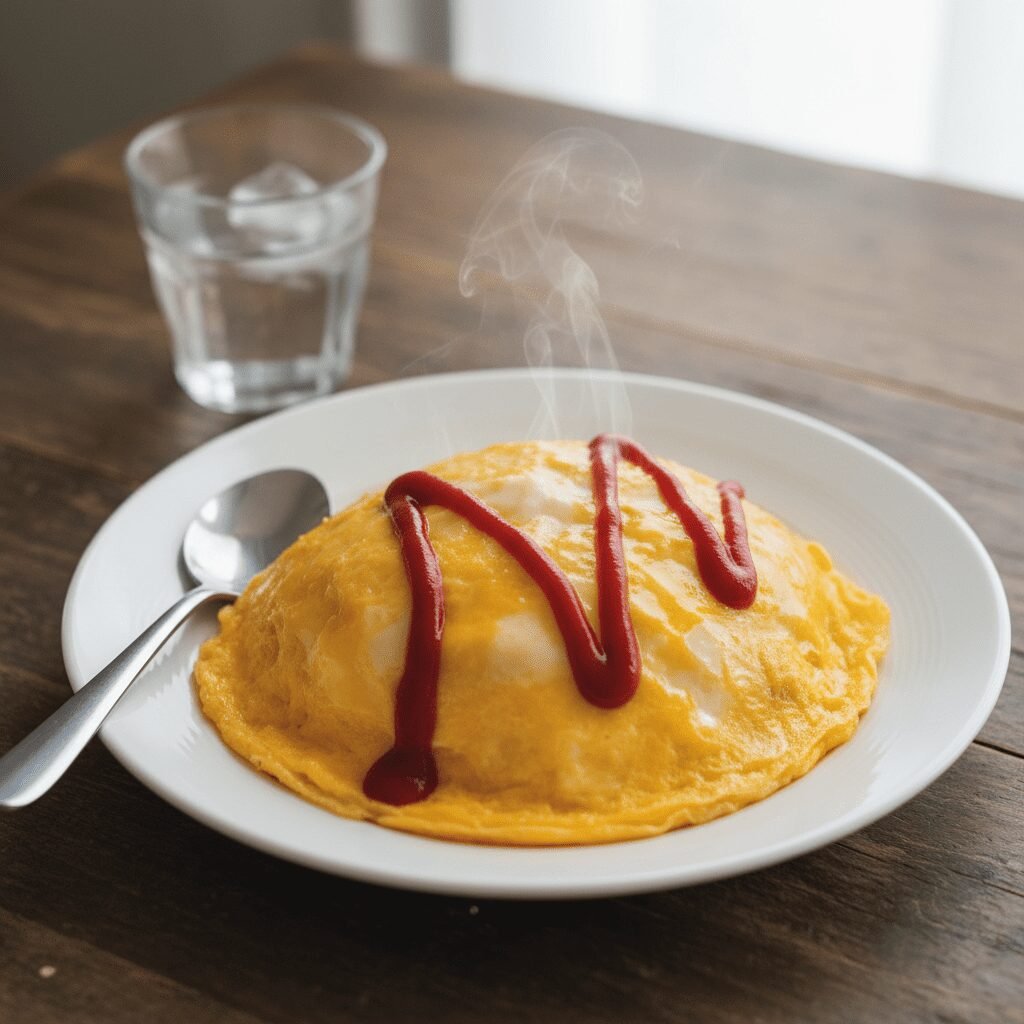
In a small microwave-safe bowl, mix the sauce ingredients (ketchup, Worcestershire, sugar, water). Microwave for 30 seconds just to melt the sugar and combine flavors. Set aside. - Step 6: The Fluffy Egg (The Viral Part!)
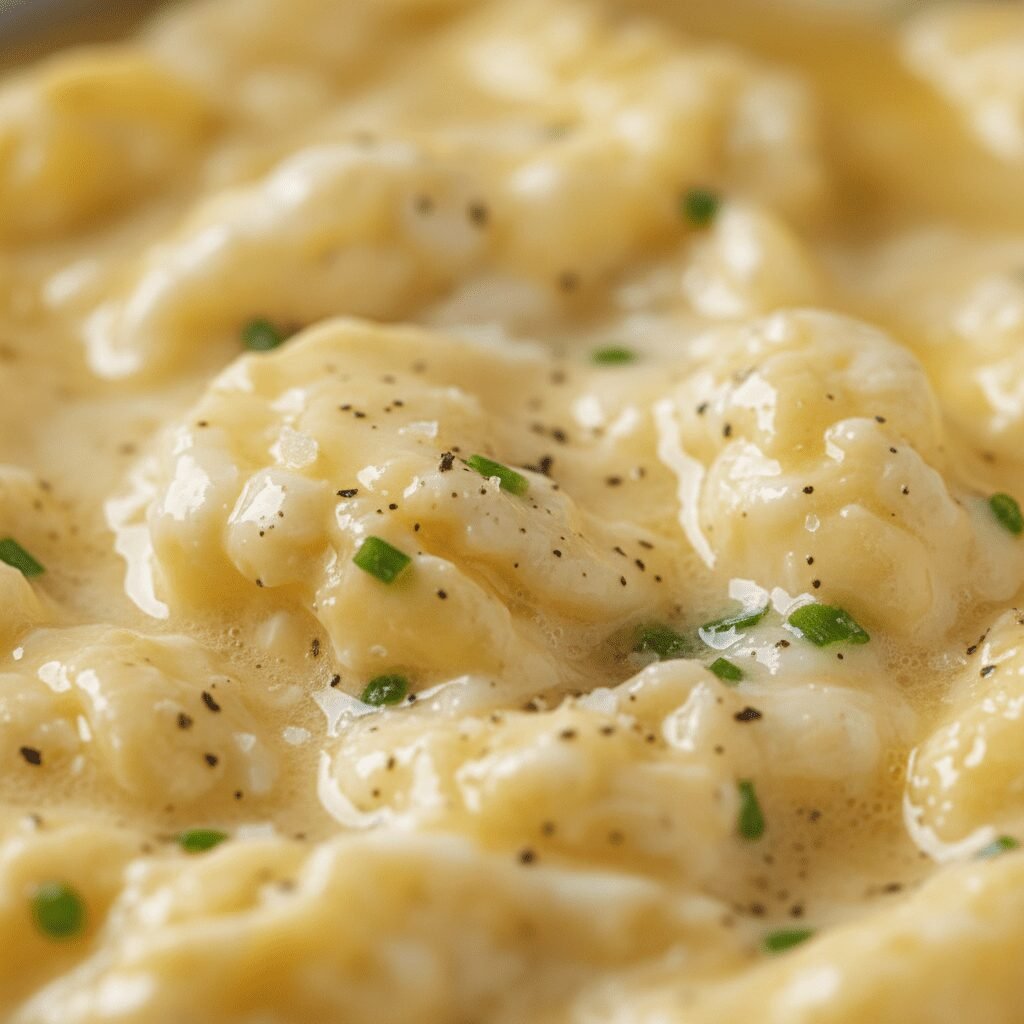
Whisk 2-3 eggs with milk and a pinch of salt vigorously. Heat an 8-inch non-stick pan over medium-high heat. Add a generous knob of butter. Once the butter foams, pour in the eggs. - Step 7: Scramble and Drape
Using chopsticks or a spatula, rapidly stir the eggs in the center of the pan while shaking the pan back and forth. Do this for about 10-15 seconds until large, soft curds form but the top is still runny (custardy). Stop stirring. Let the bottom set for 5 seconds. Slide the soft, creamy egg blanket right on top of your rice dome. - Step 8: Garnish
Drizzle your prepared sauce over the top, sprinkle with a little dried parsley or green onion if you feel fancy, and serve immediately!
Expert Cooking Tips
- ✓Cold Rice is King: Fresh, hot rice will turn into mush when you add the ketchup. Use day-old rice or spread fresh rice on a baking sheet to cool and dry out first.
- ✓The Pan Matters: For the egg, you really need a good non-stick pan that is not too large (8 inches is perfect). If the pan is too big, the egg spreads too thin and overcooks instantly.
- ✓Don’t Overcook the Egg: The residual heat will keep cooking the egg after you take it off the stove. Pull it when it looks slightly too wet.
- ✓Caramelize the Ketchup: Frying the ketchup with the onions and meat before adding the rice deepens the flavor profile significantly.
Substitutions and Variations
Vegetarian? Skip the chicken and use diced mushrooms or firm tofu. It adds a great texture!
No Worcestershire? You can just use plain ketchup for the topping, or mix ketchup with a little oyster sauce for a deeper flavor.
Dairy-Free? Use oil instead of butter for the pan, and skip the milk in the egg mixture (add a teaspoon of water instead to help fluffiness).
Common Mistakes to Avoid
The biggest mistake is overcooking the eggs. Omurice is famous for that "juicy" egg texture. If you cook it until it’s brown or dry, it won’t drape over the rice. Another common issue is wet rice. If your fried rice turns into a gummy paste, it’s because the rice was too fresh or you added too much sauce without frying it off.
Serving Suggestions
Serve this with a side of simple green salad with a ginger dressing to cut through the richness. A small bowl of miso soup also makes this a complete, restaurant-style set meal. For the kids, I sometimes draw a smiley face with the ketchup on top!
Storage and Reheating Tips
Omurice is best eaten fresh, especially the egg. However, you can make the fried rice in advance! Store the ketchup fried rice in an airtight container in the fridge for up to 3 days. When you are ready to eat, just reheat the rice and make a fresh egg topping.
Nutrition Facts (Estimated)
| Serving Size | 1 Plate |
| Calories | 680 kcal |
| Fat | 28g |
| Saturated Fat | 8g |
| Unsaturated Fat | 18g |
| Trans Fat | 0g |
| Cholesterol | 425mg |
| Sodium | 980mg |
| Carbohydrates | 85g |
| Fiber | 3g |
| Sugar | 12g |
| Protein | 24g |
Frequently Asked Questions
Can I use brown rice instead of white rice?
Absolutely! Brown rice adds a nice nutty flavor and holds up well to the ketchup sauce. Just make sure it is cooked and cooled beforehand.
My egg keeps sticking to the pan, what am I doing wrong?
It is likely one of two things: your pan isn’t non-stick enough (eggs are unforgiving!), or the pan wasn’t hot enough when you added the butter and eggs. The butter should sizzle.
Is this spicy?
Not at all! Traditional Omurice is sweet and savory. If you want spice, you can add a dash of hot sauce or kimchi to the fried rice.
Do I need a wok?
Nope! A standard frying pan works perfectly for both the rice and the egg. In fact, a smaller frying pan is better for the egg shape.
Why is my fried rice mushy?
You likely used fresh, hot rice. The moisture in fresh rice combined with the liquid ketchup creates mush. Always use cold, day-old rice.
Can I freeze this?
You can freeze the fried rice portion! I wouldn’t recommend freezing the egg as the texture becomes rubbery upon reheating.
What if I don’t have chicken?
Bacon, ham, sausage, shrimp, or even ground beef work wonderfully. It is a ‘clean out the fridge’ meal!
How do I get the egg so yellow?
Farm-fresh eggs help, but the trick is also not to brown the butter. Let the butter melt and foam, but don’t let it turn brown before adding the eggs.
Conclusion
And there you have it! A viral-style Japanese Omurice that didn’t require a flight to Kyoto or a degree from culinary school. It is warm, comforting, and honestly, just fun to make. The look on your family’s faces when you slide that silky egg over the rice is worth the 15 minutes of effort. Give it a try tonight—I promise it will become a regular in your dinner rotation!