Flaky Baked Beef Empanadas: The Perfect Make-Ahead Hand Pie
Flaky Baked Beef Empanadas: The Perfect Make-Ahead Hand Pie
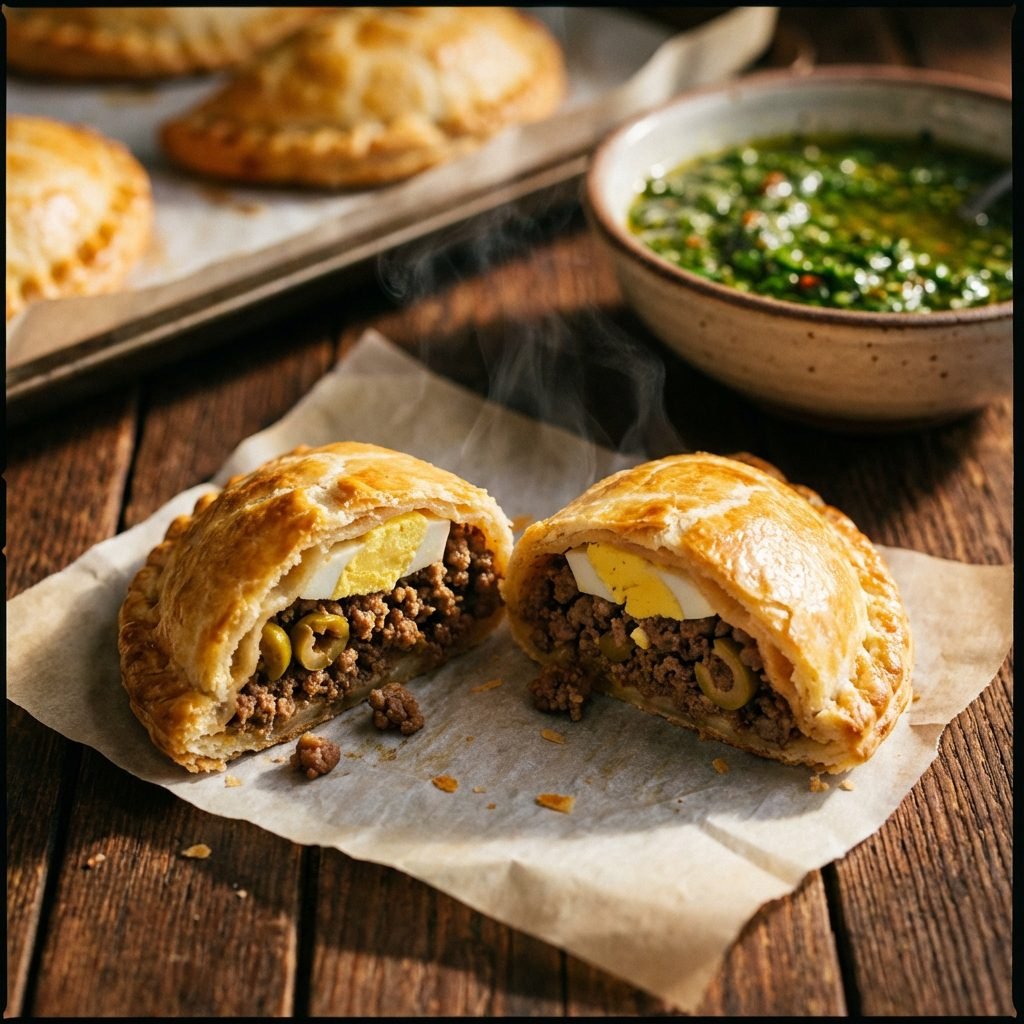
Empanadas are the ultimate culinary passport, a beloved dish found in various forms across Latin America, Spain, and the Philippines. These savory turnovers, with their crimped edges and delicious fillings, are a testament to the simple joy of a handheld meal. Our recipe focuses on a classic Argentinian-style baked beef empanada, or ’empanada de carne.’ We’ve perfected a homemade dough that bakes up incredibly light and flaky, a far cry from heavy, greasy alternatives. Inside, a rich and savory beef filling, known as ‘picadillo,’ is studded with traditional ingredients like green olives and hard-boiled egg, creating a complex flavor profile that is both comforting and exciting. The true beauty of these empanadas lies not only in their taste but in their practicality. They are the perfect make-ahead dish, ideal for stocking your freezer for quick weeknight dinners, packing in lunchboxes, or serving as impressive appetizers at your next gathering. Forget store-bought shortcuts; this guide will walk you through every step to create bakery-quality empanadas in your own kitchen.
45 minutes (plus 1 hour for dough chilling)
25-30 minutes
1 hour 45 minutes
12-14 empanadas
Appetizer / Main Course
Baking
Latin American
Standard
Why You’ll Love This Recipe
- Buttery, flaky homemade dough that shatters with every bite.
- Rich, savory, and perfectly seasoned ground beef filling.
- Baked, not fried, for a lighter yet equally delicious result.
- Freezer-friendly and ideal for meal prep and make-ahead entertaining.
- A complete, step-by-step guide for perfect results every time.
Equipment You’ll Need
- Large mixing bowl
- Pastry blender or food processor (optional)
- Rolling pin
- Large skillet
- Baking sheets
- Parchment paper
- Pastry brush
- 4-5 inch round cookie cutter (or a small bowl and knife)
- Fork
Ingredients
- For the Dough:
- 3 cups all-purpose flour, plus more for dusting
- 1 teaspoon salt
- 1 cup (2 sticks) cold unsalted butter, cut into 1/2-inch cubes
- 1 large egg
- 1/3 cup ice water
- 1 tablespoon white vinegar or lemon juice
- For the Beef Filling (Picadillo):
- 1 tablespoon olive oil
- 1 lb lean ground beef (90/10)
- 1 large yellow onion, finely chopped
- 1 red bell pepper, finely chopped
- 3 cloves garlic, minced
- 1 tablespoon smoked paprika
- 2 teaspoons ground cumin
- 1 teaspoon dried oregano
- 1/2 teaspoon red pepper flakes (optional)
- 1 teaspoon salt, or to taste
- 1/2 teaspoon black pepper
- 1/4 cup beef broth
- 1/2 cup chopped pimento-stuffed green olives
- 2 hard-boiled eggs, peeled and chopped
- For the Egg Wash:
- 1 large egg, beaten with 1 tablespoon of water
Instructions
- Step 1: Make the Dough. In a large bowl, whisk together the flour and salt. Add the cold, cubed butter. Using a pastry blender or your fingertips, cut the butter into the flour until the mixture resembles coarse crumbs with some pea-sized pieces of butter remaining. In a separate small bowl, whisk together the egg, ice water, and vinegar.
- Step 2: Form and Chill the Dough. Pour the wet ingredients into the flour mixture. Use a fork to gently mix until the dough just starts to come together. Turn the shaggy dough out onto a lightly floured surface and knead gently 2-3 times until it forms a cohesive ball. Do not overwork it. Divide the dough in half, flatten each half into a disk, wrap tightly in plastic wrap, and refrigerate for at least 1 hour or up to 2 days.
- Step 3: Cook the Filling. While the dough chills, heat the olive oil in a large skillet over medium-high heat. Add the ground beef and cook, breaking it up with a spoon, until browned. Drain off any excess fat. Add the chopped onion and bell pepper to the skillet and cook until softened, about 5-7 minutes. Stir in the minced garlic, smoked paprika, cumin, oregano, red pepper flakes, salt, and pepper. Cook for another minute until fragrant.
- Step 4: Cool the Filling. Pour in the beef broth to deglaze the pan, scraping up any browned bits from the bottom. Reduce the heat and let it simmer for 5 minutes for the flavors to meld. Remove the skillet from the heat and stir in the chopped green olives and hard-boiled eggs. Transfer the filling to a bowl and let it cool completely. You can place it in the refrigerator to speed up the process. The filling must be cold before assembling the empanadas.
- Step 5: Roll and Cut the Dough. Preheat your oven to 400°F (200°C). Line two baking sheets with parchment paper. On a lightly floured surface, roll out one disk of dough to about 1/8-inch thickness. Using a 4 to 5-inch round cutter, cut out as many circles as you can. Gather the scraps, re-roll once, and cut out more circles. Repeat with the second disk of dough.
- Step 6: Assemble the Empanadas. Place about 2 heaping tablespoons of the cooled beef filling onto one half of each dough circle, leaving a 1/2-inch border. Lightly brush the edges of the dough with water. Fold the other half of the dough over the filling to create a half-moon shape. Press the edges firmly to seal.
- Step 7: Crimp and Bake. To create the classic ‘repulgue’ edge, you can either press the edges with the tines of a fork or create a decorative rope-like pattern by folding small sections of the border over itself. Place the assembled empanadas on the prepared baking sheets. Brush the tops with the egg wash.
- Step 8: Bake to Perfection. Bake for 25-30 minutes, or until the pastry is golden brown and flaky. Let them cool on the baking sheet for a few minutes before transferring to a wire rack. Serve warm.
Expert Cooking Tips
- Keep Everything Cold: The key to a flaky crust is cold butter and cold water. If your kitchen is warm, you can even chill your mixing bowl and flour beforehand.
- Don’t Overwork the Dough: Mix and knead the dough just until it comes together. Overworking develops gluten, which will make your crust tough instead of tender and flaky.
- Cool the Filling Completely: This is a critical step. A warm filling will melt the butter in the dough, resulting in a soggy crust and potential leaks during baking.
- Don’t Overfill: It’s tempting to pack the empanadas, but overfilling makes them difficult to seal and increases the likelihood of them bursting open in the oven.
- Vent the Empanadas: For extra insurance against bursting, you can poke the top of each empanada once or twice with a fork before baking to allow steam to escape.
Substitutions and Variations
For the filling, you can easily substitute ground turkey, chicken, or pork for the beef. For a vegetarian version, use a mix of lentils, mushrooms, and finely diced vegetables. Raisins can be added for a traditional touch of sweetness. If you’re short on time, high-quality store-bought pie crust or puff pastry can be used in place of the homemade dough, though the texture will be different.
Common Mistakes to Avoid
The most common mistake is using a warm or hot filling, which melts the dough and prevents a flaky crust. Another pitfall is not sealing the edges properly, causing the filling to leak out during baking; be sure to press firmly and use a little water as an adhesive. Finally, avoid overworking the dough, which will result in a tough, chewy crust rather than a light, flaky one.
Serving Suggestions
Serve these empanadas warm with a side of chimichurri sauce for a fresh, herby contrast. A simple green salad with a vinaigrette dressing also pairs beautifully. For a more substantial meal, serve them with a side of rice and black beans. They are also fantastic on their own as a snack or party appetizer.
Storage and Reheating Tips
To Store: Baked empanadas can be stored in an airtight container in the refrigerator for up to 4 days. Reheat in a 350°F (175°C) oven or an air fryer for 5-10 minutes to restore crispness. To Freeze (Unbaked): Arrange assembled but unbaked empanadas on a baking sheet in a single layer. Freeze until solid, then transfer to a freezer-safe bag or container. They can be frozen for up to 3 months. Bake directly from frozen, adding about 10-15 minutes to the baking time. To Freeze (Baked): Let the baked empanadas cool completely, then freeze in the same manner. Reheat from frozen in the oven.
Nutrition Facts (Estimated)
| Serving Size | 1 empanada |
| Calories | 365 kcal |
| Fat | 21g |
| Saturated Fat | 9g |
| Unsaturated Fat | 10g |
| Trans Fat | 0g |
| Cholesterol | 75mg |
| Sodium | 410mg |
| Carbohydrates | 28g |
| Fiber | 2g |
| Sugar | 2g |
| Protein | 15g |
Frequently Asked Questions
Can I fry these empanadas instead of baking them?
Yes, you can. Heat about 2-3 inches of neutral oil in a deep pot to 350°F (175°C). Fry the empanadas in batches for 2-3 minutes per side, until golden brown and crispy. Drain on a wire rack. Note that the texture will be different from the baked version.
Why did my empanadas leak while baking?
Leaking usually happens for one of three reasons: they were overfilled, the edges were not sealed securely, or the filling was too wet. Ensure you leave a clear border, press the edges firmly, and that your filling has cooled and is not overly saucy.
Can I make the dough or filling ahead of time?
Absolutely! The dough can be made up to 2 days in advance and kept refrigerated. The beef filling can also be made up to 3 days ahead and stored in an airtight container in the refrigerator. This makes assembly quick and easy.
Conclusion
Mastering the art of the homemade baked empanada is a rewarding culinary skill that will pay dividends for years to come. With its incredibly flaky crust and deeply flavorful filling, this recipe is a guaranteed crowd-pleaser. Whether you’re preparing for a party, stocking your freezer, or simply craving a delicious and satisfying meal, these beef empanadas deliver on all fronts. Enjoy the process, and get ready to fall in love with your new favorite hand pie.