Crispy Stuffed Flatbreads Made in a Skillet (No Yeast Required)
Crispy Stuffed Flatbreads Made In A Skillet (No Yeast Required)
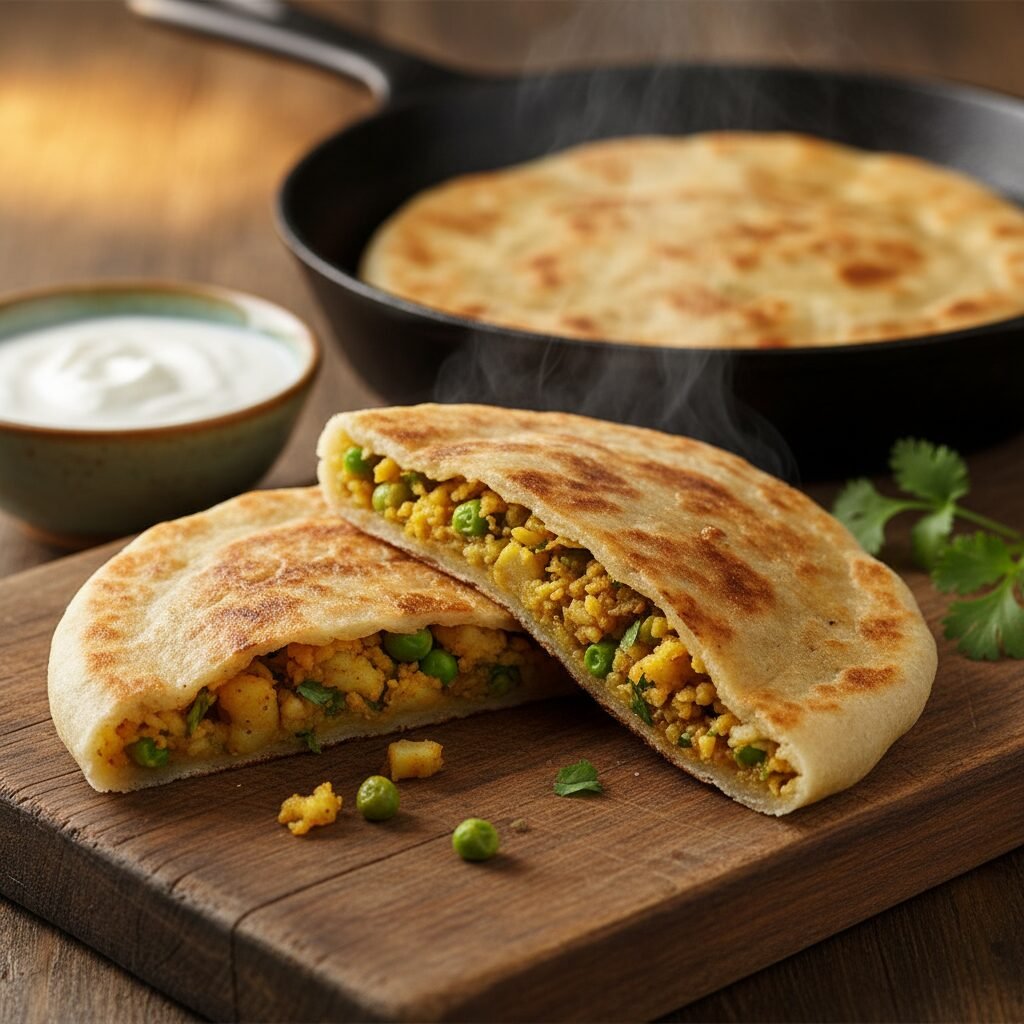
There is a unique, deeply satisfying pleasure in tearing into a warm, freshly made flatbread, especially one that’s crisped to golden perfection and bursting with a flavorful, savory filling. Many believe this experience is reserved for restaurant dining or requires the patience for yeast-based doughs. This recipe is here to shatter that myth. We present the ultimate guide to creating incredibly delicious, crispy stuffed flatbreads right in your own skillet, with a simple, no-yeast dough that comes together in minutes. This dough, enriched with yogurt for tenderness, provides the perfect pliable canvas for a classic spiced potato and pea filling. Each bite offers a delightful contrast: a shatteringly crisp exterior gives way to a soft, chewy layer of bread, leading to a warm, aromatic center. It’s a complete, comforting meal in a single, handheld package, perfect for a quick weeknight dinner, a lazy weekend brunch, or an impressive appetizer for guests. Forget waiting for dough to rise; let’s get straight to rolling, stuffing, and pan-frying our way to flatbread heaven.
30 minutes
20 minutes
50 minutes
6-8 flatbreads
Main Course/Side Dish
Pan-Frying
International
Vegetarian
Why You’ll Love This Recipe
- No Yeast Needed: The dough uses baking powder and yogurt for a quick, reliable rise and tender texture, eliminating proofing time.
- Skillet-Cooked Perfection: Achieves a restaurant-quality crispy, blistered crust using just a standard frying pan.
- Pantry-Friendly Ingredients: Built on common staples like flour, potatoes, and spices you likely already have.
- Completely Customizable: The filling can be easily adapted to use other vegetables, cheeses, lentils, or even minced meats.
- Quick and Easy: From start to finish, you can have hot, fresh flatbreads on the table in under an hour.
Equipment You’ll Need
- Large mixing bowl
- Rolling pin
- Large cast-iron or non-stick skillet (10-12 inch)
- Wide spatula
- Measuring cups and spoons
- Small bowl for oil or ghee
- Pastry brush (optional)
- Medium saucepan
- Potato masher
- Knife and cutting board
Ingredients
- For the No-Yeast Dough:
- 2 cups (250g) all-purpose flour, plus more for dusting
- 1 teaspoon baking powder
- 1 teaspoon salt
- 1/2 cup plain whole milk yogurt
- 1/4 cup warm water, plus more as needed
- 2 tablespoons neutral oil or melted ghee
- For the Spiced Potato Filling:
- 3 medium potatoes (about 1 lb), peeled and cubed
- 1 tablespoon neutral oil
- 1 small onion, finely chopped
- 1-2 green chilies, finely chopped (optional)
- 1 teaspoon grated fresh ginger
- 1 clove garlic, minced
- 1/2 cup frozen peas, thawed
- 1 teaspoon ground cumin
- 1/2 teaspoon ground coriander
- 1/2 teaspoon turmeric powder
- 1/2 teaspoon garam masala
- 1/4 cup chopped fresh cilantro
- 1 tablespoon lemon juice
- Salt to taste
- For Cooking:
- 1/4 cup ghee or neutral oil, for pan-frying
Instructions
- Step 1: Prepare the Spiced Potato Filling. Place the cubed potatoes in a saucepan, cover with cold salted water, and bring to a boil. Cook for 15-20 minutes, or until fork-tender. Drain thoroughly and mash until smooth but with some texture remaining. Set aside.
- Step 2: Sauté the Aromatics. While the potatoes cook, heat 1 tablespoon of oil in a small pan over medium heat. Add the chopped onion and cook until softened and translucent, about 5-7 minutes. Add the green chilies, ginger, and garlic, and cook for another minute until fragrant.
- Step 3: Combine the Filling. In a large bowl, combine the mashed potatoes, the sautéed onion mixture, thawed peas, ground cumin, coriander, turmeric, garam masala, fresh cilantro, and lemon juice. Mix well until everything is evenly incorporated. Season with salt to taste. Allow the filling to cool completely.
- Step 4: Make the No-Yeast Dough. In a large mixing bowl, whisk together the all-purpose flour, baking powder, and salt. Make a well in the center and add the plain yogurt, warm water, and 2 tablespoons of oil. Mix with a spoon or your hands until a shaggy dough forms.
- Step 5: Knead and Rest the Dough. Turn the dough out onto a lightly floured surface and knead for 5-7 minutes until it becomes smooth and elastic. The dough should be soft but not sticky. Place it back in the bowl, cover with a damp cloth, and let it rest for at least 15-20 minutes. This allows the gluten to relax, making it easier to roll.
- Step 6: Divide Dough and Filling. Divide the rested dough into 6 or 8 equal portions and roll each into a smooth ball. Divide the cooled potato filling into the same number of portions and roll them into balls as well.
- Step 7: Stuff the Flatbreads. Take one ball of dough and flatten it with your fingers into a 3-4 inch disc. Place a ball of filling in the center. Gently pull the edges of the dough up and around the filling, pinching them together at the top to seal completely. Roll the sealed ball between your palms to smooth it out.
- Step 8: Roll the Flatbreads. Lightly flour your work surface and the stuffed dough ball. Using a rolling pin, gently and evenly roll the ball into a 6-7 inch circle. Apply gentle pressure to avoid tearing the dough and causing the filling to leak. Repeat with the remaining dough and filling.
- Step 9: Cook the Flatbreads. Heat your skillet over medium heat. Place a rolled-out flatbread onto the dry, hot skillet. Cook for 1-2 minutes, until you see bubbles forming and the underside has light brown spots. Flip the flatbread.
- Step 10: Crisp the Flatbreads. Brush or drizzle about 1-2 teaspoons of ghee or oil onto the top surface of the flatbread. Cook for another 1-2 minutes, then flip again. Press down gently with a spatula to encourage even browning. The side with the ghee should be golden brown and crispy. Add a little more ghee to the skillet and cook the other side until it’s also perfectly browned and crisp. Each flatbread should take about 4-5 minutes in total.
- Step 11: Serve Immediately. Remove the cooked flatbread from the skillet and serve hot. Keep cooked flatbreads warm in a covered dish or wrapped in a clean kitchen towel while you cook the rest of the batch.
Expert Cooking Tips
- Achieve the Perfect Dough: The key to a soft, pliable dough is the right hydration. If it feels too sticky, add a teaspoon of flour at a time. If it’s too dry and crumbly, add a teaspoon of water. It should feel soft and supple, like play-doh.
- Cool the Filling Completely: Using a warm filling can make the dough gummy and prone to tearing. Ensure the potato mixture has cooled to at least room temperature before stuffing.
- Don’t Overstuff: While a generous filling is delicious, overfilling is the primary cause of tearing during rolling. A dough-to-filling ratio of roughly 2:1 by volume is a good starting point.
- Master the Rolling Technique: Roll from the center outwards, rotating the flatbread frequently. Use light, even pressure. If the filling starts to peek through, sprinkle a tiny bit of flour on the spot and continue gently.
- Maintain Consistent Heat: Cook the flatbreads on steady medium heat. If the heat is too high, the outside will burn before the inside cooks. If it’s too low, they will become dry and hard rather than crispy and soft.
Substitutions and Variations
For a vegan version, use a plant-based yogurt and a vegan butter or oil for cooking. For a gluten-free option, use a high-quality 1-to-1 gluten-free flour blend that contains xanthan gum; you may need slightly more water. The filling is highly versatile: try crumbled paneer with spices, mashed lentils, spiced minced chicken or lamb (cooked), or a mix of finely chopped vegetables like cauliflower and carrots.
Common Mistakes to Avoid
A common mistake is having a sticky or tough dough. This is usually due to an incorrect flour-to-liquid ratio; adjust slowly until the consistency is right. Another pitfall is the filling leaking out. This happens from overfilling, not sealing the dough properly, or rolling too aggressively. Be sure to pinch the seams tightly and use a gentle hand. Finally, if your flatbreads are dry, it’s likely because not enough fat (ghee/oil) was used during cooking or the skillet heat was too low, causing them to dry out before browning.
Serving Suggestions
These stuffed flatbreads are a meal in themselves but are elevated when served hot with a side of cooling mint-coriander chutney, tangy tamarind sauce, or a simple bowl of plain yogurt or raita. For a heartier meal, pair them with a lentil dal or a chickpea curry. A crisp, simple side salad with a lemon vinaigrette also provides a refreshing contrast.
Storage and Reheating Tips
Store leftover flatbreads in an airtight container in the refrigerator for up to 3 days. It’s best to separate the layers with parchment paper to prevent them from sticking together. To reheat, place them on a dry, non-stick skillet over medium-low heat for a minute or two per side until warm and the crispness returns. They can also be frozen for up to two months; thaw completely before reheating.
Nutrition Facts (Estimated)
| Serving Size | 1 flatbread (approx. 150g) |
| Calories | 360 kcal |
| Fat | 15g |
| Saturated Fat | 5g |
| Unsaturated Fat | 10g |
| Trans Fat | 0g |
| Cholesterol | 15mg |
| Sodium | 480mg |
| Carbohydrates | 48g |
| Fiber | 5g |
| Sugar | 3g |
| Protein | 9g |
Frequently Asked Questions
Can I make the dough or filling ahead of time?
Yes, both can be prepared in advance. The dough can be made, wrapped tightly, and refrigerated for up to 24 hours. The filling can also be made and stored in an airtight container in the fridge for up to 2 days. Let the dough come to room temperature for about 30 minutes before rolling.
Why didn’t my flatbread puff up like a balloon?
While this no-yeast dough isn’t designed to puff up dramatically like a pita, it should have small bubbles and pockets of air. If it’s completely flat, it could be due to the skillet temperature being too low, the dough being rolled too thick, or a small tear in the dough that allowed steam to escape.
Can I use whole wheat flour instead of all-purpose?
Absolutely. You can substitute up to 100% whole wheat flour (atta). Whole wheat flour absorbs more liquid, so you may need to add a few extra tablespoons of water to achieve the same soft dough consistency. The resulting flatbread will be heartier and have a nuttier flavor.
Conclusion
Mastering these Crispy Stuffed Flatbreads is a true kitchen victory, unlocking a world of delicious, satisfying meals with minimal effort and maximum flavor. This recipe proves that you don’t need yeast or special equipment to create something truly spectacular. The beauty lies in its simplicity and adaptability. Embrace the process, experiment with your favorite fillings, and enjoy the unparalleled taste of a homemade flatbread, hot from the skillet. It’s a culinary skill that will reward you and your loved ones time and time again.