Crispy Sizzling Crepes: The Cheap Gluten-Free Dinner Secret
Crispy Sizzling Crepes: The Cheap Gluten-Free Dinner Secret
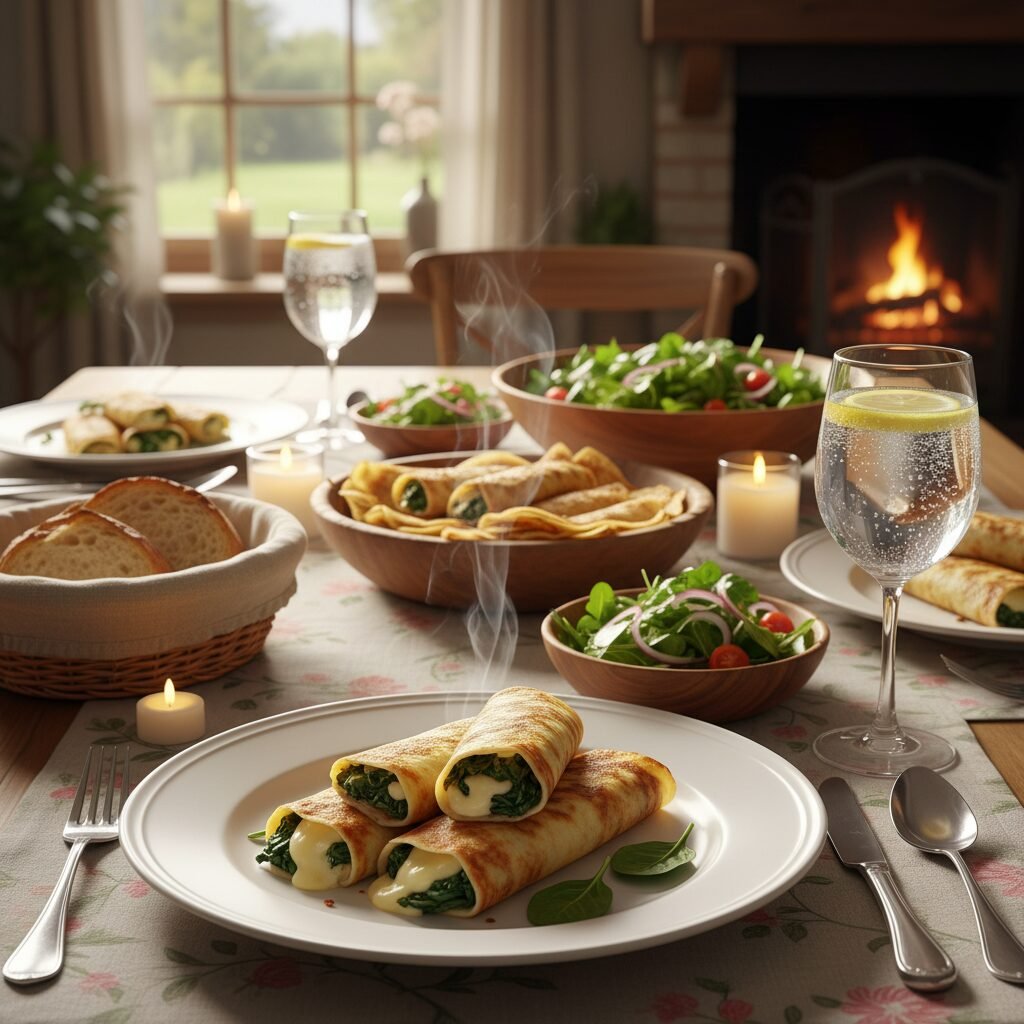
Discover the magic of crispy, sizzling crepes – a budget-friendly, gluten-free dinner that’s surprisingly easy and incredibly versatile! Perfect for busy weeknights or a fun family meal, these savory crepes will quickly become a new favorite in your home.
15 minutes (plus 30 minutes rest)
25 minutes
1 hour 10 minutes
8-10 crepes (serves 4-5)
Main Dish
Pan-Frying
French-inspired, adaptable
Gluten-Free, Vegetarian (if filling is vegetarian)
Oh, sweet friends, let me tell you, there’s nothing quite like the joy of discovering a recipe that feels like a warm hug on a plate, especially when it’s kind to your wallet and your dietary needs! Today, I’m absolutely bursting to share with you a true kitchen secret that has revolutionized our dinner routine: Crispy Sizzling Crepes. Now, I know what you might be thinking – crepes for dinner? Aren’t those usually for breakfast with berries and whipped cream? And gluten-free? Can they really be crispy?
Well, prepare to have your culinary world rocked, because these aren’t your grandma’s sweet breakfast crepes (though we love those too!). These are savory, golden-edged wonders, filled with all sorts of deliciousness, and they come together with such simple ingredients, you’ll wonder where they’ve been all your life. As a busy mom, finding meals that are both nutritious, affordable, and universally loved by everyone from my pickiest eater to my hungry husband is like striking gold. And when that meal also happens to be naturally gluten-free, it’s a total win-win-win!
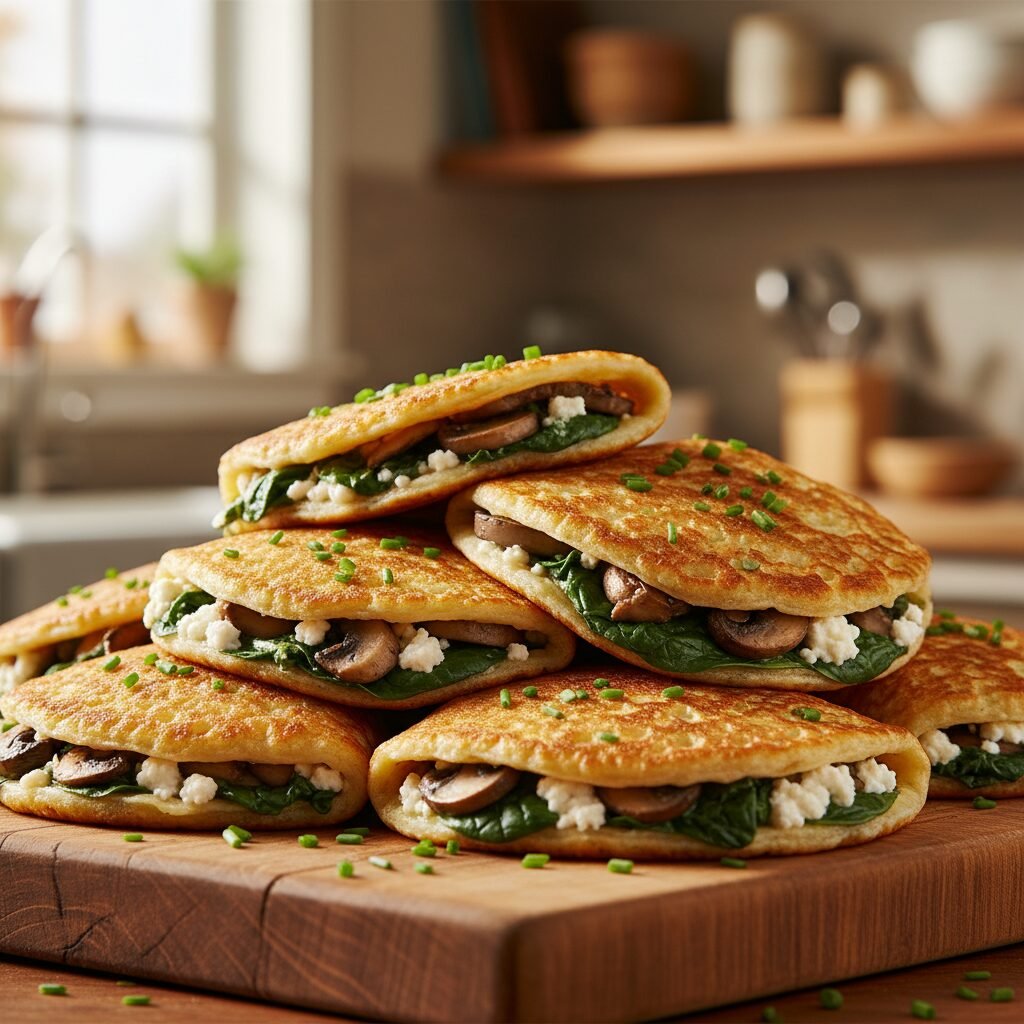
Imagine a light, delicate wrapper with just the right amount of crispness, giving way to a warm, flavorful filling. It’s comforting, it’s satisfying, and it feels a little bit fancy without any of the fuss. We’re talking about a dinner solution that’s endlessly customizable, making it perfect for using up whatever veggies you have lingering in the fridge, or for catering to different tastes around the table. So, grab your apron, my dears, because we’re about to unlock the secret to these delightful Crispy Sizzling Crepes, and I promise, your family will be asking for them again and again!
History & Origins
While crepes often conjure images of Parisian cafes and elegant French cuisine, their history is far more humble and widespread than you might imagine! The concept of a thin, griddle-cooked pancake is ancient, with variations found in nearly every culture across the globe. Think about it: tortillas, injera, dosa, blini, even our everyday pancakes – they all share a common ancestor in the simple mixture of grain and water cooked on a hot surface.
The word “crêpe” itself comes from the Latin “crispa,” meaning “curled,” referring to the delicate, sometimes ruffled edges. In France, crepes became particularly popular in Brittany, a region known for its buckwheat production. Buckwheat, naturally gluten-free, was a staple grain there, and so the savory “galette” (a buckwheat crepe) was born, often filled with ham, cheese, and an egg. These were hearty, nourishing meals for farmers and families, a far cry from the delicate dessert crepes we often associate with France today.
What’s truly beautiful about crepes is their adaptability. They traveled the world, evolving with local ingredients and culinary traditions. Our Crispy Sizzling Crepes draw inspiration from this rich history, embracing the naturally gluten-free nature of buckwheat (or a similar GF flour blend) and the savory fillings that make them a complete and satisfying meal. It’s a testament to how simple, wholesome ingredients can create something truly extraordinary, a tradition passed down through generations, now reimagined for our modern, health-conscious kitchens.
Why This Recipe Works
From a culinary perspective, these Crispy Sizzling Crepes are a stroke of genius, and here’s why they work so beautifully, especially for a gluten-free option. The secret lies in the batter’s composition and the cooking technique. Traditional wheat flour crepes rely on gluten for their elasticity and structure. When we go gluten-free, we need to compensate for that missing elasticity to prevent the crepes from being too fragile or crumbly.
Using a good quality gluten-free all-purpose flour blend (often containing a mix of rice flour, tapioca starch, and potato starch) provides a similar structural integrity. The starches help create that delicate, pliable texture. Adding eggs acts as a binder and provides richness, while milk (or a dairy-free alternative) contributes to the liquid consistency. A touch of oil or melted butter in the batter also helps prevent sticking and contributes to that desirable crispiness as the crepe cooks.
The “sizzling” part is key to achieving that wonderful crispy edge. Cooking the crepes in a hot, lightly oiled pan allows the edges to caramelize and crisp up quickly, while the center remains tender. This contrast in texture is what makes them so incredibly satisfying. The thinness of the crepe also ensures quick cooking and a higher surface-area-to-volume ratio, maximizing the crispy bits. Plus, the neutral flavor of the crepe itself makes it a perfect canvas for a myriad of savory fillings, allowing the flavors of your chosen ingredients to truly shine without being overwhelmed.
Why You’ll Love This Recipe
- ✓Naturally gluten-free and incredibly satisfying.
- ✓Budget-friendly and uses simple pantry staples.
- ✓Endlessly customizable with your favorite fillings.
- ✓Quick and easy for weeknight dinners.
- ✓A fun and interactive meal for the whole family.
- ✓Achieves perfect crispiness with tender interiors.
Equipment You’ll Need
- ✓Large mixing bowl
- ✓Whisk
- ✓Measuring cups and spoons
- ✓Non-stick crepe pan or 8-inch non-stick skillet
- ✓Rubber spatula or thin metal spatula
- ✓Ladle
- ✓Small plate for cooked crepes
- ✓Plastic wrap
Ingredients
- ✓
For the Crepes:
- ✓1 cup gluten-free all-purpose flour blend (with xanthan gum)
- ✓2 large eggs
- ✓1 1/2 cups milk (dairy or non-dairy, like almond or oat milk)
- ✓2 tablespoons melted butter or neutral oil (like avocado or grapeseed)
- ✓1/2 teaspoon salt
- ✓1/4 teaspoon black pepper
- ✓Butter or oil for cooking
- ✓
For a Simple Savory Filling (example):
- ✓1 tablespoon olive oil
- ✓1 medium onion, finely chopped
- ✓2 cloves garlic, minced
- ✓8 oz mushrooms, sliced
- ✓1 cup spinach, roughly chopped
- ✓1/2 cup ricotta cheese
- ✓1/4 cup grated Parmesan cheese
- ✓Salt and pepper to taste
- ✓Optional: Cooked shredded chicken or ham for a heartier meal

Instructions
-
- Prepare the Crepe Batter: In a large mixing bowl, whisk together the gluten-free all-purpose flour, salt, and pepper.
- In a separate bowl, whisk the eggs, milk, and melted butter (or oil) until well combined.
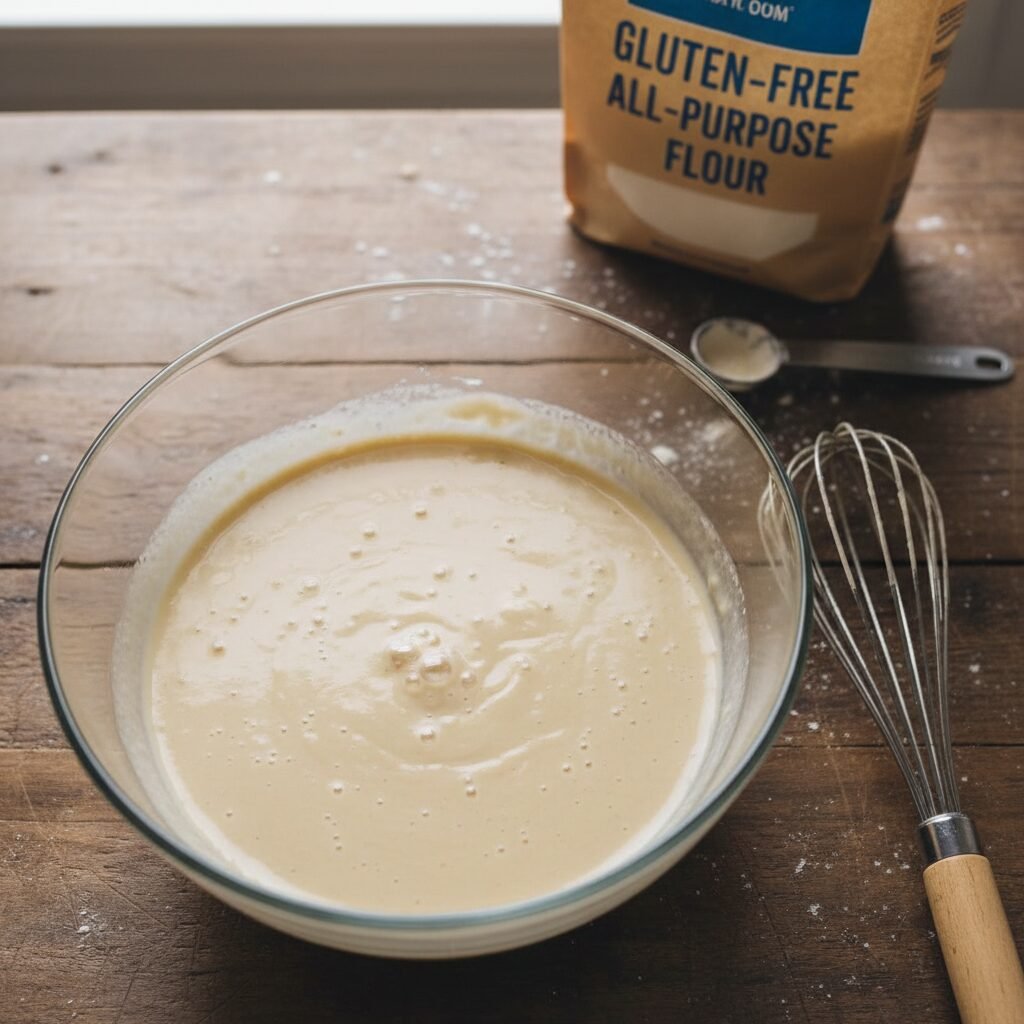
- Gradually pour the wet ingredients into the dry ingredients, whisking continuously until the batter is smooth and lump-free. The batter should be thin, similar to heavy cream. If it seems too thick, add a tablespoon or two more milk.
- Rest the Batter: Cover the bowl with plastic wrap and let the batter rest at room temperature for at least 30 minutes. This allows the flours to fully hydrate, resulting in more pliable crepes.
- Prepare the Filling (while batter rests): Heat olive oil in a skillet over medium heat. Add chopped onion and cook until softened, about 5 minutes. Add minced garlic and sliced mushrooms, cooking until mushrooms are tender and any liquid has evaporated, about 7-10 minutes. Stir in spinach and cook until wilted. Remove from heat and let cool slightly.
- In a bowl, combine the cooked vegetable mixture with ricotta cheese and Parmesan cheese. Season with salt and pepper to taste. If using, stir in cooked shredded chicken or ham.
- Cook the Crepes: Heat an 8-inch non-stick crepe pan or skillet over medium heat. Lightly grease the pan with a tiny bit of butter or oil (a paper towel works great for this).
- Once the pan is hot, pour about 1/4 cup of batter into the center of the pan. Immediately tilt and swirl the pan to evenly coat the bottom with a thin layer of batter.
- Cook for 1-2 minutes, or until the edges are golden brown and crispy, and the surface looks set.
- Carefully loosen the edges with a spatula, then flip the crepe. Cook for another 30-60 seconds on the second side until lightly golden.
- Transfer the cooked crepe to a plate. Repeat with the remaining batter, stacking the cooked crepes on top of each other. You may need to lightly grease the pan between each crepe.
- Assemble and Serve: Lay a cooked crepe flat. Spoon a generous amount of savory filling onto one half of the crepe.
- Fold the crepe in half, then in half again to form a triangle, or simply roll it up like a burrito.
- For extra crispiness and warmth, you can briefly return the filled crepes to a lightly oiled hot pan for 1-2 minutes per side until heated through and extra golden.
- Serve immediately and enjoy your delicious Crispy Sizzling Crepes!

Expert Cooking Tips
- ✓Batter Consistency is Key: Your batter should be thin, like heavy cream. If it’s too thick, your crepes will be heavy and cake-like. If it’s too thin, they’ll be hard to flip. Adjust with a splash more milk if needed.
- ✓Resting Time Matters: Don’t skip the 30-minute rest! It allows the gluten-free flours to absorb the liquid, preventing gritty crepes and making them more pliable and less prone to tearing.
- ✓Hot Pan, Lightly Oiled: A properly heated pan is crucial for crisp edges. Too cool, and they’ll be soggy; too hot, and they’ll burn. Use just enough oil or butter to prevent sticking, not to fry them.
- ✓First Crepe is a Test: The first crepe often doesn’t turn out perfectly. It’s your chance to adjust the heat and batter consistency. Don’t worry, it’s usually the cook’s treat!
- ✓Swirl Quickly: Once the batter hits the hot pan, it sets fast. Swirl the pan immediately and quickly to get a thin, even layer.
- ✓Don’t Overfill: While tempting, overfilling can make crepes difficult to fold and eat. Start with a moderate amount and adjust to your preference.
Substitutions and Variations
One of the most wonderful things about these Crispy Sizzling Crepes is how incredibly adaptable they are! If you don’t have a specific gluten-free flour blend, you can experiment with a mix of individual flours like 1/2 cup rice flour, 1/4 cup tapioca starch, and 1/4 cup potato starch, adding 1/2 teaspoon of xanthan gum. For dairy-free options, simply swap out the milk for your favorite unsweetened non-dairy milk (almond, oat, or soy work great) and use a plant-based butter or extra oil. The filling is where you can truly let your creativity shine! Instead of mushrooms and spinach, consider sautéed bell peppers and onions, roasted sweet potatoes and black beans, or even a simple scrambled egg and cheese mixture. For a protein boost, cooked ground turkey, shredded rotisserie chicken, or crumbled firm tofu can be easily incorporated. Don’t have ricotta? Cottage cheese or even a creamy vegan cheese alternative can work in a pinch. Feel free to play around with different herbs and spices too – a touch of smoked paprika, Italian seasoning, or a pinch of red pepper flakes can transform the flavor profile entirely!
Common Mistakes to Avoid
Making crepes can seem intimidating, but avoiding a few common pitfalls will ensure your success! The biggest mistake is often not letting the batter rest. Skipping this step leads to crepes that are more likely to tear, have a gritty texture, and aren’t as pliable. Another frequent issue is not having the pan at the right temperature. If the pan isn’t hot enough, your crepes will stick and be soggy; if it’s too hot, they’ll burn before they cook through. Always aim for medium heat and adjust as needed. Using too much batter for each crepe is another common error, resulting in thick, pancake-like crepes instead of delicate, thin ones. Remember, a little batter goes a long way! Lastly, being impatient when flipping can lead to torn crepes. Wait until the edges are clearly set and golden, and the surface looks dry before attempting to flip. A thin, flexible spatula is your best friend here!
Serving Suggestions
These Crispy Sizzling Crepes are a meal in themselves, but they truly shine with a few thoughtful accompaniments! For a fresh contrast, serve them alongside a crisp green salad with a light vinaigrette. A dollop of sour cream or Greek yogurt on top adds a lovely tang and creaminess, especially if your filling is rich. If you’re feeling extra fancy, a sprinkle of fresh herbs like chives or parsley adds a pop of color and freshness. For a heartier meal, a side of roasted vegetables like asparagus or broccoli would be delightful. And for those who love a little heat, a drizzle of your favorite hot sauce or a sprinkle of red pepper flakes can really elevate the experience. Don’t forget a warm cup of tea or a glass of sparkling water to complete this cozy, comforting meal!
Storage and Reheating Tips
Cooked crepes are surprisingly versatile for meal prep! Once cooled completely, you can stack them with a piece of parchment paper or wax paper between each crepe to prevent sticking. Store them in an airtight container or a resealable bag in the refrigerator for up to 3-4 days. To reheat, you can gently warm them in a lightly oiled skillet over medium-low heat until heated through and slightly crispy again, or microwave them briefly (though they won’t be as crispy). The savory filling can also be stored separately in an airtight container in the refrigerator for the same amount of time. When ready to eat, simply reheat the filling and assemble your crepes fresh. You can even freeze cooked crepes! Stack them with parchment paper, wrap the stack tightly in plastic wrap, then aluminum foil, and freeze for up to 1-2 months. Thaw in the refrigerator overnight before reheating.
Nutrition Facts (Estimated)
| Serving Size | 2 crepes with filling |
| Calories | 350 kcal |
| Fat | 18g |
| Saturated Fat | 8g |
| Unsaturated Fat | 9g |
| Trans Fat | 0.5g |
| Cholesterol | 120mg |
| Sodium | 420mg |
| Carbohydrates | 35g |
| Fiber | 3g |
| Sugar | 5g |
| Protein | 12g |
Frequently Asked Questions
Can I make the crepe batter ahead of time?
Absolutely! In fact, letting the batter rest in the refrigerator for a few hours or even overnight can actually improve the texture of the crepes, making them more pliable and less prone to tearing. Just give it a good whisk before cooking.
What kind of gluten-free flour blend should I use?
Look for a good quality “all-purpose” gluten-free flour blend that already contains xanthan gum. Brands like King Arthur Gluten-Free All-Purpose Flour or Bob’s Red Mill 1-to-1 Baking Flour work wonderfully. If your blend doesn’t have xanthan gum, add 1/2 teaspoon per cup of flour.
My crepes are tearing when I try to flip them. What am I doing wrong?
This usually means one of a few things: the batter might be too thick (add a splash more milk), the pan isn’t hot enough, or you’re trying to flip them too soon. Make sure the edges are golden and the surface is set before attempting to flip. A thin, flexible spatula helps immensely!
Can I make these crepes sweet instead of savory?
You sure can! To make them sweet, omit the black pepper and reduce the salt to a pinch. You can also add 1-2 tablespoons of sugar to the batter. Then fill them with fresh fruit, whipped cream, Nutella, or a drizzle of maple syrup.
How do I get those perfect crispy edges?
The key is a hot pan and just enough oil or butter to lightly coat the surface. Don’t overcrowd the pan, and let the crepe cook undisturbed until the edges turn golden and slightly crisp before flipping.
What are some other savory filling ideas?
The possibilities are endless! Try a chicken and broccoli Alfredo filling, a ground beef and cheese mixture, roasted vegetables with feta, or even a simple ham and Swiss cheese. Get creative with what you have on hand!
Is it okay if the first crepe isn’t perfect?
Absolutely! The first crepe is almost always a “test crepe.” It helps you gauge the pan’s temperature and the batter’s consistency. Don’t worry if it’s not perfect; enjoy it as the chef’s treat!
Can I use a regular non-stick pan instead of a crepe pan?
Yes, an 8-inch non-stick skillet works perfectly well. A dedicated crepe pan often has lower sides which makes flipping a bit easier, but it’s not essential.
Conclusion
And there you have it, my sweet friends – the secret to Crispy Sizzling Crepes, a truly delightful and versatile gluten-free dinner that’s sure to become a cherished recipe in your home. It’s more than just a meal; it’s an invitation to gather, to create, and to savor simple, wholesome goodness together. Whether you’re navigating dietary restrictions, looking to stretch your grocery budget, or simply craving something new and exciting for dinner, these crepes deliver on all fronts. They’re a testament to the fact that delicious, comforting food doesn’t have to be complicated or expensive. So go ahead, whip up a batch, fill them with your heart’s desire, and watch as your family’s faces light up with every crispy, flavorful bite. Happy cooking, and enjoy making beautiful memories around your table!