Crispy Japanese Potato Croquettes (Korokke) – Kids Love These!
Crispy Japanese Potato Croquettes (Korokke) – Kids Love These!
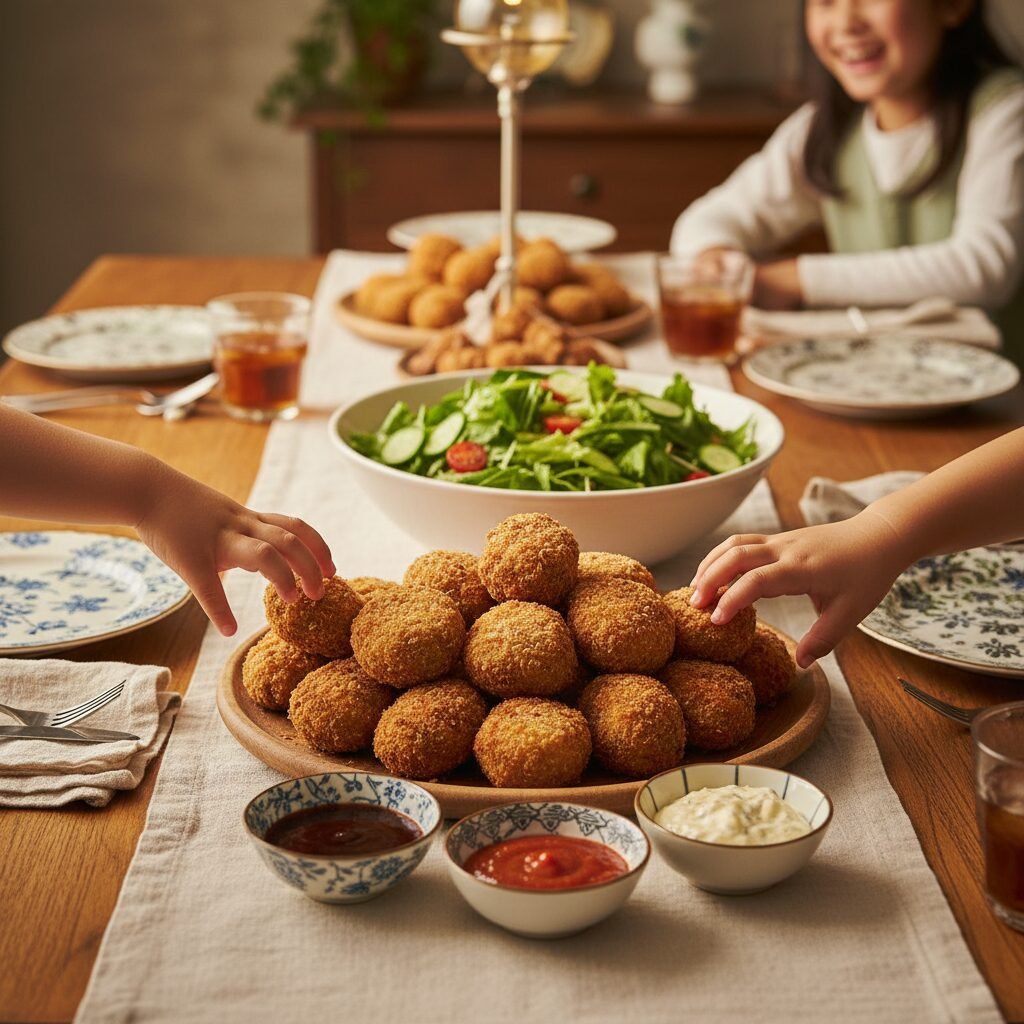
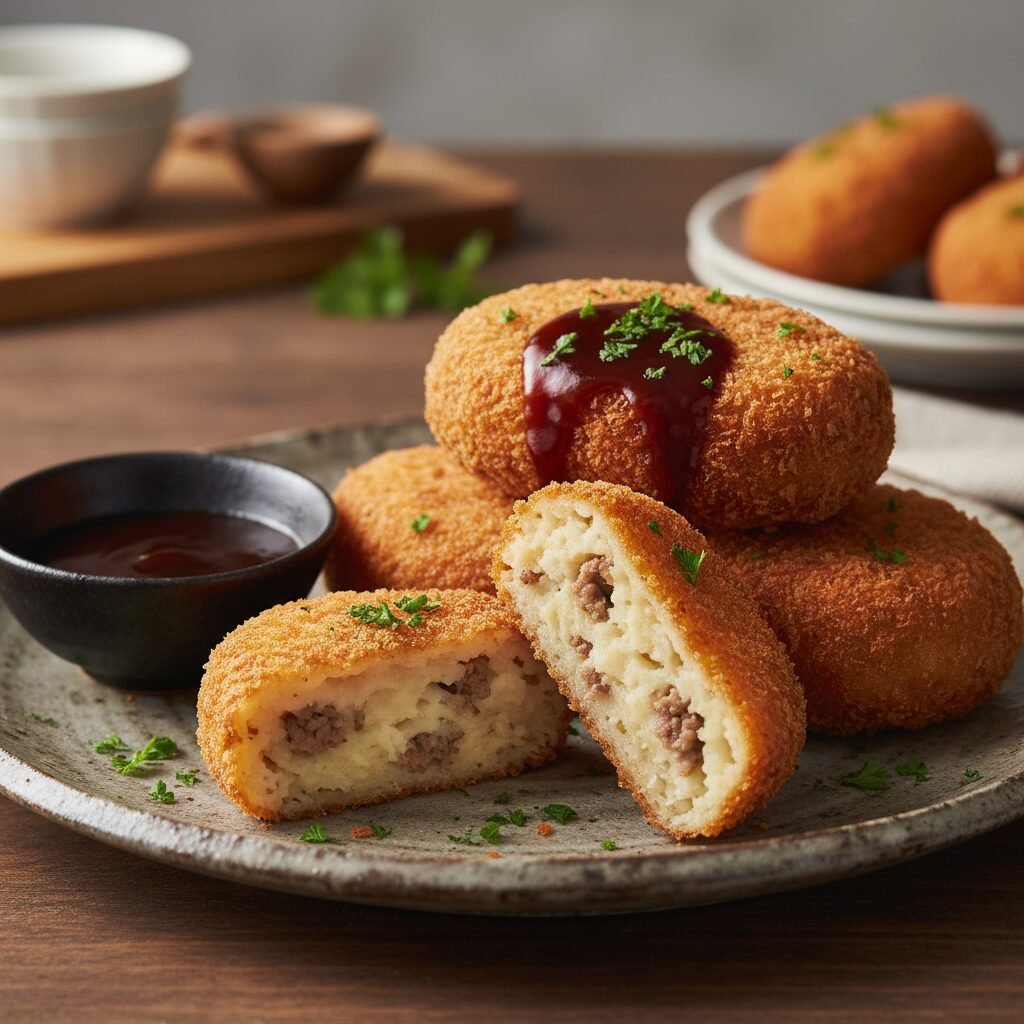
Oh my goodness, mamas! Get ready to discover your new family favorite: Crispy Japanese Potato Croquettes, or Korokke! These golden, crunchy delights are packed with creamy potato goodness and are so incredibly satisfying, your little ones will be begging for more. They’re a hug in food form, perfect for a cozy family dinner or a fun lunchbox treat!
45 minutes
15 minutes
1 hour
10-12 croquettes
Appetizer, Side Dish, Main Course
Deep Frying
Japanese
Omnivore (can be adapted to Vegetarian)
Hello, lovely friends and fellow busy mamas! Today, I’m absolutely thrilled to share a recipe that has become a true superstar in my household: Crispy Japanese Potato Croquettes, affectionately known as Korokke! If you’ve ever dreamed of a dish that combines comfort, crunch, and pure kid-friendly magic, then you’ve stumbled upon a treasure. These aren’t just any potato patties; they’re a delightful culinary experience that transports you straight to the bustling streets of Japan, right from your very own kitchen.
Imagine biting into a perfectly golden-brown, crispy exterior, giving way to a cloud of fluffy, savory mashed potato filling. It’s pure bliss! My kids, who can sometimes be the pickiest eaters on the planet (sound familiar, anyone?), absolutely devour these. There’s something about their irresistible texture and comforting flavor that just speaks to everyone, from the tiniest tots to the grown-ups at the table. Plus, they’re surprisingly simple to make, making them a fantastic addition to your weekly meal rotation. So, grab your aprons, because we’re about to embark on a delicious journey to create these utterly charming and incredibly tasty Korokke!
History & Origins
The story of Korokke is a fascinating blend of international influence and Japanese culinary ingenuity! While these crispy delights are now a beloved staple in Japanese home cooking and street food, their origins actually trace back to French cuisine. The word “Korokke” itself is a Japanese phonetic approximation of the French word “croquette.” Croquettes, typically made with a thick béchamel sauce and various fillings, were introduced to Japan during the Meiji era (1868-1912), a period of significant Westernization.
As Japan opened up to the West, new ingredients and cooking techniques began to make their way into Japanese kitchens. The original French croquette was adapted to suit Japanese tastes and available ingredients. Potatoes, being a readily available and versatile vegetable, quickly became the star ingredient, replacing the more complex béchamel base. Over time, Japanese chefs and home cooks perfected the art of Korokke, transforming it into the comforting, crispy, and utterly delicious dish we know and love today. It became a symbol of Western influence adapted into a uniquely Japanese comfort food, found everywhere from high-end restaurants to humble convenience stores and school lunchboxes. It’s a beautiful example of how food traditions evolve and enrich each other across cultures!
Why This Recipe Works
The magic of Korokke lies in a beautiful interplay of textures and flavors, making it a culinary marvel that truly “works” on every level. First, let’s talk about that incredible crunch! The double-breading technique—first with flour, then egg, and finally panko breadcrumbs—is absolutely crucial. Panko, a Japanese breadcrumb, is coarser and flakier than traditional breadcrumbs, which allows it to absorb less oil and create an exceptionally light, airy, and super crispy crust when fried. This isn’t just a coating; it’s a protective, flavor-enhancing shell!
Beneath that golden armor lies the heart of the Korokke: a creamy, fluffy potato filling. The potatoes are mashed until smooth, often with a touch of milk or butter, creating a rich, velvety texture that contrasts perfectly with the crisp exterior. The addition of sautéed ground meat (like beef or pork) and onions provides a savory depth and umami richness that elevates the simple potato. The starch in the potato also acts as a binder, ensuring the croquette holds its shape during frying. When fried at the right temperature, the exterior crisps up quickly, while the interior heats through without becoming greasy. It’s a symphony of textures and tastes – the ultimate comfort food experience!
Why You’ll Love This Recipe
- ✓Irresistibly crispy exterior with a creamy, savory potato filling.
- ✓A beloved Japanese comfort food, perfect for family meals.
- ✓Kid-friendly and a fantastic way to get veggies into little ones.
- ✓Versatile – customize with your favorite fillings!
- ✓Surprisingly easy to make with simple ingredients.
- ✓Perfect for meal prepping and freezing for later.
Equipment You’ll Need
- ✓Large pot for boiling potatoes
- ✓Potato masher or ricer
- ✓Large mixing bowl
- ✓Large skillet or frying pan
- ✓Three shallow dishes for breading
- ✓Deep pot or Dutch oven for frying
- ✓Slotted spoon or spider strainer
- ✓Wire rack for draining
- ✓Meat thermometer (optional, for oil temperature)
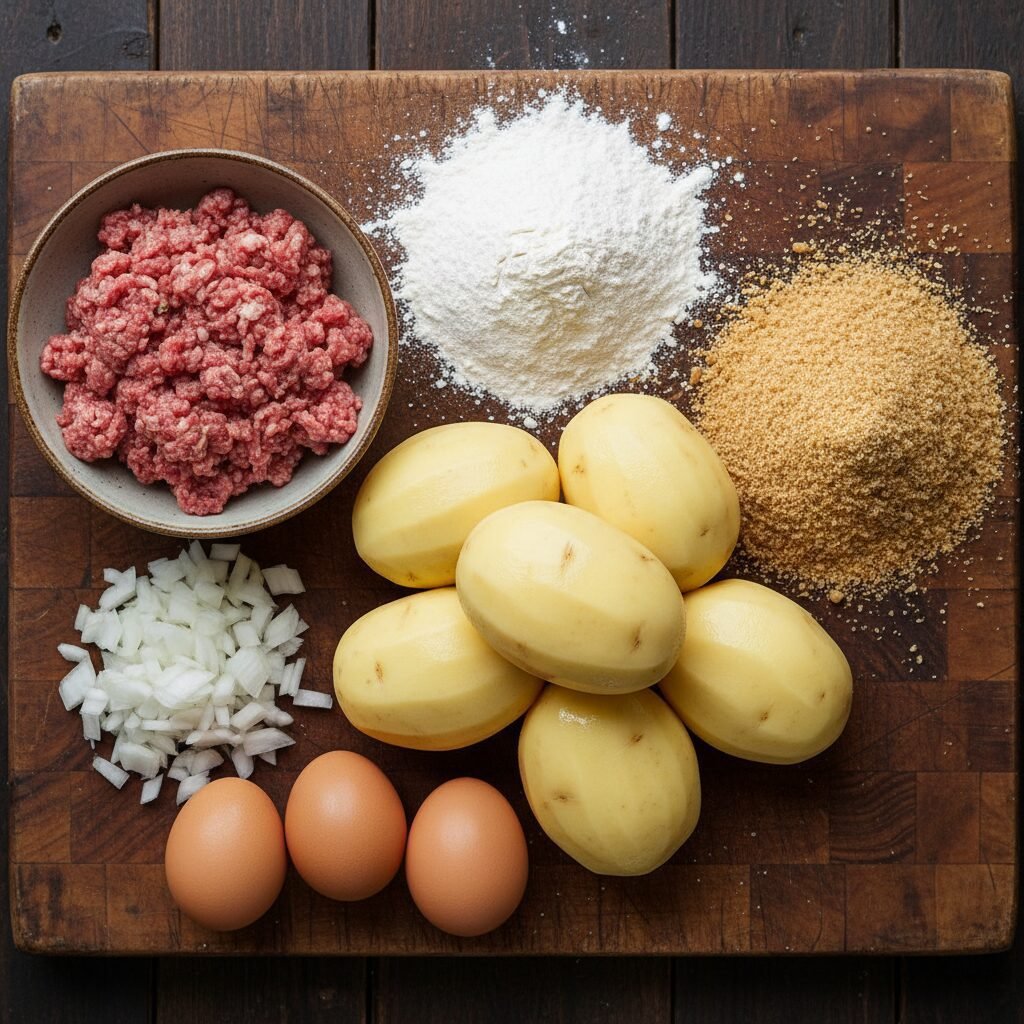
Ingredients
- ✓2 lbs (about 4-5 medium) Russet potatoes, peeled and quartered
- ✓1 tbsp unsalted butter
- ✓1/4 cup milk (whole milk recommended)
- ✓1/2 tsp salt, plus more to taste
- ✓1/4 tsp black pepper, plus more to taste
- ✓1 tbsp vegetable oil
- ✓1/2 lb ground beef or pork (or a mix), lean
- ✓1 medium onion, finely diced
- ✓1/4 cup all-purpose flour
- ✓2 large eggs, beaten
- ✓2 cups panko breadcrumbs
- ✓4-6 cups vegetable oil, for deep frying
Instructions
- Step 1: Cook the Potatoes. Place the peeled and quartered potatoes in a large pot and cover with cold water. Add a pinch of salt. Bring to a boil, then reduce heat and simmer until the potatoes are fork-tender, about 15-20 minutes.
- Step 2: Mash the Potatoes. Drain the cooked potatoes thoroughly. Return them to the hot pot over low heat for a minute or two to dry out any excess moisture. Mash the potatoes until smooth using a potato masher or ricer. Stir in the butter, milk, 1/2 tsp salt, and 1/4 tsp black pepper until well combined and creamy. Set aside to cool slightly.
- Step 3: Cook the Filling. While the potatoes are cooling, heat 1 tbsp vegetable oil in a large skillet over medium-high heat. Add the finely diced onion and cook until softened and translucent, about 5-7 minutes. Add the ground meat and cook, breaking it up with a spoon, until browned and cooked through. Drain any excess fat. Season with a pinch of salt and pepper.
- Step 4: Combine Filling. Add the cooked meat and onion mixture to the mashed potatoes. Mix gently until just combined. Be careful not to overmix, or the potatoes can become gummy. Taste and adjust seasoning if needed.
- Step 5: Shape the Croquettes. Allow the potato mixture to cool completely (this is important for shaping!). Once cool, take about 1/4 cup of the mixture and shape it into an oval or cylindrical patty, about 3 inches long and 1 inch thick. Repeat with the remaining mixture. You should get 10-12 croquettes.
- Step 6: Set Up Breading Station. Prepare your breading station: place flour in the first shallow dish, beaten eggs in the second, and panko breadcrumbs in the third.
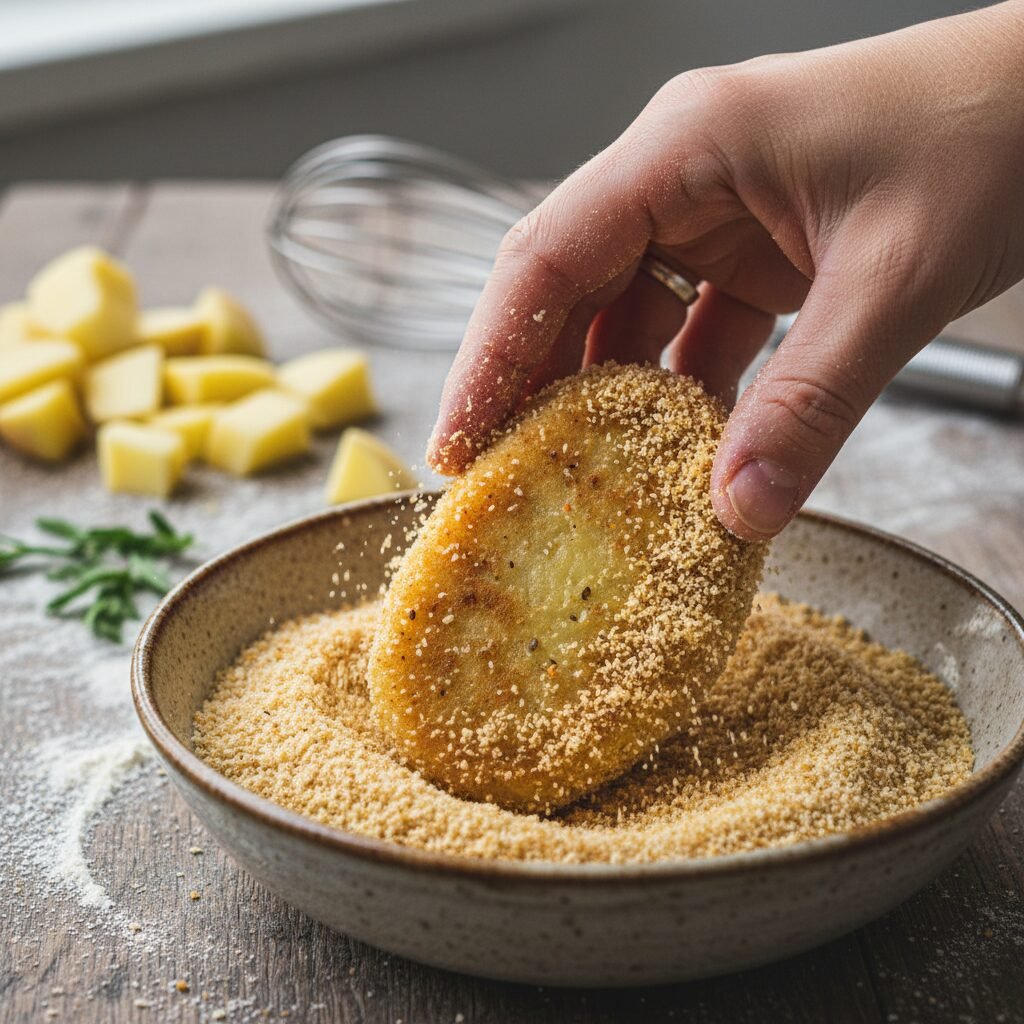
- Step 7: Bread the Croquettes. Dredge each croquette first in the flour, shaking off any excess. Then dip it into the beaten egg, ensuring it’s fully coated. Finally, roll it generously in the panko breadcrumbs, pressing gently to ensure the panko adheres well. Place the breaded croquettes on a plate or baking sheet.
- Step 8: Chill (Optional but Recommended). For best results and to prevent them from falling apart, chill the breaded croquettes in the refrigerator for at least 30 minutes (or up to a few hours).
- Step 9: Fry the Croquettes. Heat 4-6 cups of vegetable oil in a deep pot or Dutch oven over medium-high heat to 350°F (175°C). If you don’t have a thermometer, a small piece of panko should sizzle immediately and turn golden in about 30 seconds.
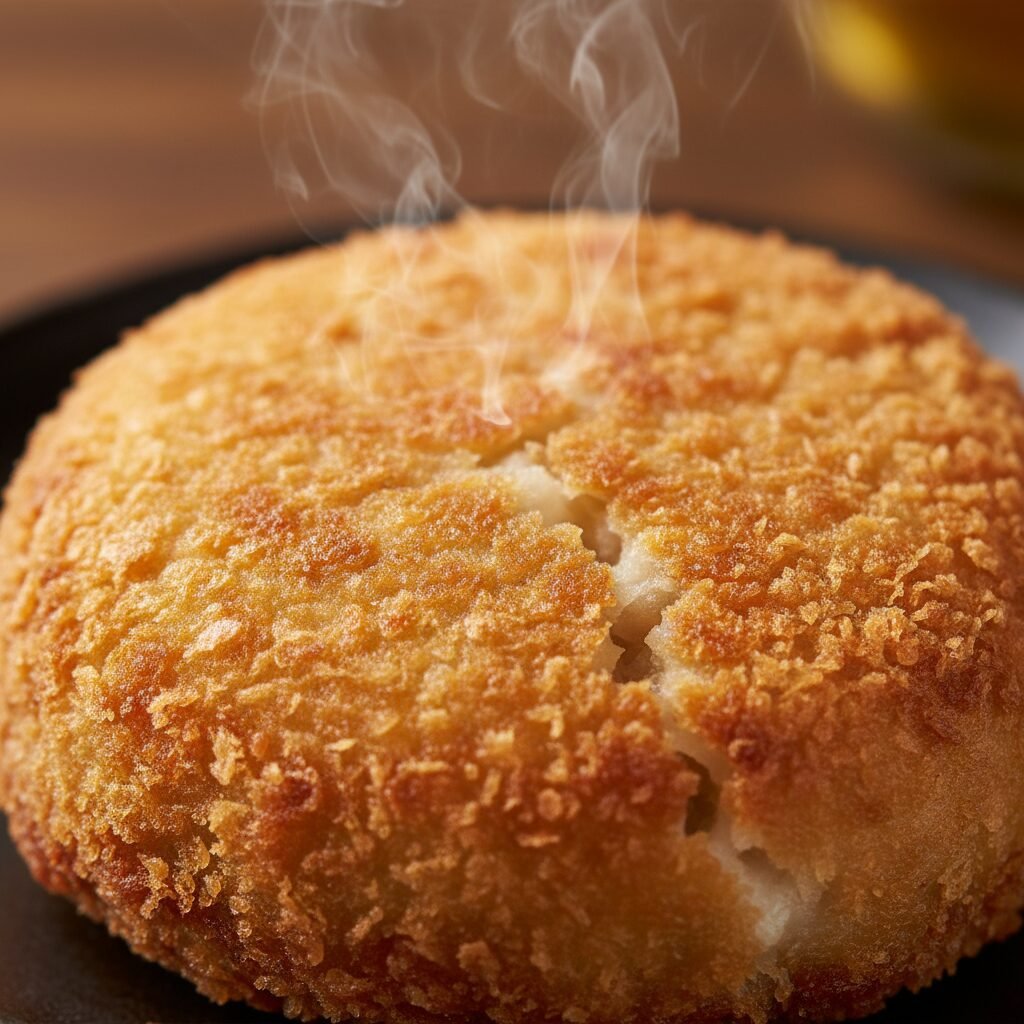
- Step 10: Cook until Golden. Carefully lower 2-3 croquettes into the hot oil (do not overcrowd the pot). Fry for 3-4 minutes, turning occasionally, until they are beautifully golden brown and crispy.
- Step 11: Drain and Serve. Remove the fried croquettes with a slotted spoon or spider strainer and place them on a wire rack set over a paper towel-lined baking sheet to drain any excess oil. Serve immediately with your favorite dipping sauce!
Expert Cooking Tips
- ✓Don’t Overmix Potatoes: When mashing, avoid overworking the potatoes, as this can release too much starch and make them gummy.
- ✓Dry Potatoes Thoroughly: After boiling, return potatoes to the hot pot for a minute or two to evaporate excess moisture. This prevents a watery filling.
- ✓Chill is Key: Chilling the potato mixture before shaping, and then chilling the breaded croquettes, helps them hold their shape better during frying and prevents them from breaking apart.
- ✓Maintain Oil Temperature: Keep your oil temperature consistent at 350°F (175°C). If it’s too low, the croquettes will absorb too much oil and be greasy. If it’s too high, they’ll brown too quickly before the inside is heated through.
- ✓Don’t Overcrowd the Pot: Fry in batches to maintain oil temperature and ensure even cooking and crispiness.
- ✓Use Panko: Regular breadcrumbs won’t give you the same light, airy crispness as panko. It’s a game-changer!
Substitutions and Variations
Feeling creative or need to adapt? Here are some easy substitutions for your Korokke! For the meat, you can easily swap ground beef or pork for ground chicken or turkey, or even finely chopped ham. If you’re looking for a vegetarian option, simply omit the meat and sauté some finely diced mushrooms, carrots, or corn along with the onion for extra flavor and texture. You can also add a pinch of nutmeg to the potato mixture for a hint of warmth, or a dash of soy sauce to the meat filling for an extra umami kick. For a dairy-free version, use a plant-based milk and butter substitute. The beauty of Korokke is its adaptability – feel free to make it your own!
Common Mistakes to Avoid
Even the most seasoned home cooks can make a few missteps with Korokke, but don’t worry, I’m here to help you avoid them! The most common mistake is not drying the potatoes enough after boiling, leading to a watery, mushy filling that struggles to hold its shape. Another big one is not chilling the potato mixture or the breaded croquettes – this is crucial for structural integrity during frying. If your oil isn’t hot enough, your croquettes will become greasy and soggy instead of crispy. Conversely, if the oil is too hot, the outside will burn before the inside is properly heated. Lastly, don’t overmix your mashed potatoes; this can activate too much starch and make them gluey. Follow these tips, and you’ll be a Korokke master in no time!
Serving Suggestions
Oh, the possibilities for serving these delightful Korokke are endless! Traditionally, they’re served with Tonkatsu sauce, a sweet and savory Japanese Worcestershire-style sauce, which is absolutely divine. You can also serve them with a simple squeeze of fresh lemon juice for brightness, or a dollop of Japanese mayonnaise (Kewpie mayo is my favorite!). For a complete meal, pair them with a fresh green salad, a bowl of steamed rice, or a comforting miso soup. They also make fantastic additions to bento boxes for school lunches or picnics. My kids love them with a side of ketchup, so don’t be afraid to keep it simple! However you serve them, prepare for smiles all around.
Storage and Reheating Tips
Good news, mamas! Korokke are fantastic for making ahead and storing. Once fried, let them cool completely on a wire rack. Store leftover fried croquettes in an airtight container in the refrigerator for up to 3-4 days. To reheat, I recommend popping them in an air fryer at 350°F (175°C) for 5-7 minutes, or in an oven at 375°F (190°C) for 10-15 minutes, until heated through and crispy again. This helps revive that lovely crunch! You can also freeze un-fried, breaded croquettes. Place them on a baking sheet in a single layer and freeze until solid, then transfer to a freezer-safe bag or container for up to 2-3 months. Fry directly from frozen, adding a few extra minutes to the cooking time.
Nutrition Facts (Estimated)
| Serving Size | 1 croquette |
| Calories | 250-300 kcal |
| Fat | 15g |
| Saturated Fat | 5g |
| Unsaturated Fat | 8g |
| Trans Fat | 0g |
| Cholesterol | 30mg |
| Sodium | 350mg |
| Carbohydrates | 25g |
| Fiber | 3g |
| Sugar | 3g |
| Protein | 8g |
Frequently Asked Questions
Can I bake Korokke instead of frying them?
While traditional Korokke are deep-fried for that signature crispiness, you can bake them as a healthier alternative. Preheat your oven to 400°F (200°C). Lightly spray the breaded croquettes with cooking oil and bake for 20-25 minutes, flipping halfway, until golden brown and heated through. They won’t be quite as crispy as fried, but still delicious!
What kind of potatoes are best for Korokke?
Russet potatoes are ideal for Korokke because they are starchy and produce a fluffy, dry mash, which is perfect for the creamy filling. Yukon Gold potatoes can also work, but avoid waxy varieties like red or new potatoes, as they can result in a gummy texture.
Can I make the potato mixture ahead of time?
Absolutely! You can prepare the potato and meat filling mixture a day in advance. Store it in an airtight container in the refrigerator. Just make sure it’s completely chilled before shaping the croquettes, as this makes them much easier to handle.
Why are my Korokke falling apart in the oil?
This is usually due to the potato mixture being too wet, not chilling the shaped croquettes sufficiently, or the oil temperature being too low. Ensure your potatoes are well-drained and dried, chill the croquettes for at least 30 minutes before frying, and maintain an oil temperature of 350°F (175°C).
What is panko breadcrumbs and why is it important?
Panko is a type of Japanese breadcrumb that is coarser, flakier, and lighter than regular breadcrumbs. It creates a much crispier and less greasy crust because it absorbs less oil during frying. It’s truly essential for authentic Korokke texture!
Can I add other vegetables to the filling?
Yes, absolutely! Finely diced carrots, corn, peas, or even spinach can be sautéed with the onion and meat to add extra flavor, nutrition, and color. Just make sure they are cooked until tender and any excess moisture is removed.
What’s the best way to reheat leftover Korokke?
For the best results, reheat leftover fried Korokke in an air fryer at 350°F (175°C) for 5-7 minutes, or in a conventional oven at 375°F (190°C) for 10-15 minutes. This will help them regain their crispiness. Microwaving is not recommended as it will make them soggy.
Is Korokke suitable for freezing?
Yes, Korokke freezes beautifully! You can freeze them un-fried after breading. Place them on a baking sheet in a single layer and freeze until solid, then transfer to a freezer-safe bag or container. Fry directly from frozen, adding a few extra minutes to the cooking time, or thaw in the fridge overnight before frying.
Conclusion
And there you have it, my sweet friends! A recipe for Crispy Japanese Potato Croquettes that I truly believe will become a cherished favorite in your home, just as it has in mine. There’s something so incredibly heartwarming about serving a dish that brings smiles to everyone’s faces, and Korokke does exactly that. From the satisfying crunch to the creamy, savory interior, every bite is a little piece of comfort and joy. Whether you’re making them for a special family dinner, a fun weekend lunch, or even prepping them for school lunchboxes, these Korokke are sure to be a hit. So go ahead, embrace the joy of cooking, and create some delicious memories with your loved ones. Happy cooking, mamas!