Authentic Navajo Tacos With Homemade Fry Bread
Authentic Navajo Tacos With Homemade Fry Bread
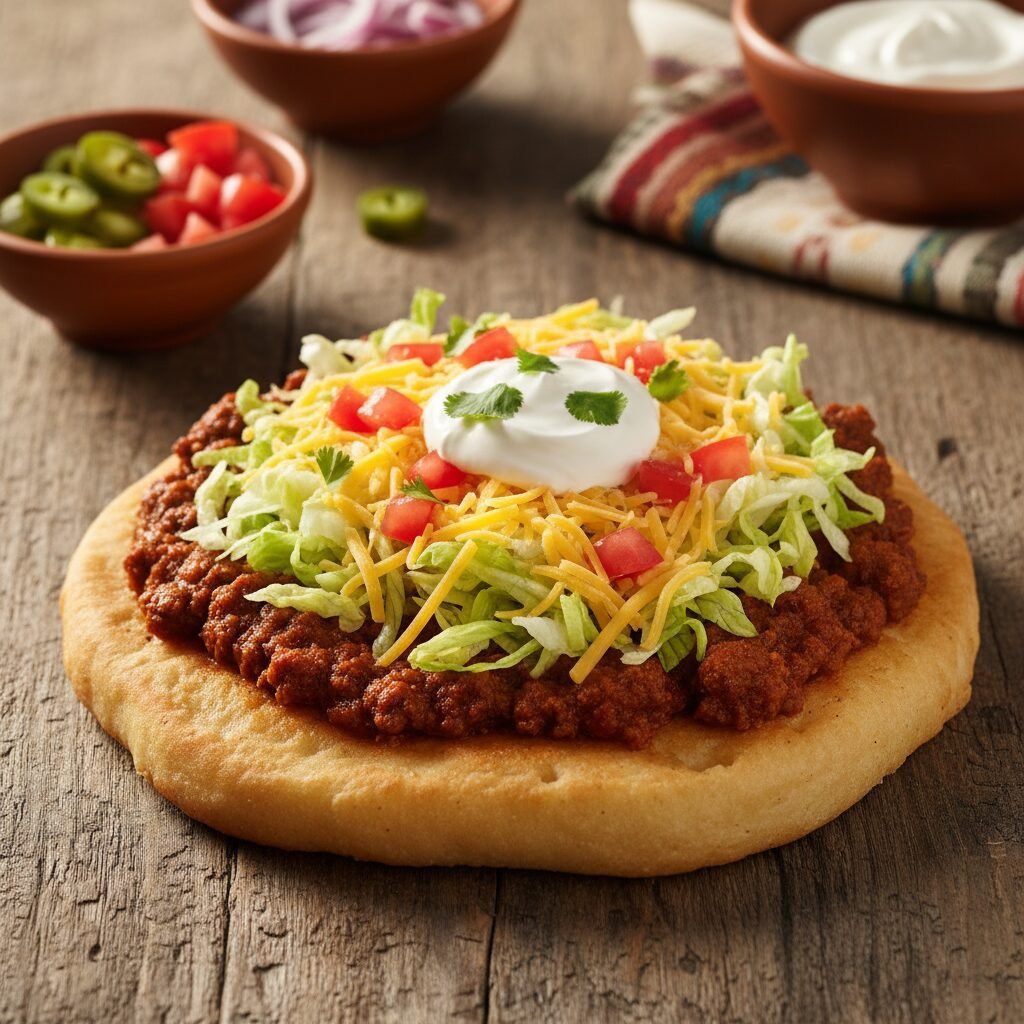
The Navajo taco is more than just a meal; it’s a celebrated dish deeply woven into the fabric of Native American, particularly Diné (Navajo), culture and history. It represents resilience, adaptation, and the vibrant culinary traditions of the American Southwest. At its heart is the iconic fry bread: a simple dough, fried to golden perfection, resulting in a bread that is simultaneously crisp and fluffy, light yet substantial. This delightful base is then generously topped with a savory, spiced chili and a colorful array of fresh toppings like crisp lettuce, juicy tomatoes, sharp cheese, and cool sour cream. This recipe provides a comprehensive guide to creating truly authentic Navajo tacos from scratch, starting with a traditional, no-fail fry bread that will become the star of the show. We will walk through the process of creating a rich, flavorful chili topping and offer tips and insights to ensure your final dish is a stunning tribute to this beloved Southwestern classic. Prepare to embark on a culinary journey that is not only delicious but also rich with cultural significance.
30 minutes
45 minutes
1 hour 15 minutes
6-8 tacos
Main Course
Frying, Simmering
Native American / Southwestern
Standard
Why You’ll Love This Recipe
- Features a traditional, easy-to-follow recipe for light and fluffy homemade fry bread.
- Includes a robust and savory ground beef and bean chili topping, perfectly spiced.
- Highly customizable with a wide variety of fresh toppings to suit any preference.
- A perfect centerpiece for family gatherings, potlucks, and festive occasions.
- Provides a genuine taste of Southwestern and Native American cuisine.
Equipment You’ll Need
- Large skillet or Dutch oven
- Large mixing bowl
- Rolling pin (optional)
- Deep, heavy-bottomed pot or deep fryer
- Kitchen thermometer
- Tongs or a slotted spoon
- Wire cooling rack
- Paper towels
- Measuring cups and spoons
- Chef’s knife
- Cutting board
Ingredients
- For the Homemade Fry Bread:
- 4 cups all-purpose flour, plus more for dusting
- 2 tablespoons baking powder
- 1 ½ teaspoons salt
- 2 cups warm milk or water (approx. 110°F/43°C)
- 4-6 cups vegetable, canola, or other neutral oil for frying
- For the Chili Topping:
- 1 tablespoon olive oil
- 1 ½ pounds ground beef (85/15 recommended)
- 1 large yellow onion, finely chopped
- 3 cloves garlic, minced
- 3 tablespoons chili powder
- 1 tablespoon ground cumin
- 1 teaspoon dried oregano
- 1 teaspoon salt, or to taste
- ½ teaspoon black pepper
- 1 (15-ounce) can diced tomatoes, undrained
- 1 (15-ounce) can pinto beans, rinsed and drained
- 1 (15-ounce) can kidney beans, rinsed and drained
- 1 cup beef broth or water
- For Serving (Suggested Toppings):
- 3 cups shredded iceberg or romaine lettuce
- 2 cups diced ripe tomatoes
- 2 cups shredded cheddar or Monterey Jack cheese
- 1 cup sour cream or Mexican crema
- ½ cup sliced black olives
- ½ cup chopped green onions or cilantro
- Your favorite salsa or picante sauce
Instructions
- Step 1: Prepare the Chili Topping
- Heat the olive oil in a large skillet or Dutch oven over medium-high heat. Add the ground beef and cook, breaking it apart with a spoon, until browned, about 5-7 minutes. Drain off any excess grease.
- Add the chopped onion to the skillet and cook until softened, about 5 minutes. Stir in the minced garlic and cook for another minute until fragrant.
- Stir in the chili powder, cumin, oregano, salt, and pepper. Cook for 1 minute, stirring constantly, to toast the spices and deepen their flavor.
- Add the diced tomatoes (with their juice), rinsed pinto and kidney beans, and beef broth. Stir everything together to combine.
- Bring the mixture to a simmer, then reduce the heat to low, cover, and let it simmer for at least 30 minutes, or up to an hour, for the flavors to meld. Stir occasionally. Keep warm while you prepare the fry bread.
- Step 2: Make the Fry Bread Dough
- In a large mixing bowl, whisk together the 4 cups of all-purpose flour, baking powder, and salt.
- Gradually pour in the warm milk or water while mixing with a fork or your hands. Mix until a shaggy, soft dough forms. The dough should be slightly sticky but manageable.
- Turn the dough out onto a lightly floured surface. Knead gently for 2-3 minutes until it becomes smooth and elastic. Do not overwork the dough.
- Place the dough back in the bowl, cover it with a clean kitchen towel or plastic wrap, and let it rest for at least 15-20 minutes. This allows the gluten to relax, making the bread more tender.
- Step 3: Shape and Fry the Bread
- While the dough rests, heat about 2-3 inches of oil in a deep, heavy-bottomed pot over medium-high heat until it reaches 350-375°F (175-190°C). Use a kitchen thermometer for accuracy.
- Divide the rested dough into 6 or 8 equal pieces. Roll each piece into a ball.
- On a lightly floured surface, use your hands or a rolling pin to flatten each ball into a 6- to 8-inch circle, about ¼-inch thick. The shape can be rustic and imperfect. For a traditional touch, you can poke a small hole in the center of the dough, which helps it cook evenly and prevents large air pockets.
- Carefully place one piece of dough into the hot oil. It should sizzle immediately. Fry for 1-2 minutes per side, until it puffs up and turns a deep golden brown. Use tongs to flip it carefully.
- Once cooked, use tongs or a slotted spoon to remove the fry bread from the oil, allowing excess oil to drip off. Place it on a wire rack lined with paper towels to drain.
- Repeat with the remaining dough, frying one or two pieces at a time to avoid overcrowding the pot and lowering the oil temperature.
- Step 4: Assemble the Navajo Tacos
- Place a piece of warm, fresh fry bread on a plate. Spoon a generous amount of the warm chili topping over the center of the bread.
- Layer with your favorite toppings: shredded lettuce, diced tomatoes, cheese, a dollop of sour cream, black olives, and green onions.
- Serve immediately and enjoy the delightful combination of textures and flavors.
Expert Cooking Tips
- For the Fluffiest Fry Bread: The key is a light touch. Do not over-knead the dough, as this develops too much gluten and can result in tough, chewy bread instead of a light, airy texture. The resting period is also crucial, so don’t skip it.
- Maintain Oil Temperature: The single most important factor for non-greasy fry bread is the oil temperature. Too low, and the bread will absorb oil and become heavy. Too high, and the outside will burn before the inside is cooked. Use a thermometer for best results.
- Flavorful Chili Base: For a deeper, more complex chili, take the time to properly brown the beef and toast the spices before adding the liquid ingredients. This small step makes a significant difference in the final taste.
- Dough Consistency: Your dough should be soft and slightly tacky. If it’s too dry, add a tablespoon of milk/water at a time. If it’s too sticky to handle, add a tablespoon of flour at a time. The humidity in your kitchen can affect flour, so adjust as needed.
Substitutions and Variations
Protein: Ground turkey, ground chicken, or shredded beef can be used in place of ground beef. For a vegetarian version, omit the meat and add 1-2 extra cans of beans (like black beans), lentils, or a plant-based ground meat substitute. Broth: Use vegetable broth for the vegetarian version. Dairy: For a dairy-free fry bread, use warm water or a plant-based milk and ensure your toppings are dairy-free.
Common Mistakes to Avoid
Overworking the Dough: This is the most common mistake and leads to tough, dense fry bread. Knead just until the dough comes together and is smooth. Greasy Bread: This is almost always due to the oil temperature being too low. Let the oil come back up to temperature between batches. Bland Chili: Don’t be shy with the seasonings. Taste the chili after it has simmered and adjust the salt, pepper, and chili powder to your liking. A squeeze of lime juice at the end can also brighten the flavors.
Serving Suggestions
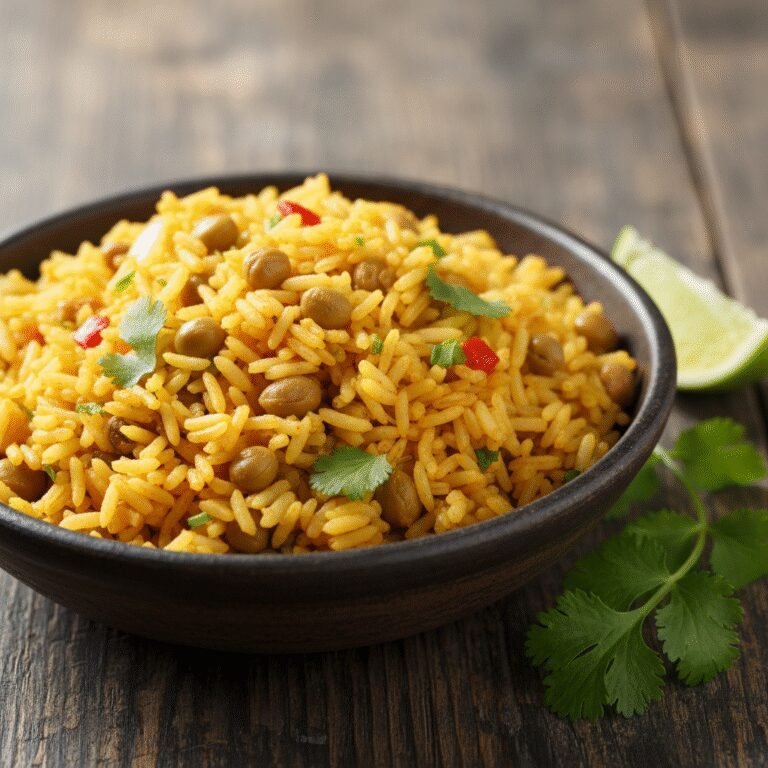
Create a ‘taco bar’ by setting out the warm chili and all the toppings in separate bowls. This allows guests to build their own Navajo tacos exactly as they like. This dish is very filling, so a simple side like a light green salad with a vinaigrette or a side of cilantro-lime rice is all you need to complete the meal.
Storage and Reheating Tips
Leftover chili and fry bread should be stored separately. The chili can be refrigerated in an airtight container for up to 4 days or frozen for up to 3 months. Fry bread is best enjoyed fresh on the day it’s made. If you have leftovers, store them in a paper bag or loosely covered container at room temperature for up to 2 days. Reheat in a 350°F (175°C) oven or a toaster oven for a few minutes to restore some of its crispiness.
Nutrition Facts (Estimated)
| Serving Size | 1 Navajo Taco |
| Calories | 780 kcal |
| Fat | 42g |
| Saturated Fat | 16g |
| Unsaturated Fat | 21g |
| Trans Fat | 1g |
| Cholesterol | 95mg |
| Sodium | 950mg |
| Carbohydrates | 68g |
| Fiber | 11g |
| Sugar | 8g |
| Protein | 32g |
Frequently Asked Questions
Can I make the fry bread dough ahead of time?
Yes, you can prepare the dough up to 24 hours in advance. After kneading, place it in a lightly oiled bowl, cover tightly with plastic wrap, and refrigerate. Let it sit at room temperature for about 30-60 minutes before shaping and frying.
What is the best type of oil for frying?
A neutral oil with a high smoke point is best. Vegetable oil, canola oil, peanut oil, or shortening are all excellent choices for frying.
Is a Navajo taco the same as a chalupa?
While they are similar in concept (a fried bread base with toppings), they are distinct. Traditional chalupas are typically made from masa (corn flour) and are often boat-shaped and crispier, whereas Navajo tacos use a leavened wheat flour dough that results in a softer, puffier bread.
Can this recipe be made gluten-free?
You can experiment with a high-quality, all-purpose gluten-free flour blend that contains xanthan gum. The texture of the fry bread will be different from the traditional version, likely denser, but it can still be delicious. Follow the package instructions for the flour blend.
Conclusion
Mastering the art of homemade Navajo tacos is a rewarding experience that brings a cherished piece of American culinary heritage into your home. The magic lies in the contrast of the warm, pillowy fry bread against the hearty, savory chili and the cool, crispness of the fresh toppings. Each bite is a symphony of flavor and texture. We hope this recipe not only guides you to a delicious meal but also inspires an appreciation for the history and culture behind this incredible dish. Enjoy the process, share it with loved ones, and create new memories around the table.