Authentic Chilaquiles Rojos: The Only Way To Eat Leftover Tortilla Chips
Authentic Chilaquiles Rojos: The Only Way To Eat Leftover Tortilla Chips
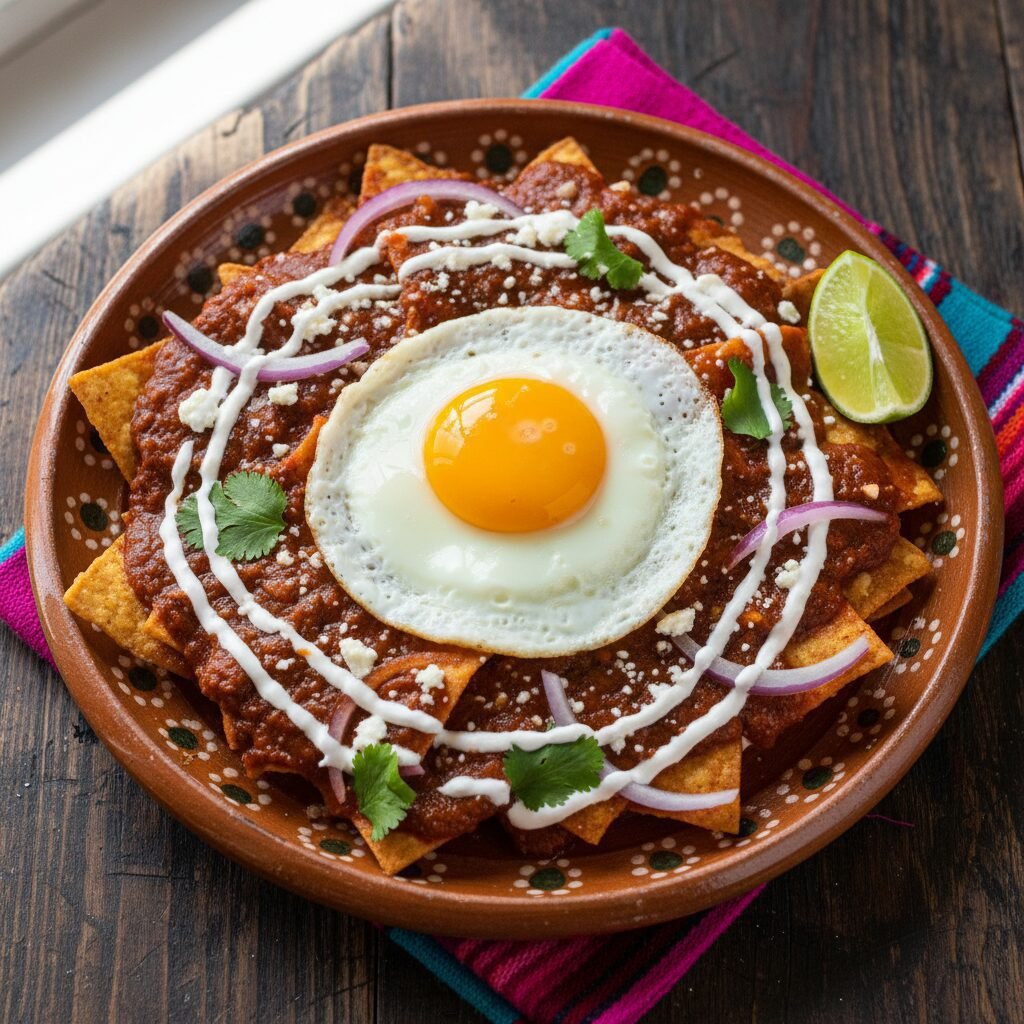
Welcome to the ultimate guide for one of Mexico’s most cherished breakfast and brunch dishes: Chilaquiles Rojos. Far more than just a clever way to use up stale tortillas or the last handful of chips from a party, authentic chilaquiles are a culinary masterpiece of texture, flavor, and tradition. This dish, whose name is derived from the Nahuatl language, meaning ‘chilis and greens,’ is a testament to the resourcefulness and brilliance of Mexican cuisine. It transforms simple, humble ingredients into a vibrant, satisfying meal that can power you through the day. Our recipe focuses on the ‘rojos’ (red) version, featuring a rich, smoky, and deeply flavorful red chile sauce that coats each chip to perfection. We’ll walk you through creating a salsa from scratch that strikes the perfect balance of heat and earthiness, ensuring your chilaquiles are anything but ordinary. Forget the notion of a soggy, sad plate of chips; when done right, chilaquiles offer a delightful interplay between the softened, sauce-laden chips and those that retain a slight, satisfying crunch. Topped with crumbled cheese, Mexican crema, and a perfectly fried egg, this is a dish that comforts the soul and excites the palate. Prepare to elevate your breakfast game and discover why this traditional dish has stood the test of time.
15 minutes
20 minutes
35 minutes
4 servings
Brunch
Simmering
Mexican
Vegetarian
Why You’ll Love This Recipe
- Authentic Mexican Flavor: Features a homemade salsa roja with dried chiles for a deep, complex taste.
- Perfect for Brunch: A hearty, satisfying, and impressive dish ideal for a weekend gathering.
- Reduces Food Waste: The perfect recipe to use leftover or slightly stale tortilla chips.
- Highly Customizable: Easily adjust spice levels and toppings to suit your personal preference.
- Quick and Easy: Ready in about 30 minutes, making it a feasible weekday breakfast or a quick weekend treat.
Equipment You’ll Need
- Large skillet or saucier (at least 12 inches)
- Blender (high-speed recommended)
- Medium saucepan
- Tongs
- Cutting board
- Chef’s knife
- Small non-stick skillet (for eggs)
Ingredients
- For the Salsa Roja:
- 3 dried guajillo chiles, stems and seeds removed
- 2 dried ancho chiles, stems and seeds removed
- 1 chile de árbol, stem removed (optional, for extra heat)
- 4 medium Roma tomatoes (about 1 lb), halved
- 1/2 white onion, roughly chopped
- 2 cloves garlic, peeled
- 2 cups low-sodium chicken or vegetable broth
- 1/2 teaspoon dried Mexican oregano
- 1/4 teaspoon ground cumin
- Salt and freshly ground black pepper to taste
- 1 tablespoon neutral oil (like canola or avocado)
- For the Chilaquiles:
- 8 ounces (about 8 cups) thick, sturdy tortilla chips (restaurant-style is best)
- 4 large eggs
- 1 tablespoon butter or oil for frying eggs
- For Topping:
- 1/2 cup crumbled cotija cheese or queso fresco
- 1/4 cup Mexican crema or sour cream
- 1/4 cup finely chopped fresh cilantro
- 1/4 red onion, thinly sliced
- 1 avocado, sliced or diced
- Lime wedges for serving
Instructions
- Step 1: Rehydrate the Chiles. Place the stemmed and seeded guajillo, ancho, and optional chile de árbol in a dry skillet over medium heat. Toast for 30-60 seconds per side until fragrant, being careful not to burn them. Transfer the toasted chiles to a medium bowl and cover with hot water. Let them soak for 20-30 minutes until softened.
- Step 2: Prepare the Salsa Base. While the chiles soak, place the halved Roma tomatoes, chopped white onion, and garlic cloves in a medium saucepan. Add the 2 cups of broth. Bring to a boil, then reduce the heat to a simmer. Cook for 10-15 minutes, or until the vegetables are very soft.
- Step 3: Blend the Salsa. Drain the rehydrated chiles and add them to a high-speed blender. Using a slotted spoon, transfer the cooked tomatoes, onion, and garlic to the blender as well. Add 1 cup of the cooking broth from the saucepan, the Mexican oregano, and the cumin. Blend on high until the salsa is completely smooth. If it’s too thick, add more of the reserved broth until it reaches a medium consistency, similar to a thin tomato sauce. Season generously with salt and pepper.
- Step 4: Cook the Salsa. Heat 1 tablespoon of neutral oil in a large skillet over medium-high heat. Once shimmering, carefully pour the blended salsa into the skillet (it may splatter). Reduce the heat to medium-low and let it simmer for 5-7 minutes, stirring occasionally. The salsa will darken in color and thicken slightly. This step is crucial for developing the flavor and cooking out any raw taste.
- Step 5: Assemble the Chilaquiles. Add the tortilla chips to the simmering salsa. Use tongs to gently toss and coat all the chips evenly. Cook for 1-3 minutes, depending on your preference for texture. For a crispier result, toss for just a minute. For softer chilaquiles, let them simmer a bit longer. Turn off the heat.
- Step 6: Cook the Eggs. While the chips are simmering, heat butter or oil in a separate non-stick skillet over medium heat. Fry the eggs to your liking (sunny-side up or over-easy is traditional).
- Step 7: Serve Immediately. Divide the chilaquiles among four plates. Top each serving with a fried egg. Garnish generously with crumbled cotija cheese, a drizzle of crema, sliced red onion, fresh cilantro, and avocado. Serve immediately with lime wedges on the side.
Expert Cooking Tips
- Use Sturdy Chips: The success of chilaquiles hinges on the chips. Use thick, high-quality, restaurant-style tortilla chips. Thin chips will disintegrate into mush almost instantly.
- Don’t Burn the Chiles: When toasting the dried chiles, work quickly. If they burn, they will impart a bitter, acrid taste to your entire sauce. Fragrance is the key indicator they are ready.
- Cook the Salsa: Do not skip the step of frying the blended salsa in oil. This process, known in Mexican cooking as ‘sazonar,’ deepens the flavors, melds them together, and transforms the sauce from good to great.
- Taste and Adjust: Before adding the chips, taste your finished salsa. Does it need more salt? A pinch of sugar to balance the acidity of the tomatoes? Adjusting the seasoning at this stage is critical.
- Serve Instantly: Chilaquiles are a dish that waits for no one. The texture is best the moment they come out of the pan. Have all your toppings prepped and ready to go so you can assemble and serve immediately.
Substitutions and Variations
For a quicker version, you can use 1 (15-ounce) can of fire-roasted tomatoes (drained) instead of fresh Roma tomatoes. If you can’t find cotija cheese, feta is a decent substitute, though saltier. For a vegan version, use vegetable broth, skip the egg and cheese, and top with a cashew-based crema, extra avocado, and black beans. You can also add shredded cooked chicken or beef to the simmering sauce for a heartier meal.
Common Mistakes to Avoid
The most common mistake is using thin, flimsy tortilla chips, which leads to a plate of soggy mush. Another error is not cooking the salsa after blending it; this leaves a raw, sometimes bitter, flavor from the chiles and garlic. Finally, avoid over-soaking the chips in the sauce. The goal is to coat them, not drown them. The ideal chilaquiles have a mix of textures—some soft parts saturated with sauce and some firmer parts that still have a bite.
Serving Suggestions
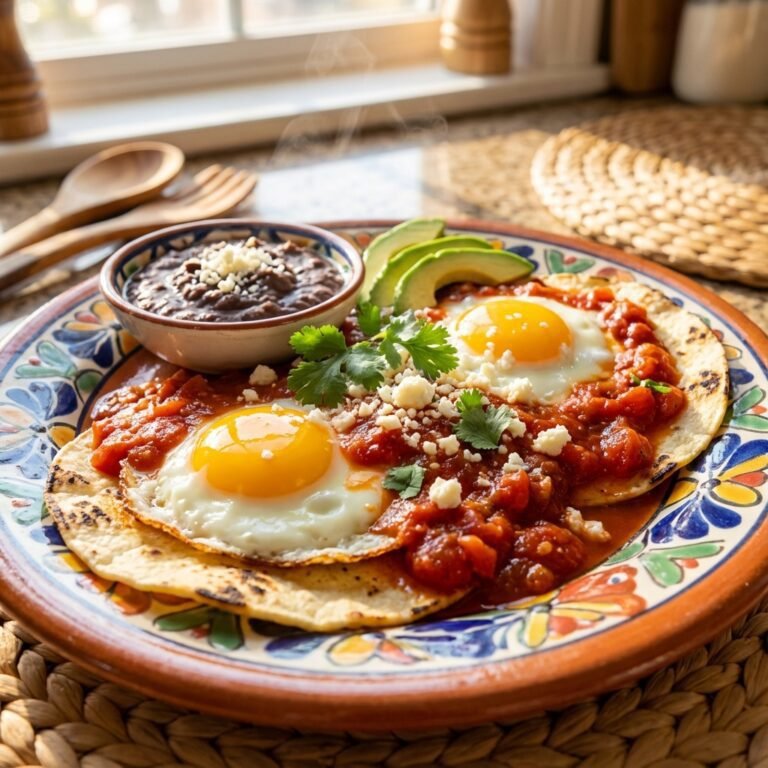
Chilaquiles are a complete meal on their own, but they are traditionally served with a side of refried beans (frijoles refritos). A simple side salad or some fresh fruit can provide a nice, light contrast. For beverages, a strong cup of coffee (café de olla, if you’re feeling ambitious) is perfect. For a weekend brunch, consider pairing them with a refreshing Agua Fresca or a spicy Michelada.
Storage and Reheating Tips
Chilaquiles are best eaten immediately. Storing assembled chilaquiles is not recommended as the chips will become completely soggy. However, you can make the salsa roja ahead of time. It can be stored in an airtight container in the refrigerator for up to 5 days or frozen for up to 3 months. When you’re ready to eat, simply reheat the sauce in a skillet and proceed with adding the chips and toppings for a near-instant meal.
Nutrition Facts (Estimated)
| Serving Size | 1/4 of the recipe |
| Calories | 480 kcal |
| Fat | 28g |
| Saturated Fat | 9g |
| Unsaturated Fat | 17g |
| Trans Fat | 0g |
| Cholesterol | 195mg |
| Sodium | 750mg |
| Carbohydrates | 45g |
| Fiber | 9g |
| Sugar | 6g |
| Protein | 16g |
Frequently Asked Questions
Are chilaquiles supposed to be soggy or crispy?
This is a topic of great debate! The texture is a matter of personal and regional preference. Some prefer their chilaquiles ‘al dente,’ where the chips are added at the last second and retain a significant crunch. Others prefer them softer, allowing the chips to fully absorb the sauce. Our recipe aims for a happy medium, but you can easily adjust the simmering time to achieve your desired texture.
What’s the difference between chilaquiles rojos and chilaquiles verdes?
The primary difference is the salsa. Chilaquiles rojos are made with a red salsa based on red tomatoes and dried red chiles (like guajillo and ancho), resulting in a smoky, earthy flavor. Chilaquiles verdes are made with a green salsa based on tomatillos, green chiles (like jalapeños and serranos), and cilantro, which gives them a brighter, tangier, and often spicier flavor.
Can I use store-bought enchilada sauce?
In a pinch, you can use a high-quality store-bought red enchilada sauce. However, the flavor will not be as deep or complex as a homemade salsa made from scratch with dried chiles. If you do use store-bought sauce, we recommend simmering it for a few minutes to deepen its flavor before adding the chips.
Conclusion
You have now mastered the art of authentic Chilaquiles Rojos. This dish is a beautiful expression of Mexican culinary tradition—simple, resourceful, and bursting with complex flavor. It’s proof that a few leftover ingredients, combined with the magic of chiles, can create a truly memorable meal. Whether you’re enjoying a slow weekend brunch or looking for a comforting and hearty breakfast, this recipe provides a delicious and satisfying experience every time. We encourage you to play with the toppings, adjust the spice to your liking, and make this recipe your own. Enjoy!