Grandma’s Secret Potato Pierogi Recipe That Melts In Your Mouth
Grandma’S Secret Potato Pierogi Recipe That Melts In Your Mouth
There are certain recipes that are more than just food; they are vessels of memory, love, and tradition passed down through generations. For me, that recipe is my grandmother’s potato pierogi. I can still picture her standing in the kitchen, her hands dusted with flour, meticulously pinching the edges of each perfect half-moon dumpling. The aroma of boiling potatoes and sizzling onions was the scent of home, a promise of the incredible comfort food to come. This isn’t just a recipe from a cookbook; it’s a piece of our family’s history, a culinary heirloom that has graced countless holiday tables and cozy Sunday dinners. For years, the exact measurements were a well-guarded secret, a little bit of this and a handful of that, guided by intuition and decades of practice. After much coaxing and careful observation, I finally managed to document this treasured process. The secret, I learned, isn’t just in one ingredient, but in the technique and the love poured into every step. The dough is uniquely tender and pliable, thanks to a dollop of rich sour cream, and the filling is a perfectly balanced, creamy blend of fluffy potatoes and sharp, savory cheese. Making pierogi from scratch is a labor of love, there’s no doubt about it. It’s a wonderful project for a lazy weekend afternoon, and even more fun when you can get the whole family involved. The process of rolling, cutting, filling, and pinching becomes a rhythm, a meditation that connects you to the past. And the reward? A platter of the most divine, melt-in-your-mouth dumplings you have ever tasted. Whether you boil them for a soft, delicate texture or pan-fry them in butter until golden and crisp, they are pure, unadulterated comfort. This recipe will yield a generous batch, perfect for sharing and even better for freezing, ensuring you have a taste of homemade love ready at a moment’s notice. Prepare to create your own delicious memories.
1 hour 30 minutes
15 minutes
1 hour 45 minutes
Approximately 4-5 dozen (48-60) pierogi
Main Course
Boiling and Pan-Frying
Polish
Vegetarian
Why You’ll Love This Recipe
- Authentic, time-tested family recipe passed down through generations.
- Features a uniquely tender and easy-to-work-with dough made with a secret ingredient: sour cream.
- Perfectly creamy and flavorful potato and sharp cheddar filling.
- Makes a large batch, ideal for freezing for quick and comforting future meals.
- Detailed, step-by-step instructions suitable for both beginners and experienced cooks.
- Versatile cooking options: enjoy them soft and boiled or crispy and pan-fried.
Equipment You’ll Need
- Large pot for boiling potatoes
- Potato masher or ricer
- Large skillet
- Large mixing bowl
- Rolling pin
- 3-inch round biscuit cutter or a drinking glass
- Parchment-lined baking sheets
- Large stockpot for boiling pierogi
- Slotted spoon
Ingredients
- For the Pierogi Dough:
- 3 cups all-purpose flour, plus more for dusting
- 1 teaspoon salt
- 1 large egg, lightly beaten
- 1/2 cup full-fat sour cream
- 1/2 cup lukewarm water
- For the Potato and Cheese Filling:
- 2 lbs Russet potatoes (about 4-5 medium), peeled and quartered
- 8 oz sharp cheddar cheese, finely shredded
- 1 large yellow onion, finely chopped
- 4 tablespoons unsalted butter, divided
- 1 teaspoon salt, or to taste
- 1/2 teaspoon black pepper, or to taste
- For Serving:
- 1/2 cup unsalted butter
- 2 large yellow onions, thinly sliced
- Sour cream
- Freshly chopped chives or parsley
Instructions
- Step 1: Prepare the Potato Filling. Place the peeled and quartered potatoes in a large pot and cover with cold, salted water. Bring to a boil and cook for 15-20 minutes, or until the potatoes are very tender when pierced with a fork. Drain the potatoes thoroughly and return them to the hot, empty pot for a minute to evaporate any excess moisture.
- Step 2: Sauté the Onions for the Filling. While the potatoes are boiling, melt 2 tablespoons of butter in a large skillet over medium heat. Add the finely chopped onion and cook, stirring occasionally, until soft, translucent, and lightly golden, about 8-10 minutes. Do not rush this step, as it builds a deep flavor base.
- Step 3: Combine the Filling Ingredients. Mash the hot potatoes until smooth using a potato masher or, for an exceptionally smooth texture, pass them through a ricer into a large bowl. Add the sautéed onions, the remaining 2 tablespoons of butter, the shredded cheddar cheese, 1 teaspoon of salt, and 1/2 teaspoon of pepper. Stir until the cheese and butter are completely melted and everything is well combined. Taste and adjust seasoning if necessary. Set the filling aside to cool completely. This is a crucial step; a warm filling will make the dough difficult to handle.
- Step 4: Make the Pierogi Dough. In a large mixing bowl, whisk together the 3 cups of flour and 1 teaspoon of salt. Make a well in the center. Add the beaten egg, sour cream, and lukewarm water to the well. Using a fork, gradually incorporate the flour from the sides into the wet ingredients until a shaggy dough forms.
- Step 5: Knead the Dough. Turn the dough out onto a lightly floured surface. Knead for 8-10 minutes until the dough is smooth, elastic, and no longer sticky. It should be soft and pliable. Form the dough into a ball, place it back in the bowl, cover it with a clean kitchen towel or plastic wrap, and let it rest for at least 30 minutes. This allows the gluten to relax, making the dough much easier to roll out.
- Step 6: Roll and Cut the Dough. Divide the rested dough in half, keeping the other half covered so it doesn’t dry out. On a lightly floured surface, roll out one half of the dough until it is about 1/8-inch thick. Using a 3-inch round cutter or the rim of a drinking glass, cut out as many circles as you can. Gather the scraps, gently knead them into a ball, cover, and let them rest before re-rolling.
- Step 7: Fill and Seal the Pierogi. Place about 1 tablespoon of the cooled potato filling in the center of each dough circle. Be careful not to overfill. Gently fold the dough circle in half to create a half-moon shape. Pinch the edges together firmly to seal, ensuring there are no air pockets. You can go over the seal a second time to be certain. A strong seal is essential to prevent the filling from leaking out during boiling. Place the finished pierogi on a parchment-lined baking sheet in a single layer, making sure they don’t touch.
- Step 8: Repeat. Continue the process with the remaining dough and filling. You should have between 4 and 5 dozen pierogi.
- Step 9: Boil the Pierogi. Bring a large stockpot of salted water to a rolling boil. Gently drop the pierogi into the water, working in batches of about 10-12 at a time to avoid overcrowding the pot. Stir gently once to prevent them from sticking to the bottom. Once the pierogi float to the surface, continue to cook them for another 2-3 minutes. Remove them with a slotted spoon and place them on a plate or tray.
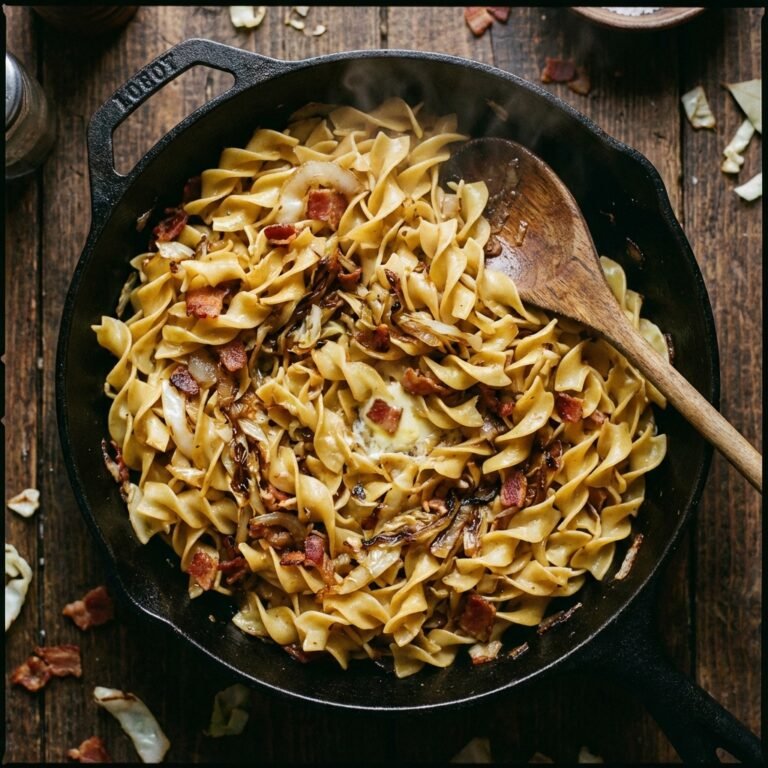
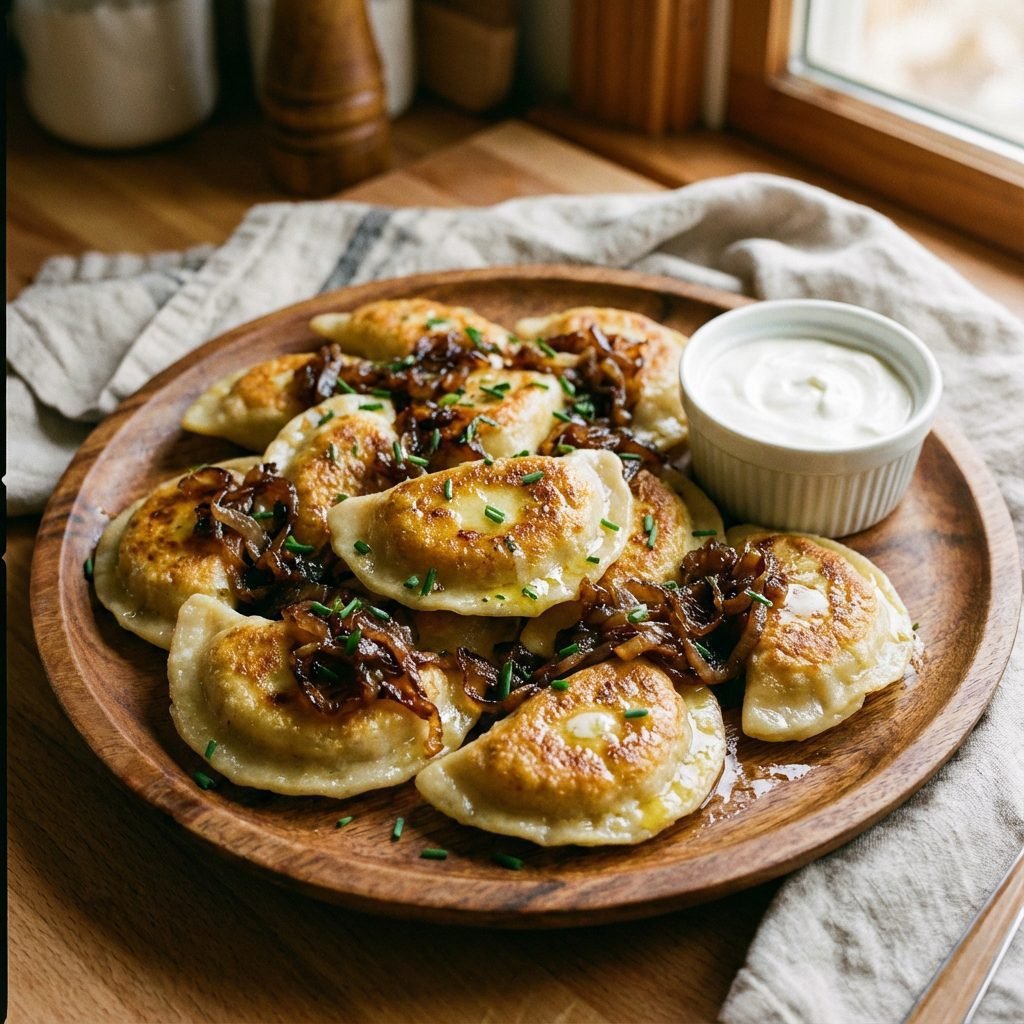
- Step 10: Pan-Fry for Serving (Optional but Recommended). For a classic presentation, melt butter in a large skillet over medium heat. Add sliced onions and cook until they are soft and caramelized. Add the boiled pierogi to the skillet and pan-fry for 2-3 minutes per side, until they are golden brown and slightly crispy. Serve immediately, topped with the caramelized onions, a dollop of sour cream, and a sprinkle of fresh chives.
Expert Cooking Tips
- Cool the Filling Completely: This is the most important tip. Warm or hot filling will make the dough greasy and difficult to seal, causing the pierogi to burst open when boiled.
- Don’t Overwork the Dough: Knead the dough just until it becomes smooth and elastic. Overworking it can develop too much gluten, resulting in tough pierogi.
- Roll the Dough Thinly: A thin dough creates a delicate pierogi where the filling is the star. Aim for about 1/8-inch thickness for the perfect dough-to-filling ratio.
- Ensure a Tight Seal: Press the edges together firmly, pushing out any air bubbles. Any gaps will allow water to get in and the filling to get out. If you’re having trouble, you can lightly moisten the edge with a dab of water.
- Don’t Crowd the Pot: Boil the pierogi in batches. Overcrowding the pot will lower the water temperature and cause the pierogi to stick together and cook unevenly.
- Use a Potato Ricer: For the smoothest, fluffiest filling without any lumps, use a potato ricer instead of a masher. This prevents the potatoes from becoming gluey.
Substitutions and Variations
For the filling, you can substitute farmer’s cheese or ricotta for a portion of the cheddar for a tangier, more traditional flavor. For a non-vegetarian option, add crispy, crumbled bacon or finely diced kielbasa to the potato mixture. In the dough, full-fat Greek yogurt can be used as a substitute for sour cream in a pinch. For a gluten-free version, use a high-quality measure-for-measure gluten-free flour blend, though the dough’s texture may vary.
Common Mistakes to Avoid
The most common mistake is using a warm filling, which makes the dough impossible to seal. Another frequent error is not sealing the pierogi properly, leading to them bursting during boiling. Make sure to pinch the edges very firmly. Overfilling the pierogi can also cause them to break open, so use just a tablespoon of filling per circle. Finally, avoid overworking the dough, as this will result in a tough, chewy texture rather than a tender, soft dumpling.
Serving Suggestions
The classic way to serve potato pierogi is topped with golden caramelized onions and melted butter, with a generous side of sour cream. They are a fantastic main course when served alongside smoked Polish kielbasa and a crisp cucumber salad or sauerkraut. They also work beautifully as a side dish for roasted meats or as part of a larger holiday spread. For a simple and satisfying meal, just serve a large platter of them family-style in the center of the table.
Storage and Reheating Tips
Pierogi are perfect for making ahead and freezing. To freeze, arrange the uncooked, assembled pierogi on a parchment-lined baking sheet in a single layer, ensuring they do not touch. Place the baking sheet in the freezer for 1-2 hours, or until the pierogi are frozen solid. Once frozen, transfer them to a freezer-safe zip-top bag or container. They will keep for up to 3 months. Cook them directly from frozen by adding them to boiling water; they will just need an additional 3-4 minutes of cooking time.
Nutrition Facts (Estimated)
| Serving Size | 6 pierogi |
| Calories | 410 kcal |
| Fat | 18 g |
| Saturated Fat | 10 g |
| Unsaturated Fat | 8 g |
| Trans Fat | 0 g |
| Cholesterol | 75 mg |
| Sodium | 480 mg |
| Carbohydrates | 50 g |
| Fiber | 4 g |
| Sugar | 3 g |
| Protein | 12 g |
Frequently Asked Questions
Can I make the dough ahead of time?
Yes, you can prepare the dough, wrap it tightly in plastic wrap, and refrigerate it for up to 2 days. Let it sit at room temperature for about 20-30 minutes before rolling to make it more pliable.
Why is my dough so sticky and hard to work with?
Sticky dough usually means the flour-to-liquid ratio is slightly off. Try adding a little more flour, one tablespoon at a time, while kneading until it’s smooth and no longer tacky. Also, make sure you let the dough rest for the full 30 minutes, as this step is crucial for making it easy to handle.
Can I use leftover mashed potatoes for the filling?
While you can, it’s generally better to make the potatoes fresh. Leftover mashed potatoes often contain milk or cream, which can make the filling too loose or moist, potentially causing the pierogi to leak. If you do use them, ensure they are very thick and well-seasoned.
My pierogi fell apart while boiling. What did I do wrong?
This is almost always due to a poor seal. Ensure you are pinching the edges very firmly to create a watertight seal. Also, avoid overfilling them, as this puts stress on the seam. Finally, make sure the water is at a gentle, rolling boil, not a violent one, which can tear the pierogi apart.
Conclusion
Bringing this recipe for Grandma’s secret potato pierogi to your table is about so much more than just making dinner. It’s an act of creation, a connection to a rich culinary heritage, and a way to show love through food. Each perfectly pinched dumpling is a testament to the time and care you’ve invested. The first bite—the tender dough giving way to that rich, creamy, and savory filling—is a reward unlike any other. We hope this recipe becomes a new tradition in your own family, a reason to gather in the kitchen and create lasting memories. Enjoy every delicious, comforting bite.