Authentic Chile Rellenos Stuffed With Ooey Gooey Cheese
Authentic Chile Rellenos Stuffed With Ooey Gooey Cheese
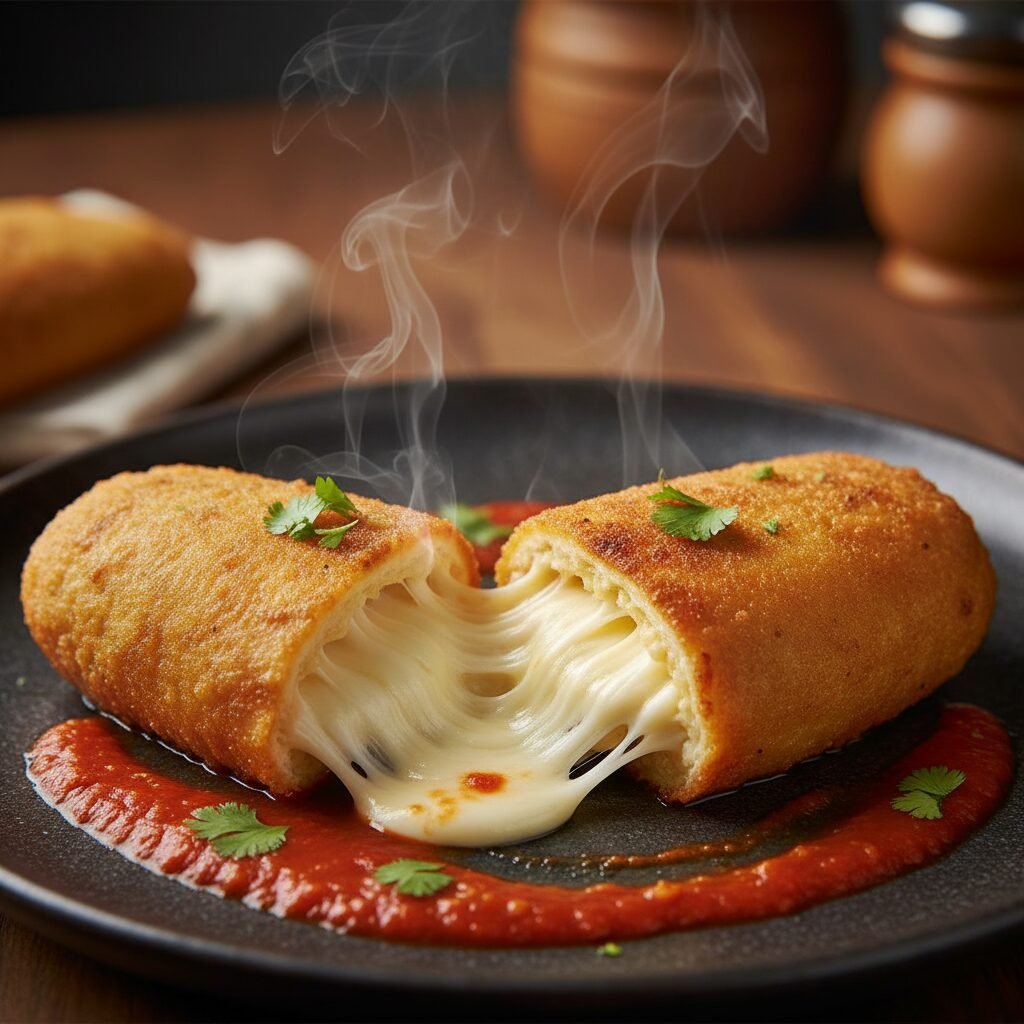
Welcome to the ultimate guide to creating one of Mexico’s most beloved culinary treasures: Chile Rellenos. This dish, whose name translates to ‘stuffed chiles,’ is a masterpiece of texture and flavor. It begins with a large, mild poblano pepper, fire-roasted to impart a smoky depth and tenderize the flesh. This perfect vessel is then filled to the brim with a generous amount of melting cheese—traditionally Oaxaca or Asadero—that becomes a molten river of goodness upon cooking. The crowning glory is the batter: a light, airy, and miraculously crispy egg soufflé-like coating that encases the chile in a golden-brown hug. When you cut into a perfectly executed chile relleno, you’re greeted with a satisfying crunch, followed by the soft, smoky chile, and finally, the decadent pull of warm, gooey cheese. It’s a dish that comforts the soul and excites the palate. While many variations exist, this recipe focuses on the classic, authentic preparation you’d find in a traditional Mexican kitchen. We will walk you through every step, from charring the peppers to whipping the perfect batter, ensuring you can replicate this iconic dish at home with confidence and achieve truly spectacular results.
45 minutes
20 minutes
1 hour 5 minutes
6 servings
Main Course
Frying
Mexican
Vegetarian
Why You’ll Love This Recipe
- Features a traditional, light-as-air egg batter (capeado) for a crispy, puffy coating.
- Provides a detailed, step-by-step guide for fire-roasting and peeling poblano peppers perfectly.
- Focuses on a classic cheese filling using authentic Mexican cheeses for the ultimate ‘cheese pull’.
- Includes professional tips for preventing the batter from sliding off and the cheese from leaking out.
- Vegetarian-friendly main course that is both hearty and incredibly flavorful.
Equipment You’ll Need
- Baking sheet
- Gas stovetop or broiler
- Large bowl and plastic wrap (for steaming chiles)
- Stand mixer with whisk attachment or hand mixer
- Two shallow dishes (for flour and batter)
- Large, deep skillet or Dutch oven
- Kitchen tongs
- Wire rack or plate lined with paper towels
Ingredients
- 6 large, fresh poblano peppers
- 1 lb (about 450g) melting cheese, such as Oaxaca, Asadero, or Monterey Jack, cut into thick sticks
- 1/2 cup all-purpose flour, for dredging
- 4 large eggs, separated
- 1/4 teaspoon cream of tartar (optional, for stabilizing egg whites)
- 1/2 teaspoon salt, plus more for seasoning
- 1/4 teaspoon black pepper
- 2-3 cups neutral oil with a high smoke point, for frying (such as canola, vegetable, or grapeseed oil)
Instructions
- Step 1: Roast the Poblano Peppers. Place the poblano peppers directly over the open flame of a gas stove, turning them frequently with tongs until the skin is blackened and blistered on all sides. Alternatively, place them on a baking sheet and broil on high in the oven, turning every 2-3 minutes, until all sides are charred. This process develops a crucial smoky flavor.
- Step 2: Steam the Peppers. Immediately transfer the hot, charred peppers to a large bowl and cover tightly with plastic wrap, or place them in a plastic bag and seal it. Let them steam for 10-15 minutes. This step is critical as it loosens the tough outer skin, making it easy to peel.
- Step 3: Peel and Prep the Peppers. Once cool enough to handle, gently peel away the blackened skin with your fingers or the back of a knife. The skin should slip off easily. Do not rinse the peppers under water, as this will wash away the smoky flavor. Carefully cut a vertical slit down the side of each pepper, about 2-3 inches long, being careful not to cut all the way through to the other side. Reach inside and gently remove the seed pod and any loose seeds.
- Step 4: Stuff the Peppers. Gently open the slit in each pepper and stuff it with the cheese sticks. Be generous, but do not overstuff to the point where the pepper might tear. If needed, you can use a toothpick to secure the slit closed.
- Step 5: Prepare for Frying. Set up your dredging station. Place the 1/2 cup of flour in a shallow dish and season it with a pinch of salt and pepper. Heat the oil in your large skillet over medium-high heat. You’ll need about 1-1.5 inches of oil. The oil is ready when it reaches 350-375°F (175-190°C), or when a small drop of batter sizzles and turns golden immediately.
- Step 6: Make the Egg Batter (Capeado). While the oil heats, prepare the batter. In a clean, dry bowl of a stand mixer (or using a hand mixer), beat the egg whites and cream of tartar on high speed until stiff, glossy peaks form. You should be able to turn the bowl upside down without the whites sliding out. In a separate small bowl, whisk the egg yolks with the 1/2 teaspoon of salt. Gently fold the whisked yolks into the stiff egg whites with a spatula until just combined. Be careful not to deflate the whites.
- Step 7: Dredge and Batter the Chiles. Working one at a time, take a stuffed chile and gently roll it in the seasoned flour, tapping off any excess. The flour helps the batter adhere. Next, dip the floured chile into the egg batter, using a spoon or spatula to coat it completely.
- Step 8: Fry the Chile Rellenos. Immediately and carefully place the battered chile into the hot oil. It should sizzle vigorously. Fry for 2-3 minutes per side, spooning hot oil over the top as it cooks, until it’s a deep golden brown and crispy all over. Work in batches of 2-3 at a time to avoid overcrowding the pan and lowering the oil temperature.
- Step 9: Drain and Serve. Using tongs, carefully remove the finished chile relleno from the oil and let any excess oil drip off. Place it on a wire rack or a paper towel-lined plate to drain. Repeat with the remaining chiles. Serve immediately while hot, often with a simple tomato sauce spooned over the top.
Expert Cooking Tips
- Choosing Peppers: Look for poblano peppers that are firm, glossy, and relatively straight, which makes them easier to stuff.
- Perfect Egg Whites: Ensure your mixing bowl and whisk are completely clean and free of any fat or grease, as this can prevent the egg whites from whipping to stiff peaks.
- Oil Temperature is Key: Use a thermometer to maintain the oil temperature between 350-375°F (175-190°C). If the oil is too cool, the batter will be greasy; if it’s too hot, it will burn before the cheese melts.
- Securing the Chiles: If your chiles are threatening to open up, use one or two toothpicks to pin the slit closed before dredging and frying. Just remember to remove them before serving!
- Work Quickly: Once the batter is made, it will start to deflate. Have your chiles stuffed and your oil hot so you can move from battering to frying without delay.
Substitutions and Variations
Cheese: While Oaxaca cheese is traditional for its superior melting and stringy quality, you can substitute with Monterey Jack, low-moisture mozzarella, or a blend of cheeses. Peppers: If you cannot find poblano peppers, Anaheim peppers are a suitable, though slightly milder, alternative. Flour: For a gluten-free version, you can try dredging the chiles in a gluten-free all-purpose flour blend before dipping them in the egg batter.
Common Mistakes to Avoid
Batter Sliding Off: This usually happens if the chile is wet or not properly dredged in flour. Make sure the peeled chiles are patted dry and have a light, even coating of flour to give the batter something to grip onto. Cheese Leaking Out: This is caused by overstuffing the chile or having a tear in the pepper’s skin. Don’t overfill, and use a toothpick to secure the slit if necessary. Frying the chiles slit-side-up first can also help seal it. Soggy/Greasy Batter: This is almost always due to the oil temperature being too low. Ensure your oil is hot enough before adding the chiles and don’t overcrowd the pan, which causes the temperature to drop.
Serving Suggestions
Chile Rellenos are traditionally served smothered in a simple, brothy tomato sauce (salsa de jitomate). Serve alongside classic Mexican rice and refried beans. A sprinkle of fresh cilantro, crumbled cotija cheese, or a dollop of Mexican crema on top adds a perfect finishing touch. For a lighter meal, a simple side salad with a lime vinaigrette works wonderfully.
Storage and Reheating Tips
Chile Rellenos are best enjoyed immediately after frying to experience the crispy batter. If you have leftovers, store them in an airtight container in the refrigerator for up to 2 days. To reheat, place them on a baking sheet in an oven or air fryer at 350°F (175°C) for 10-15 minutes, or until heated through and the coating has re-crisped. Avoid reheating in the microwave, as it will make the batter soggy.
Nutrition Facts (Estimated)
| Serving Size | 1 Chile Relleno |
| Calories | 485 kcal |
| Fat | 35 g |
| Saturated Fat | 16 g |
| Unsaturated Fat | 19 g |
| Trans Fat | 0 g |
| Cholesterol | 280 mg |
| Sodium | 650 mg |
| Carbohydrates | 21 g |
| Fiber | 4 g |
| Sugar | 7 g |
| Protein | 22 g |
Frequently Asked Questions
Can I make Chile Rellenos ahead of time?
You can do the prep work ahead of time. The peppers can be roasted, peeled, and stuffed a day in advance and stored in the refrigerator. However, the battering and frying should be done just before serving for the best texture.
Can I bake these instead of frying them?
While traditional Chile Rellenos are fried for that signature puffy, crispy ‘capeado’ batter, you can make a baked version. However, you would need to use a different coating, such as breadcrumbs, as the egg batter is not suitable for baking. The result will be different but still delicious.
My poblano peppers are spicy. How can I reduce the heat?
The heat of a chile is concentrated in the seeds and the white veins (or pith) inside. To reduce the spiciness, be very thorough when removing the seeds and scrape out as much of the interior white membrane as you can.
Conclusion
Mastering the art of authentic Chile Rellenos is a rewarding culinary journey that brings the heart of Mexican cuisine into your kitchen. The combination of smoky, tender pepper, a molten cheese core, and the impossibly light, crispy coating is a testament to why this dish has been cherished for generations. While it requires several steps, each one is simple and contributes to the final, spectacular result. We hope this comprehensive guide empowers you to create this iconic dish with confidence, bringing a truly special and delicious meal to your table that will impress family and friends alike. Enjoy every cheesy, crispy bite!