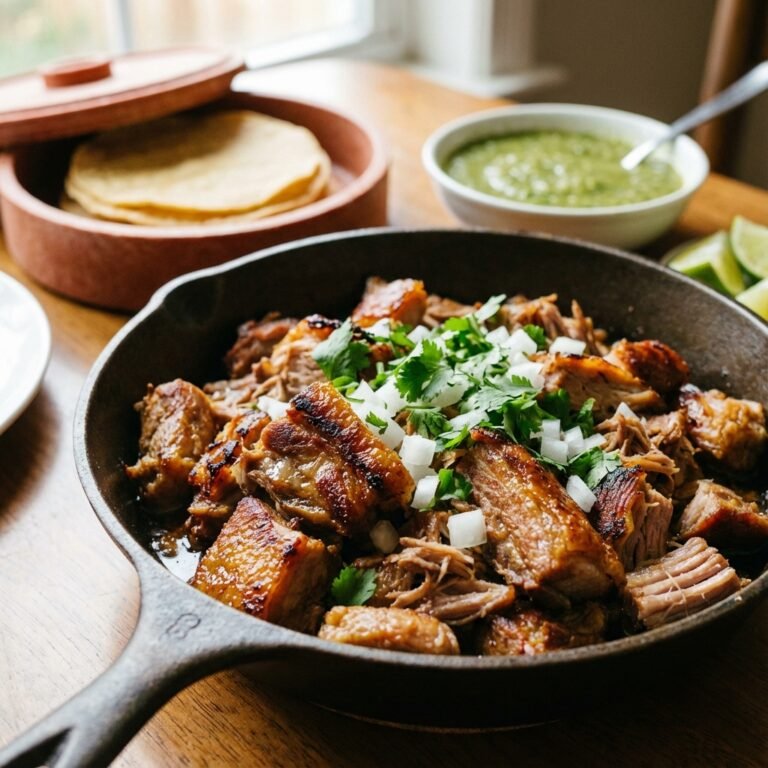
Move Over Beef: These Crispy Chickpea Tacos Are a Dollar Saver
Move Over Beef: These Crispy Chickpea Tacos Are A Dollar Saver
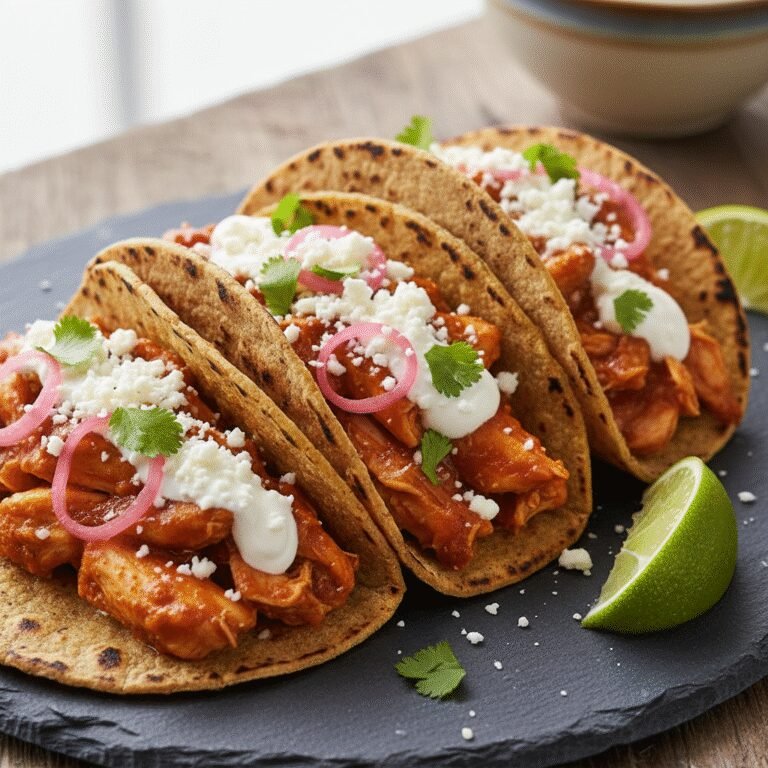
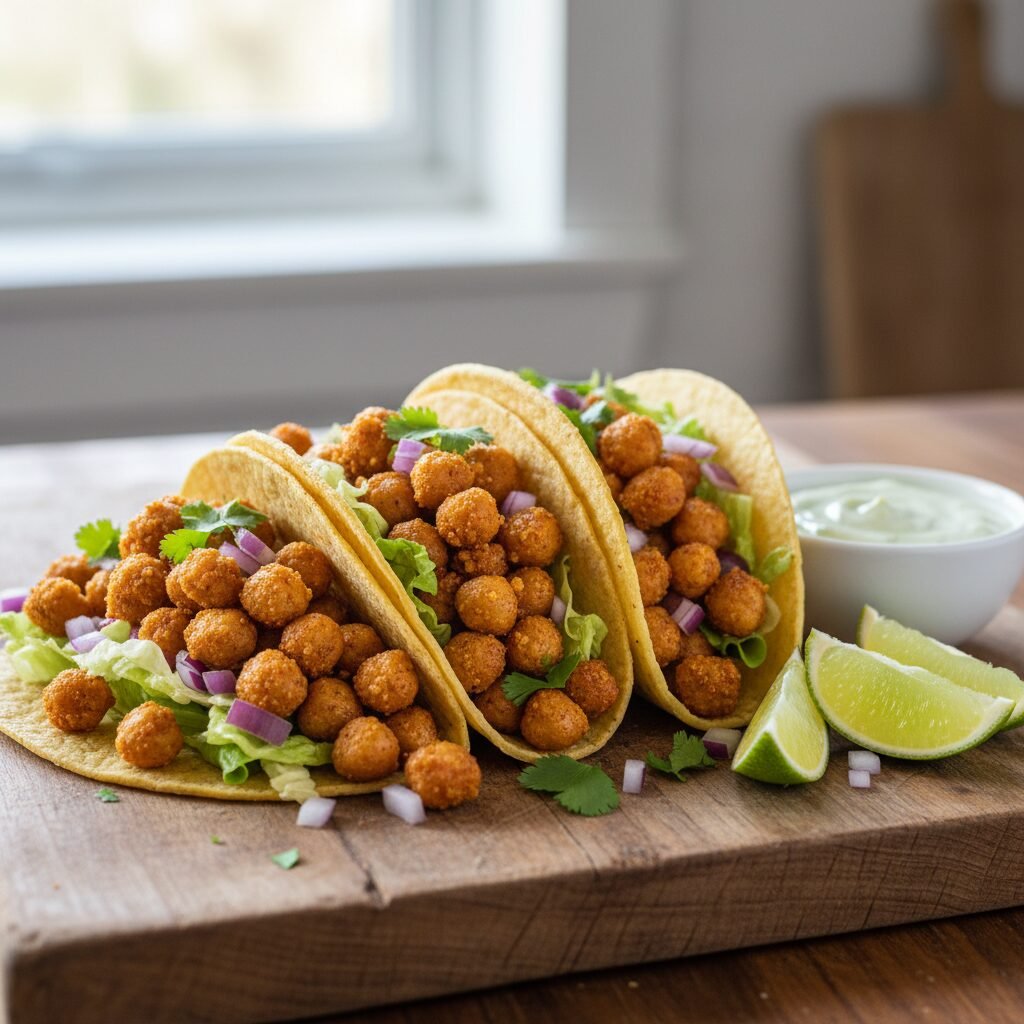
In the world of satisfying, quick, and flavorful meals, tacos reign supreme. But what if we told you that you could achieve taco night perfection without the beef, and save a significant amount of money in the process? Enter the humble chickpea. Often relegated to salads and hummus, this versatile legume is ready for its star turn. These Crispy Chickpea Tacos are a culinary game-changer, offering a delightful crunch, a robust and smoky flavor profile, and a wealth of nutritional benefits that traditional ground beef tacos simply can’t match. This recipe is more than just a vegetarian alternative; it’s a delicious, budget-conscious upgrade that will have even the most dedicated carnivores asking for seconds. We’ve meticulously developed this recipe to ensure every chickpea is perfectly seasoned and crisped, creating a filling that is both texturally exciting and deeply satisfying. Prepare to transform your weeknight dinner routine with a meal that is as kind to your wallet as it is to your palate.
15 minutes
20 minutes
35 minutes
Makes 8 tacos, serves 4
Main Course
Sautéing, Pan-Frying
Mexican-Inspired
Vegetarian
Why You’ll Love This Recipe
- Extremely budget-friendly, costing a fraction of traditional beef tacos.
- A quick and easy weeknight meal, ready in under 40 minutes.
- Packed with plant-based protein and dietary fiber for a filling and nutritious meal.
- Naturally vegetarian, easily made vegan, and gluten-free adaptable.
- Highly customizable with a wide array of toppings and sauces.
Equipment You’ll Need
- Large non-stick skillet or cast-iron pan
- Colander
- Medium mixing bowl
- Small bowl for spices
- Chef’s knife
- Cutting board
- Measuring spoons and cups
- Spatula or wooden spoon
- Paper towels or a clean kitchen towel
Ingredients
- For the Crispy Chickpea Filling:
- 2 (15-ounce) cans chickpeas, rinsed, drained, and thoroughly dried
- 2 tablespoons olive oil or avocado oil
- 1 tablespoon chili powder
- 2 teaspoons smoked paprika
- 2 teaspoons ground cumin
- 1 teaspoon garlic powder
- 1 teaspoon onion powder
- 1/2 teaspoon dried oregano
- 1/2 teaspoon fine sea salt, or to taste
- 1/4 teaspoon black pepper
- For Assembly:
- 8 small corn or flour tortillas
- Suggested Toppings:
- 1 cup shredded romaine or iceberg lettuce
- 1 large tomato, diced
- 1/2 red onion, finely diced
- 1/2 cup fresh cilantro, chopped
- 1 avocado, sliced or mashed
- Lime wedges, for serving
- Optional: Cotija cheese (or vegan alternative), sour cream (or vegan cashew crema), salsa, pickled jalapeños
Instructions
- Prepare the Toppings: Begin by preparing all your desired toppings. Wash and chop the lettuce, dice the tomato and red onion, chop the cilantro, and slice the avocado. Set everything aside in small bowls for easy assembly later. This step ensures everything is ready the moment the hot chickpea filling is done.
- Dry the Chickpeas: This is the most crucial step for achieving a crispy texture. After rinsing and draining the chickpeas, spread them on a clean kitchen towel or a layer of paper towels. Gently pat them dry, removing as much surface moisture as possible. You can even let them air dry for 10-15 minutes.
- Mix the Spices: In a small bowl, combine the chili powder, smoked paprika, ground cumin, garlic powder, onion powder, dried oregano, salt, and black pepper. Stir until evenly mixed. Preparing the spice blend beforehand ensures the chickpeas get coated evenly.
- Heat the Skillet: Place a large non-stick or cast-iron skillet over medium-high heat. Add the olive oil and let it heat up until it shimmers slightly. A properly heated pan is key to getting a good sear on the chickpeas.
- Sauté the Chickpeas: Carefully add the dried chickpeas to the hot skillet. Let them cook for 5-7 minutes, shaking the pan occasionally, until they start to brown and ‘pop’ slightly. This initial cook helps to further dry them out and begin the crisping process.
- Season and Crisp: Sprinkle the prepared spice blend over the chickpeas. Stir continuously for about 1 minute until the chickpeas are fully coated and the spices become fragrant. Reduce the heat to medium and continue to cook for another 8-10 minutes, stirring or shaking the pan every couple of minutes. The chickpeas should be deeply browned, fragrant, and crispy on the outside. You can gently press a few with the back of your spatula to slightly mash them, creating varied texture.
- Warm the Tortillas: While the chickpeas are in their final minutes of cooking, warm your tortillas. You can do this by heating them one by one in a dry skillet for 30 seconds per side, wrapping them in a damp paper towel and microwaving for 30-45 seconds, or carefully charring them over a gas flame with tongs.
- Assemble and Serve: Once the chickpeas are crispy and the tortillas are warm, it’s time to assemble. Fill each tortilla with a generous spoonful of the crispy chickpea filling. Top with your prepared lettuce, tomato, onion, cilantro, avocado, and any other desired toppings. Serve immediately with fresh lime wedges on the side.
Expert Cooking Tips
- The Dryer, The Better: Do not skip the step of thoroughly drying the chickpeas. Moisture is the enemy of crispiness. Pat them dry, then let them air dry for a few minutes if you have the time.
- Don’t Crowd the Pan: Use a large enough skillet to ensure the chickpeas are in a single layer. Overcrowding the pan will cause the chickpeas to steam instead of fry, resulting in a softer texture.
- Bloom the Spices: Adding the spices after the chickpeas have had a chance to sear allows the spices to ‘bloom’ in the hot oil, deepening their flavor without burning them.
- Control Your Heat: Start with medium-high heat to get a good initial sear, then reduce to medium to allow the chickpeas to crisp up without burning the spices. Adjust as needed based on your stovetop.
- Mash for Texture: Gently mashing about a quarter of the chickpeas in the pan during the last few minutes of cooking creates a more cohesive filling that holds together better in the taco.
Substitutions and Variations
For the chickpeas, you can substitute black beans or pinto beans, though the texture will be softer. Adjust cooking time accordingly, focusing on heating through and coating with spices. For the spice blend, feel free to experiment. Add a pinch of cayenne for heat or ground coriander for a brighter, citrusy note. Any neutral high-heat oil like avocado, grapeseed, or canola oil can be used in place of olive oil. For a low-carb or grain-free option, serve the chickpea filling in lettuce cups instead of tortillas.
Common Mistakes to Avoid
The most common mistake is ending up with soggy chickpeas. This is almost always due to not drying them properly before they go into the pan. Take the extra five minutes to ensure they are as dry as possible. Another frequent error is under-seasoning. Chickpeas have a mild flavor and need a bold spice blend to shine. Don’t be shy with the seasonings, and always taste a chickpea at the end and adjust the salt if needed. Finally, don’t serve on cold, stiff tortillas. Warming the tortillas makes them pliable, more flavorful, and elevates the entire eating experience from good to great.
Serving Suggestions
These tacos are a fantastic meal on their own, but they pair wonderfully with a variety of sides. For a more substantial meal, serve them with a side of cilantro-lime rice, Mexican street corn salad (esquites), or a simple pot of seasoned black beans. A fresh mango salsa or a smoky chipotle aioli can also be a delicious addition to the tacos themselves. For a beverage, a light Mexican lager or a tangy lime margarita complements the smoky spices perfectly.
Storage and Reheating Tips
To maintain the best texture, store the crispy chickpea filling separately from the tortillas and toppings. Allow the filling to cool completely, then place it in an airtight container in the refrigerator for up to 4 days. To reheat, spread the chickpeas on a baking sheet and bake at 400°F (200°C) for 5-7 minutes, or reheat them in a dry skillet over medium heat until warmed through and crisp again. Avoid reheating in the microwave, as this will make them soft.
Nutrition Facts (Estimated)
| Serving Size | 2 Tacos |
| Calories | 480 kcal |
| Fat | 22g |
| Saturated Fat | 3g |
| Unsaturated Fat | 19g |
| Trans Fat | 0g |
| Cholesterol | 0mg |
| Sodium | 550mg |
| Carbohydrates | 55g |
| Fiber | 12g |
| Sugar | 4g |
| Protein | 15g |
Frequently Asked Questions
Can I make the crispy chickpeas in an air fryer?
Absolutely! The air fryer is excellent for this. Toss the dried chickpeas with the oil and spices, then air fry at 400°F (200°C) for 15-20 minutes, shaking the basket every 5 minutes, until golden and crispy.
Are canned chickpeas or dried chickpeas better for this recipe?
Canned chickpeas are used for convenience and work perfectly. If you prefer to use dried chickpeas, you will need to soak them overnight and cook them according to package directions before proceeding with the recipe. You’ll need about 1 cup of dried chickpeas to yield the equivalent of two cans.
How can I add more protein to this meal?
To boost the protein, you can add a sprinkle of toasted pumpkin seeds (pepitas) for crunch and protein, or serve with a side of quinoa, which is a complete protein source. A dollop of Greek yogurt (if not vegan) also adds a creamy element and extra protein.
Is this recipe kid-friendly?
Yes, it’s very kid-friendly. You can adjust the spice level by reducing or omitting the chili powder for sensitive palates. Setting up a taco bar with all the toppings allows kids to build their own tacos, which is always a fun and engaging activity.
Conclusion
By embracing the power of the chickpea, you’ve unlocked a recipe that delivers on every front: flavor, texture, nutrition, and affordability. These Crispy Chickpea Tacos are a testament to the fact that plant-based eating can be incredibly satisfying and accessible. They prove that a hearty, crowd-pleasing meal doesn’t need to be complicated or expensive. So next time you’re planning a taco night, we encourage you to move past the beef and give these crispy, savory morsels a try. You’ll not only be doing your budget a favor but also discovering a new weeknight favorite that the whole family will love.