Grandma’s Hot Milk Cake: The Simplest Cake You’ll Ever Bake
Grandma’S Hot Milk Cake: The Simplest Cake You’Ll Ever Bake
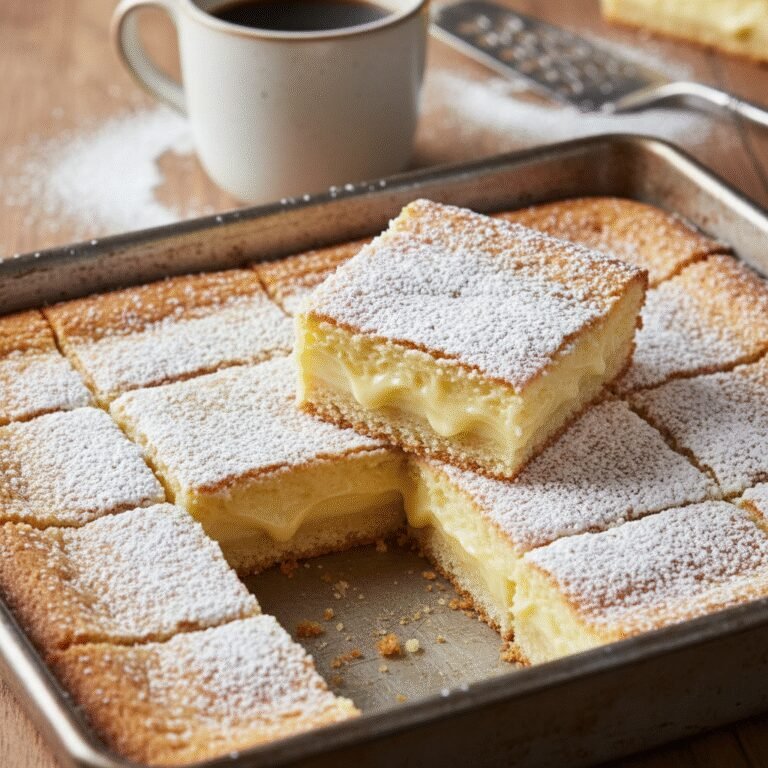
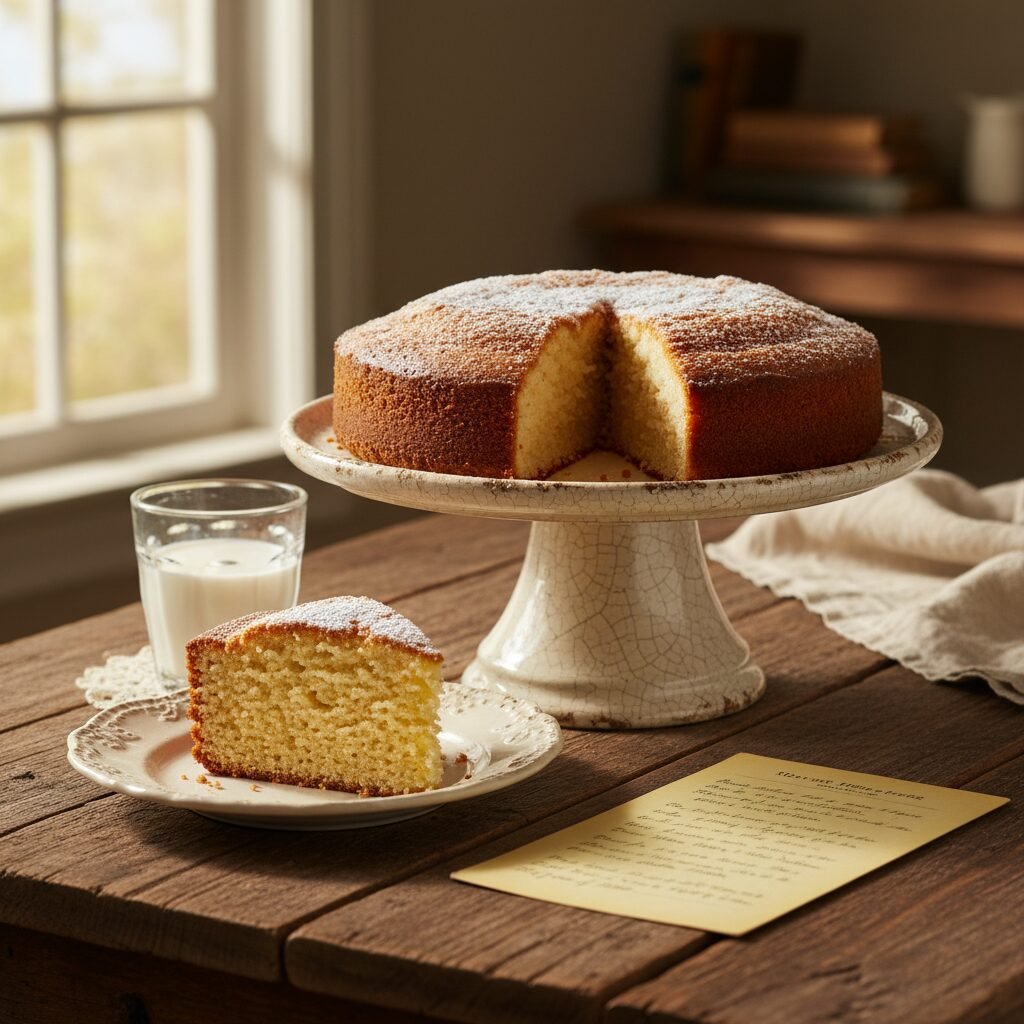
There’s a special kind of magic in recipes passed down through generations. They’re more than just lists of ingredients; they’re edible heirlooms, carrying stories of family gatherings and comforting moments. Grandma’s Hot Milk Cake is one such treasure. Deceptively simple, this vintage recipe produces a cake with a remarkably tender, fine crumb and a delicate, buttery flavor that is both comforting and elegant. The secret lies in its unusual method: heating milk and butter together and adding the warm mixture to the batter. This technique creates a uniquely moist texture that keeps the cake fresh for days. Forget complex layers and fussy frostings; this is the cake you’ll turn to for a last-minute dessert, a comforting afternoon treat, or a sweet taste of nostalgia. It’s proof that sometimes, the simplest things are truly the most wonderful.
15 minutes
30-35 minutes
50 minutes
12-16 servings
Dessert
Baking
American
Vegetarian
Why You’ll Love This Recipe
- Incredibly simple one-bowl method
- Uses basic pantry staples you likely already have
- Creates a uniquely moist and tender crumb
- Versatile base for various toppings and frostings
- A classic, nostalgic recipe perfect for any occasion
Equipment You’ll Need
- 9×13 inch baking pan
- Stand mixer with whisk attachment or a hand mixer
- Large mixing bowl
- Small saucepan
- Flour sifter or fine-mesh sieve
- Rubber spatula
- Wire cooling rack
Ingredients
- 2 cups all-purpose flour
- 2 teaspoons baking powder
- 1/2 teaspoon salt
- 4 large eggs, at room temperature
- 2 cups granulated sugar
- 1 cup whole milk
- 1/2 cup (1 stick) unsalted butter
- 2 teaspoons pure vanilla extract
Instructions
- Preheat your oven to 350°F (175°C). Grease and flour a 9×13 inch baking pan, or line with parchment paper for easy removal.
- In a medium bowl, sift together the all-purpose flour, baking powder, and salt. Set aside.
- In a large bowl using a stand mixer or hand mixer, beat the room temperature eggs on high speed until they are light and foamy, about 2-3 minutes.
- Gradually add the granulated sugar to the eggs, continuing to beat on high speed for another 5-7 minutes. The mixture should become very thick, pale yellow, and ribbon-like. When you lift the beater, the batter should fall back in a slow, thick ribbon that sits on the surface for a moment.
- While the eggs and sugar are beating, combine the whole milk and unsalted butter in a small saucepan. Heat over medium heat just until the butter is completely melted and the milk is hot and steaming. Do not let it come to a boil.
- Remove the milk mixture from the heat and stir in the vanilla extract.
- With the mixer on low speed, add about one-third of the dry ingredients to the egg mixture, followed by about one-third of the hot milk mixture. Alternate additions, ending with the dry ingredients, mixing just until combined after each addition. Be careful not to overmix.
- Pour the batter immediately into the prepared baking pan and spread it into an even layer with a spatula.
- Bake for 30-35 minutes, or until a wooden skewer or toothpick inserted into the center comes out clean. The top should be golden brown and spring back when lightly touched.
- Let the cake cool in the pan on a wire rack for at least 15-20 minutes before slicing and serving. It can be served warm or at room temperature.
Expert Cooking Tips
- Room Temperature Eggs: Using room temperature eggs is crucial. They whip up with more volume, creating a lighter, more tender cake.
- Don’t Boil the Milk: Heat the milk and butter only until the butter melts and the mixture is steaming. Boiling can scald the milk and may cook the eggs when added to the batter.
- The Ribbon Stage: Don’t rush beating the eggs and sugar. Achieving the ‘ribbon stage’ is key to the cake’s light texture. This step incorporates the air that gives the cake its structure.
- Do Not Overmix: Once you begin adding the flour and milk, mix only until the ingredients are just combined. Overmixing develops gluten and will result in a tough, dense cake.
Substitutions and Variations
This cake is wonderful on its own, but also serves as a perfect canvas. For a simple finish, a dusting of powdered sugar is all it needs. For something richer, try a classic chocolate fudge frosting or a brown butter glaze. You can also add 1/2 teaspoon of almond extract along with the vanilla for a different flavor note. While whole milk provides the best richness, you can use 2% milk in a pinch, though the texture may be slightly less tender.
Common Mistakes to Avoid
The most common mistake is not beating the eggs and sugar long enough. This step is vital for the cake’s volume and texture; skimping on it will lead to a dense, flat cake. Another pitfall is overbaking, which will dry out the delicate crumb. Start checking for doneness at the 30-minute mark. Lastly, adding the hot milk mixture all at once or when it’s too hot can scramble the eggs. Add it slowly and alternately with the flour to gently temper the batter.
Serving Suggestions
Serve a warm slice with a scoop of vanilla bean ice cream and a drizzle of caramel sauce. It’s a perfect companion to a cup of coffee or hot tea for an afternoon break. For a fresh touch, top with a dollop of sweetened whipped cream and a handful of fresh berries like strawberries, raspberries, or blueberries.
Storage and Reheating Tips
Store the cake in an airtight container at room temperature for up to 3 days. If frosted with a dairy-based frosting, it should be refrigerated. To maintain its moistness, you can place a slice of bread in the container with the cake. The cake will absorb moisture from the bread. For longer storage, the unfrosted cake freezes beautifully. Wrap it tightly in plastic wrap and then in aluminum foil and freeze for up to 3 months.
Nutrition Facts (Estimated)
| Serving Size | 1 slice (1/12th of cake) |
| Calories | 260 kcal |
| Fat | 12g |
| Saturated Fat | 7g |
| Unsaturated Fat | 5g |
| Trans Fat | 0g |
| Cholesterol | 65mg |
| Sodium | 210mg |
| Carbohydrates | 34g |
| Fiber | 1g |
| Sugar | 22g |
| Protein | 4g |
Frequently Asked Questions
Why is it called Hot Milk Cake?
It gets its name from the key step in the recipe where milk and butter are heated together until hot (but not boiling) before being incorporated into the batter. This technique helps to melt the butter evenly and creates a very fine, moist, and tender crumb.
Can I make this recipe into cupcakes?
Yes, absolutely. This batter works very well for cupcakes. Simply line a muffin tin with paper liners, fill them about two-thirds full, and bake at 350°F (175°C) for 18-22 minutes, or until a toothpick inserted into the center comes out clean.
My cake came out dense. What did I do wrong?
The most likely culprit for a dense cake is not whipping the eggs and sugar long enough to reach the thick, ribbon-like stage. This step is essential for incorporating air, which acts as the primary leavener. Another possibility is overmixing the batter after adding the flour, which develops gluten and makes the cake tough.
Conclusion
Grandma’s Hot Milk Cake is more than just a dessert; it’s a return to simple, honest baking. Its straightforward preparation and humble ingredients belie a truly special result: a cake that is consistently moist, light, and delicious. Whether you’re an experienced baker or a novice in the kitchen, this recipe is a guaranteed success that will fill your home with a wonderful aroma and your heart with warmth. We hope you’ll cherish this timeless classic as much as we do.