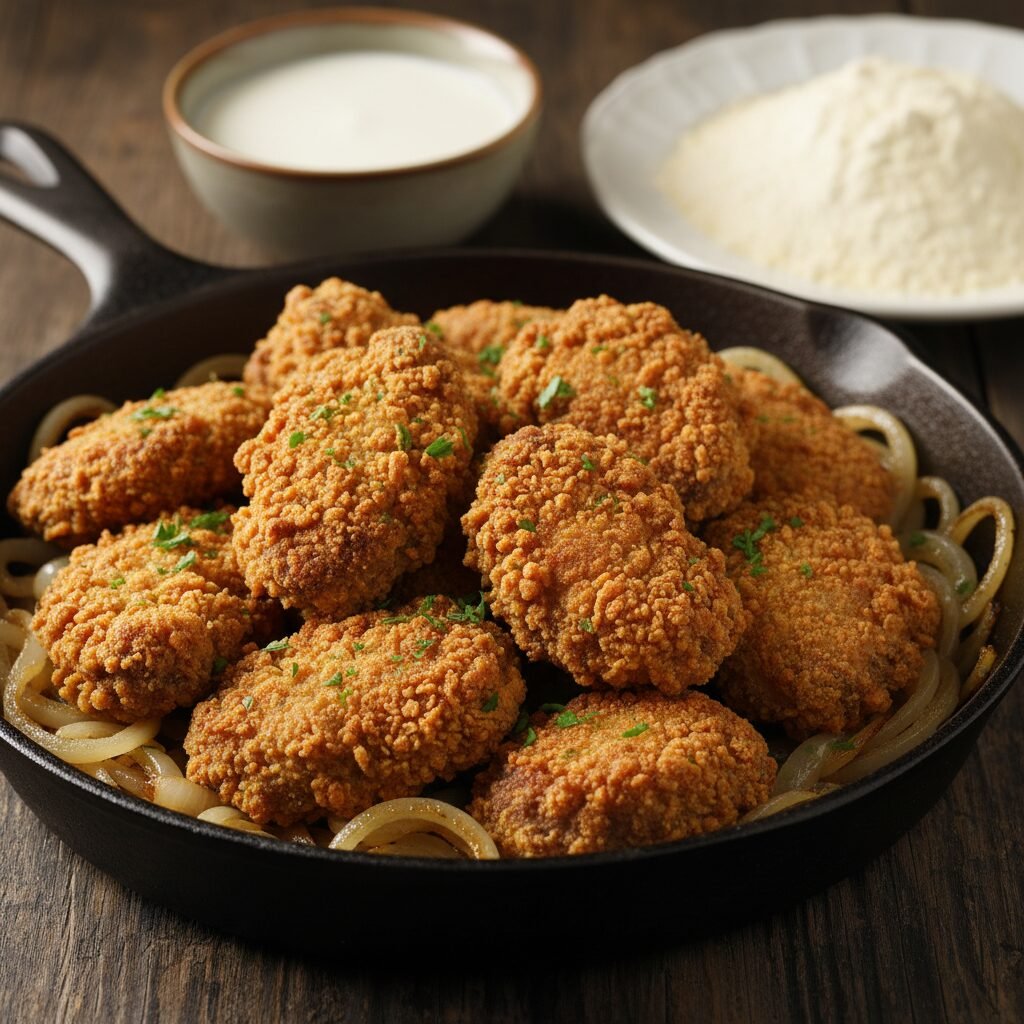
Don’t Knock It Until You Try It: Crispy Southern Livers
Don’T Knock It Until You Try It: Crispy Southern Livers
Let’s be honest: liver is a divisive food. For many, the mere mention of it conjures up memories of gray, rubbery school lunches or a metallic taste that’s hard to forget. But I’m here to tell you that when prepared correctly, liver is not just palatable; it is downright delicious. This recipe for Crispy Southern Livers is the ultimate ambassador, a dish so perfectly textured and flavorful that it has converted even the most ardent skeptics. Imagine a perfectly seasoned, shatteringly crisp crust giving way to an interior that is unbelievably tender, rich, and almost creamy. This isn’t the liver you think you know. This is a celebrated Southern classic, a humble but revered dish that showcases how simple ingredients, treated with care, can create something truly extraordinary. So, hang up your preconceived notions and trust us on this one. It’s time to discover the magic of perfectly fried livers.
15 minutes (plus 30 minutes for soaking)
10 minutes
55 minutes
4 servings
Main Course
Pan-Frying
Southern American
Traditional
Why You’ll Love This Recipe
- Shatteringly crispy exterior with a perfectly seasoned crust.
- Incredibly tender and creamy interior, never tough or rubbery.
- Classic Southern flavor profile that is savory and satisfying.
- A surprisingly quick and easy recipe perfect for a weeknight meal.
- Utilizes a buttermilk soak to mellow flavor and ensure tenderness.
Equipment You’ll Need
- Large cast-iron skillet or heavy-bottomed pan
- Two shallow dishes or pie plates
- Metal tongs
- Wire cooling rack
- Paper towels
Ingredients
- 1 lb chicken livers, rinsed and patted dry
- 1 1/2 cups buttermilk
- 1 1/2 cups all-purpose flour
- 2 tsp salt
- 1 tsp black pepper
- 1 tsp paprika
- 1/2 tsp garlic powder
- 1/2 tsp onion powder
- Pinch of cayenne pepper (optional)
- Vegetable oil or lard, for frying (about 1/2 inch deep)
Instructions
- First, prepare the livers. Trim away any visible connective tissue or greenish spots from the chicken livers. Place the trimmed livers in a shallow dish.
- Pour the buttermilk over the livers, ensuring they are fully submerged. Let them soak for at least 30 minutes (or up to 2 hours in the refrigerator). This step is crucial for tenderizing the liver and mellowing its flavor.
- While the livers soak, prepare your dredging station. In a second shallow dish, whisk together the all-purpose flour, salt, black pepper, paprika, garlic powder, onion powder, and optional cayenne pepper until well combined.
- Prepare your frying station. Place a wire rack over a baking sheet near your stove. Pour about a half-inch of oil into your cast-iron skillet and heat it over medium-high heat until it reaches 350°F (175°C). If you don’t have a thermometer, a pinch of flour should sizzle and bubble immediately when dropped in.
- Working one at a time, remove a liver from the buttermilk, allowing excess to drip off. Immediately transfer it to the seasoned flour mixture. Toss gently to coat all sides, then shake off any excess flour.
- Carefully place the coated livers into the hot oil, ensuring not to overcrowd the pan. Work in batches if necessary. Fry for about 2-3 minutes per side, until the crust is a deep golden brown and crispy.
- Using tongs, remove the fried livers from the skillet and transfer them to the prepared wire rack to drain. This keeps the bottom from getting soggy.
- Repeat with the remaining livers, allowing the oil to come back to temperature between batches.
- Serve immediately while hot and crispy, traditionally with sautéed onions.
Expert Cooking Tips
- Don’t skip the buttermilk soak. It’s the secret to a mild-flavored, tender liver.
- Ensure your oil is at the correct temperature. Too cool, and the livers will absorb excess oil and become greasy. Too hot, and the crust will burn before the inside is cooked.
- Avoid overcooking at all costs. Liver cooks very quickly. The inside should be tender and just cooked through, perhaps with a hint of pink, for the best texture.
- Dredge right before frying. Don’t let the floured livers sit around, as the coating can become gummy.
Substitutions and Variations
For a gluten-free option, substitute the all-purpose flour with a quality 1-to-1 gluten-free flour blend. For a different flavor profile, you can use thinly sliced calf’s liver, though cooking time may vary. If you don’t have buttermilk, you can make a quick substitute by adding one tablespoon of white vinegar or lemon juice to 1 1/2 cups of whole milk and letting it sit for 5-10 minutes.
Common Mistakes to Avoid
The single most common mistake is overcooking. Even an extra minute in the pan can turn liver from tender and creamy to tough and grainy. The second mistake is not soaking the liver in buttermilk or milk, which can result in a stronger, more metallic taste. Finally, overcrowding the pan will lower the oil temperature, preventing a crispy crust from forming and leading to a soggy result.
Serving Suggestions
Serve these crispy livers hot from the skillet, traditionally topped with a pile of sweet, caramelized onions. They are fantastic alongside creamy grits, mashed potatoes, or a simple side of collard greens. For a lighter pairing, a crisp salad with a sharp vinaigrette cuts through the richness beautifully. A dash of your favorite hot sauce is also highly recommended.
Storage and Reheating Tips
Crispy fried livers are best eaten immediately. If you have leftovers, store them in an airtight container in the refrigerator for up to two days. To reheat, place them on a baking sheet in a 375°F (190°C) oven or in an air fryer for a few minutes until warmed through and the crust has re-crisped. Avoid reheating in the microwave, as it will make them rubbery.
Nutrition Facts (Estimated)
| Serving Size | 1 serving (approx. 1/4 lb) |
| Calories | 380 kcal |
| Fat | 20g |
| Saturated Fat | 5g |
| Unsaturated Fat | 15g |
| Trans Fat | 0g |
| Cholesterol | 560mg |
| Sodium | 550mg |
| Carbohydrates | 18g |
| Fiber | 1g |
| Sugar | 2g |
| Protein | 29g |
Frequently Asked Questions
Why do you soak liver in buttermilk?
Soaking liver in an acidic medium like buttermilk serves two purposes. First, it helps to tenderize the meat. Second, and more importantly, it draws out some of the strong, sometimes metallic flavors associated with liver, resulting in a milder, more pleasant taste.
How do I know when the liver is done cooking?
The best indicator is the crust, which should be a deep, crispy golden brown. The total cooking time is only about 4-6 minutes total. A properly cooked chicken liver will be tender and may have a slight pinkish hue in the very center, which is perfectly safe and ensures a creamy texture.
Can I make this in an air fryer?
While you can cook dredged liver in an air fryer, you won’t achieve the same shatteringly crisp, deep-fried crust. For an air fryer version, spray the coated livers generously with cooking oil and cook at 400°F (200°C) for about 8-10 minutes, flipping halfway through.
Conclusion
This recipe is more than just a set of instructions; it’s an invitation to rediscover a classic. By embracing a simple Southern technique, we transform a humble ingredient into a culinary delight that stands tall against any comfort food. Whether you’re a lifelong fan or a curious first-timer, these Crispy Southern Livers promise a delicious experience that will challenge expectations and, hopefully, win you over for good. Give them a try—you might just be surprised.