Tofu Katsu That Actually Crunches: Better Than Chicken Cutlets
Tofu Katsu That Actually Crunches: Better Than Chicken Cutlets
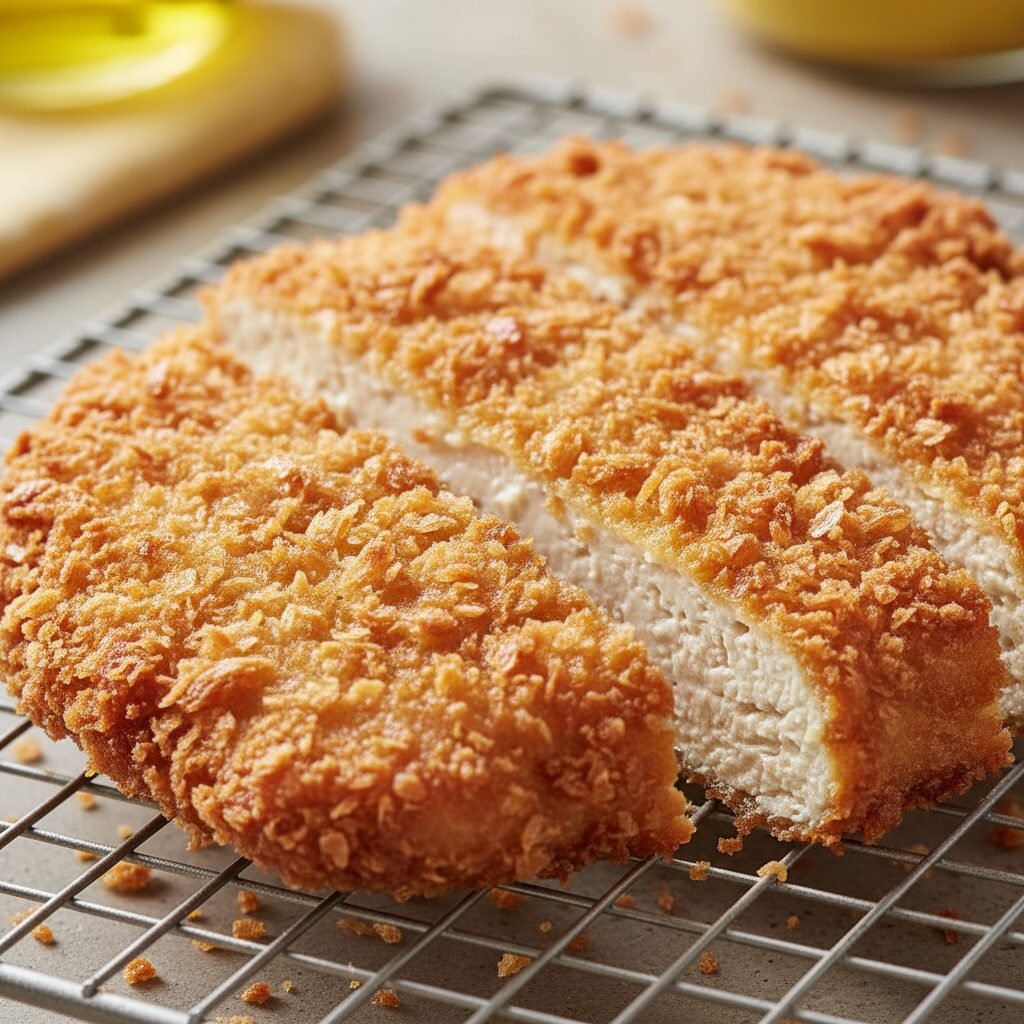
Get ready to transform your weeknight dinners with this incredible Tofu Katsu recipe! It’s so crispy, flavorful, and satisfying, you’ll wonder why you ever bothered with chicken. Perfect for a family-friendly meal that everyone will adore!
20 minutes
25 minutes
45 minutes
4 servings
Main Course
Frying
Japanese
Vegetarian, Vegan
Oh, sweet friends, if you’ve ever doubted the magic of tofu, prepare to have your world rocked! Today, we’re diving headfirst into a recipe that’s going to become an instant family favorite: Tofu Katsu That Actually Crunches: Better Than Chicken Cutlets. Yes, you read that right! I know, I know, some of you might be thinking, “Tofu? Crispy? Better than chicken?” And to that, I say, trust me on this one, mama!
As a busy mom, I’m always on the hunt for meals that are not only delicious and wholesome but also exciting enough to get everyone at the dinner table cheering. And let’s be honest, sometimes chicken cutlets can feel a little…been there, done that. That’s where this Tofu Katsu swoops in like a culinary superhero! It’s got that irresistible golden-brown crust, a tender-yet-firm interior, and a flavor profile that’s just out of this world. It’s plant-based, packed with protein, and surprisingly easy to whip up, even on those chaotic weeknights.
This isn’t just any tofu recipe; it’s a game-changer. We’re talking about a katsu that delivers on its promise of an epic crunch, making it a fantastic alternative for meatless Mondays, or any day you’re craving something truly special. So, grab your apron, gather your little helpers, and let’s get cooking! Your taste buds (and your family!) are going to thank you.
History & Origins
The beloved dish “Katsu” originates from Japan, specifically “Tonkatsu,” which means pork cutlet. It emerged in the late 19th century, influenced by Western cuisine, particularly French cutlets. Japanese chefs adapted the concept, breading thinly sliced pork with panko (Japanese breadcrumbs) and deep-frying it to golden perfection. It quickly became a staple, often served with a savory-sweet tonkatsu sauce, shredded cabbage, and rice.
Over time, the katsu concept expanded beyond pork to include chicken (Torikatsu), beef (Gyukatsu), and even seafood. As plant-based diets gained popularity and culinary innovation flourished, creative cooks began experimenting with vegetarian and vegan alternatives. Tofu, with its versatile texture and ability to absorb flavors, was a natural fit. Tofu Katsu maintains the iconic crispy breading and satisfying bite of its meat-based counterparts, offering a delicious and often healthier option that honors the spirit of the original Japanese dish while catering to diverse dietary needs.
Why This Recipe Works
The secret to achieving that truly spectacular crunch in this Tofu Katsu lies in a few key culinary techniques that work together beautifully. First, pressing the tofu is absolutely crucial. Tofu, especially extra-firm, still holds a lot of water. Removing this excess moisture allows the tofu to become denser, preventing it from steaming in the oil and instead promoting a crispier exterior. It also creates a better surface for the breading to adhere to.
Next, our three-step dredging process (flour, wet batter, panko) is the classic method for a reason. The seasoned flour creates a dry surface for the wet batter to stick to. Our wet batter, a mix of plant-based milk and apple cider vinegar, acts as a binder, creating a slightly acidic environment that helps tenderize the tofu slightly and provides a robust surface for the panko. Finally, panko breadcrumbs are the true crunch champions. Unlike regular breadcrumbs, panko are larger, flakier, and absorb less oil, resulting in an incredibly light, airy, and shatteringly crisp crust that stays crunchy long after frying. Frying at the correct temperature ensures a quick cook time, preventing the tofu from becoming greasy while allowing the panko to brown beautifully and develop that irresistible texture.
Why You’ll Love This Recipe
- ✓Achieves an unbelievably crispy, golden-brown crust.
- ✓A fantastic plant-based alternative to traditional chicken cutlets.
- ✓Packed with savory flavor and satisfying texture.
- ✓Surprisingly easy to make for a delicious weeknight meal.
- ✓Versatile and pairs wonderfully with various sides and sauces.
- ✓A protein-rich dish that’s both wholesome and comforting.
Equipment You’ll Need
- ✓Tofu press (or heavy objects and paper towels)
- ✓Large cutting board
- ✓Sharp knife
- ✓3 shallow dishes or bowls for dredging
- ✓Large skillet or Dutch oven
- ✓Tongs
- ✓Wire rack with a baking sheet underneath
- ✓Measuring cups and spoons
Ingredients
- ✓1 block (14-16 oz) extra-firm tofu, pressed for at least 30 minutes (preferably 1-2 hours)
- ✓1/2 cup all-purpose flour (or gluten-free all-purpose flour blend)
- ✓1 tsp garlic powder
- ✓1/2 tsp onion powder
- ✓1/2 tsp salt
- ✓1/4 tsp black pepper
- ✓1/2 cup unsweetened plant-based milk (almond, soy, or oat work great)
- ✓1 tbsp apple cider vinegar
- ✓1.5 cups panko breadcrumbs
- ✓2-3 cups neutral oil for frying (canola, vegetable, or grapeseed)
Instructions
-
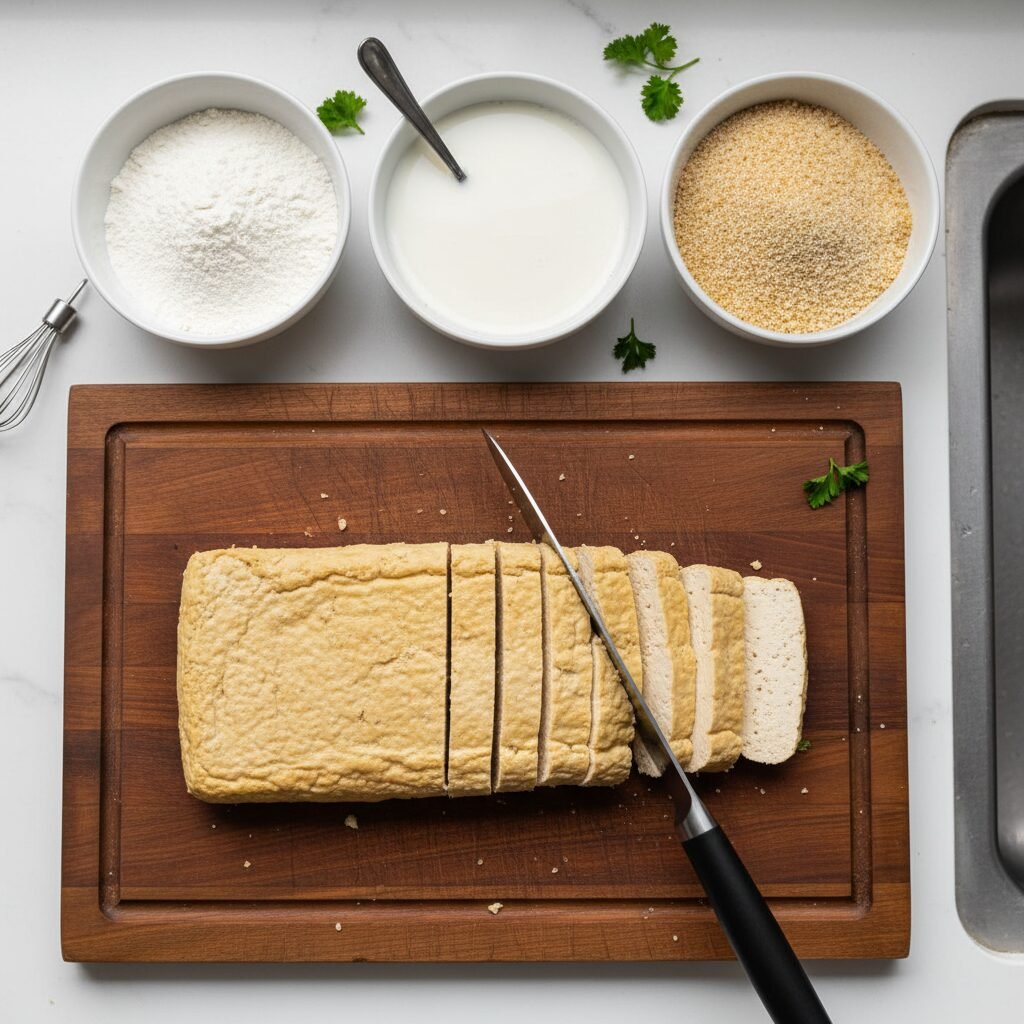
Step 1: Press and Slice the Tofu
If you haven’t already, press your extra-firm tofu. This is a crucial step for maximum crispiness! You can use a tofu press or wrap the block in paper towels, place it on a plate, and weigh it down with heavy cans or books for at least 30 minutes, ideally 1-2 hours. Once pressed, slice the tofu lengthwise into 4 even cutlets, about 1/2 inch thick.
-
Step 2: Prepare the Dredging Stations
Set up three shallow dishes or bowls. In the first dish, combine the all-purpose flour, garlic powder, onion powder, salt, and black pepper. Whisk well to combine. In the second dish, whisk together the plant-based milk and apple cider vinegar (this creates a quick buttermilk substitute that helps the breading stick). In the third dish, spread out the panko breadcrumbs.
-
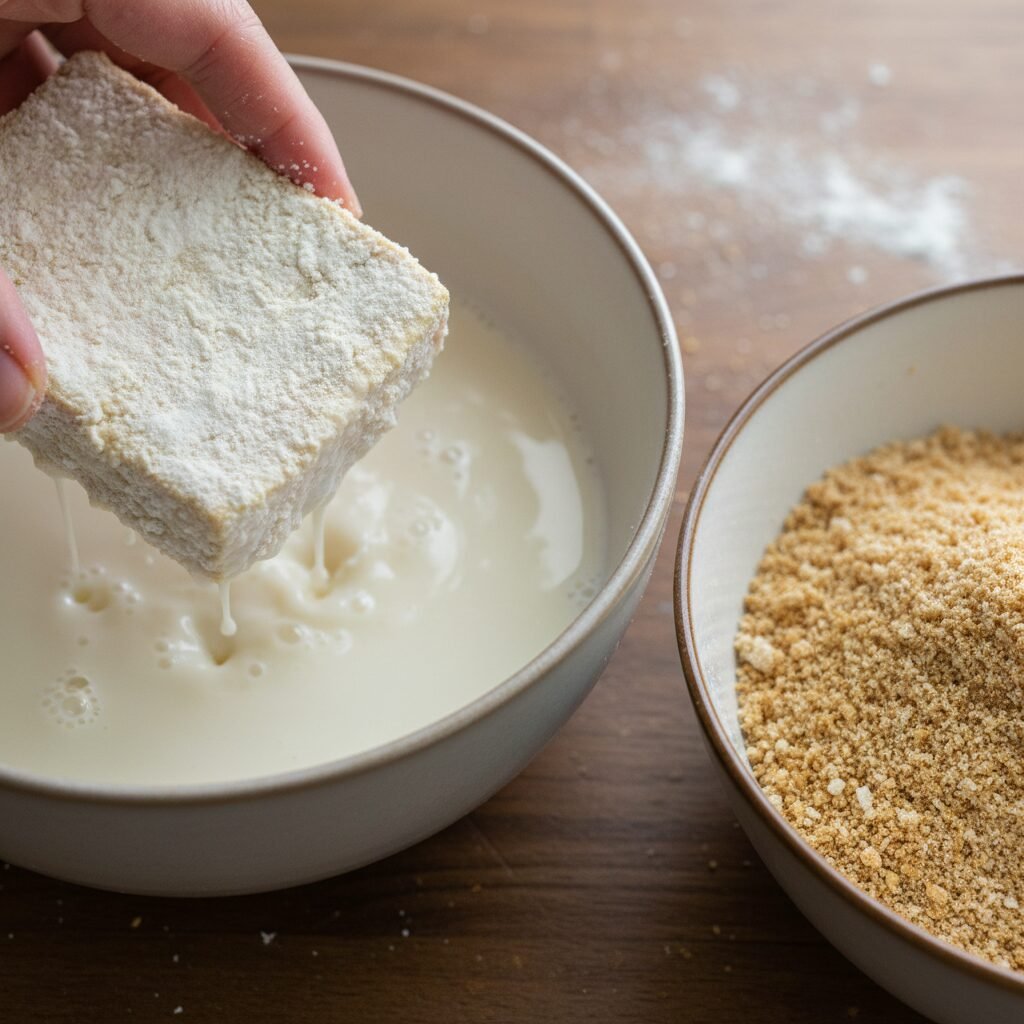
Step 3: Dredge the Tofu Cutlets
Working with one tofu cutlet at a time, first dredge it thoroughly in the flour mixture, ensuring it’s fully coated. Shake off any excess. Next, dip the floured tofu into the plant-based milk mixture, letting any excess drip off. Finally, transfer it to the panko breadcrumbs, pressing gently to ensure a thick, even coating on all sides. Repeat with the remaining tofu cutlets. Set the breaded cutlets aside on a clean plate.
-
Step 4: Heat the Oil
Pour 2-3 cups of neutral oil into a large skillet or Dutch oven, ensuring it’s deep enough to come about 1/2 inch up the sides of the pan. Heat the oil over medium-high heat until it reaches 350-375°F (175-190°C). If you don’t have a thermometer, you can test the oil by dropping a tiny pinch of panko in; it should sizzle vigorously and turn golden brown within 10-15 seconds.
-
Step 5: Fry the Tofu Katsu
Carefully place 2 tofu cutlets into the hot oil (don’t overcrowd the pan, as this will lower the oil temperature and make them less crispy). Fry for 3-5 minutes per side, or until deeply golden brown and incredibly crispy. Use tongs to carefully flip them. Once cooked, transfer the crispy tofu katsu to a wire rack set over a baking sheet to drain any excess oil. This helps maintain their crunch! Repeat with the remaining cutlets.
-
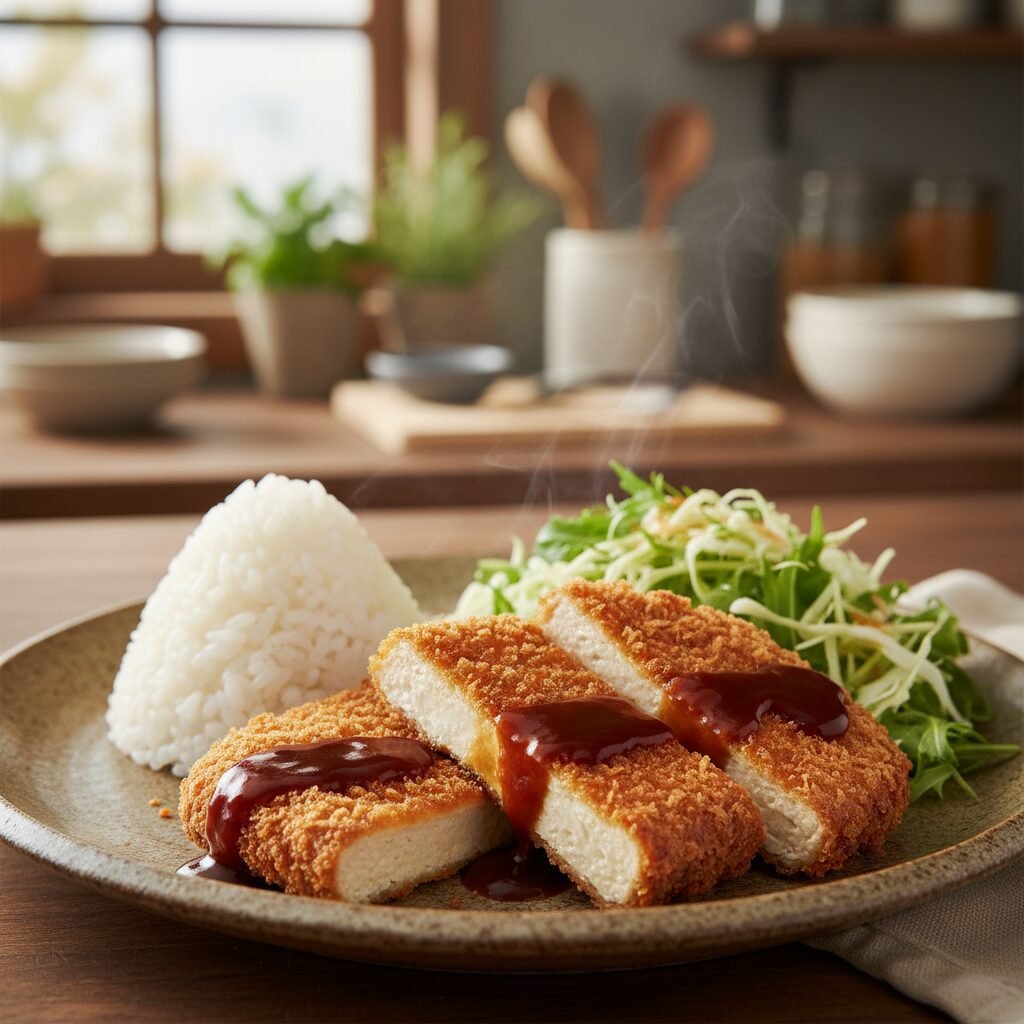
Step 6: Serve Immediately
Serve your glorious Tofu Katsu immediately with your favorite dipping sauce (tonkatsu sauce is classic!), a side of fluffy rice, and a fresh salad or shredded cabbage. Enjoy that amazing crunch!
Expert Cooking Tips
- ✓Don’t skip pressing the tofu! This is the single most important step for a truly crispy katsu.
- ✓Ensure your oil is at the correct temperature. Too low, and your katsu will be greasy; too high, and it will burn before cooking through.
- ✓Don’t overcrowd the pan. Fry in batches to maintain oil temperature and ensure even cooking.
- ✓For extra flavor, you can add a pinch of paprika or nutritional yeast to your flour mixture.
- ✓If you’re making a larger batch, keep the fried katsu warm in a single layer on a wire rack in a preheated oven at 200°F (95°C) while you finish frying the rest.
Substitutions and Variations
This recipe is wonderfully adaptable! If you’re gluten-free, simply swap the all-purpose flour for a gluten-free all-purpose flour blend and ensure your panko breadcrumbs are certified gluten-free. For a different flavor profile, you could experiment with adding a pinch of cayenne pepper to the flour for a little kick, or some dried herbs like oregano or thyme. If you don’t have apple cider vinegar, lemon juice can work as a substitute to curdle the plant-based milk. While panko is king for crunch, if you’re in a pinch, regular breadcrumbs can be used, though the texture won’t be quite as airy and crisp. You can also try crushing up cornflakes for a unique gluten-free crunch!
Common Mistakes to Avoid
The most common mistake when making Tofu Katsu is not pressing the tofu enough. This leads to a soggy interior and a less crispy exterior. Another pitfall is frying in oil that isn’t hot enough, which results in greasy katsu because the breading absorbs too much oil before it can crisp up. Conversely, oil that’s too hot will burn the panko before the tofu has a chance to heat through. Overcrowding the pan is also a no-no, as it drastically drops the oil temperature. Lastly, not seasoning the flour mixture can lead to bland katsu, so don’t be shy with those spices!
Serving Suggestions
This Tofu Katsu is incredibly versatile! The classic way to serve it is with a generous drizzle of tonkatsu sauce (store-bought or homemade), a mound of fluffy steamed white rice, and a refreshing side of shredded cabbage, perhaps with a light sesame dressing. For a heartier meal, you could serve it alongside a Japanese-inspired potato salad or a simple miso soup. It also makes fantastic katsu sandwiches (katsu sando) on soft white bread with a smear of mayo and tonkatsu sauce. Don’t forget to try it sliced over a bed of noodles or as the star of a vibrant bento box!
Storage and Reheating Tips
Leftover Tofu Katsu can be stored in an airtight container in the refrigerator for up to 3-4 days. To reheat and retain some of that glorious crunch, I highly recommend using an air fryer or an oven. In an air fryer, reheat at 350°F (175°C) for 5-7 minutes, flipping halfway. In an oven, bake at 375°F (190°C) for 10-15 minutes, or until heated through and crispy. Microwaving is not recommended as it will make the katsu soggy.
Nutrition Facts (Estimated)
| Serving Size | 1 cutlet |
| Calories | 350 calories |
| Fat | 18g |
| Saturated Fat | 2g |
| Unsaturated Fat | 12g |
| Trans Fat | 0g |
| Cholesterol | 0mg |
| Sodium | 450mg |
| Carbohydrates | 30g |
| Fiber | 5g |
| Sugar | 4g |
| Protein | 20g |
Frequently Asked Questions
Do I really need to press the tofu?
Yes, absolutely! Pressing the tofu is the most critical step for achieving that incredible crunch. It removes excess water, allowing the tofu to become denser and absorb less oil during frying, resulting in a much crispier texture. Don’t skip it!
Can I bake or air fry this Tofu Katsu instead of frying?
While deep-frying yields the absolute crispiest results, you can definitely bake or air fry for a healthier option! For baking, preheat your oven to 400°F (200°C), lightly spray the breaded cutlets with oil, and bake for 20-25 minutes, flipping halfway, until golden and crisp. For air frying, preheat to 375°F (190°C), lightly spray with oil, and air fry for 12-15 minutes, flipping halfway, until golden and crunchy.
What kind of tofu should I use?
For this recipe, extra-firm tofu is essential. It holds its shape best and has the least amount of water, making it ideal for pressing and achieving a firm, meaty texture once cooked. Avoid silken or soft tofu, as they will fall apart.
What is panko breadcrumbs and why is it important?
Panko are Japanese-style breadcrumbs that are coarser, flakier, and lighter than traditional breadcrumbs. They absorb less oil during frying, which results in a much crispier, airier, and less greasy crust. It’s truly the secret to that signature katsu crunch!
Can I make this recipe gluten-free?
Yes! Simply substitute the all-purpose flour with a gluten-free all-purpose flour blend and ensure you use gluten-free panko breadcrumbs. The rest of the ingredients are naturally gluten-free.
What kind of oil is best for frying?
A neutral-flavored oil with a high smoke point is best. Good options include canola oil, vegetable oil, grapeseed oil, or sunflower oil. Avoid olive oil, as its smoke point is too low for deep frying.
Can I prepare the tofu katsu ahead of time?
You can press and slice the tofu a day in advance and store it in the refrigerator. You can also prepare the dredging stations and bread the tofu cutlets a few hours before frying. Store the breaded cutlets on a wire rack (to prevent sogginess) in the fridge, loosely covered, until ready to fry. For best crunch, fry just before serving.
What can I use instead of apple cider vinegar in the wet batter?
If you don’t have apple cider vinegar, you can use lemon juice as a direct substitute. Both acidic ingredients help to slightly curdle the plant-based milk, creating a thicker, more adhesive batter that helps the panko stick better.
Conclusion
And there you have it, my lovely friends! A Tofu Katsu recipe that’s not just good, but truly spectacular. This dish is a testament to how incredible plant-based eating can be – full of flavor, texture, and pure comfort. It’s a meal that brings joy to the table, satisfies even the pickiest eaters, and leaves everyone feeling happy and nourished.
I truly hope this recipe inspires you to try something new and perhaps even fall in love with tofu all over again. Whether it’s for a busy weeknight or a special family dinner, this Tofu Katsu is guaranteed to be a hit. Don’t forget to share your creations with me – I absolutely adore seeing what you whip up in your kitchens! Happy cooking, and remember, every meal is an opportunity to create a little magic.