Authentic Vietnamese Fried Spring Rolls (Crispier Than Egg Rolls)
Authentic Vietnamese Fried Spring Rolls (Crispier Than Egg Rolls)
Oh my goodness, mamas! Get ready to transform your kitchen into a Vietnamese culinary haven with these absolutely divine fried spring rolls! They’re incredibly crispy, bursting with flavor, and truly a labor of love that your whole family will adore. Forget those greasy takeout versions; these are the real deal, made with so much heart!
45 minutes
20 minutes
1 hour 5 minutes
25-30 rolls
Appetizer
Frying
Vietnamese
Contains Meat & Seafood
Hello, lovely friends and fellow food adventurers! Today, I am beyond thrilled to share a recipe that holds such a special place in my heart and, I’m sure, will soon find a cherished spot in yours too: Authentic Vietnamese Fried Spring Rolls! If you’ve ever dreamed of recreating that irresistible crunch and savory goodness you find in your favorite Vietnamese restaurant, but thought it was too complicated, think again! I’m here to tell you that with a little love and these step-by-step instructions, you can absolutely master these culinary gems right in your own kitchen.
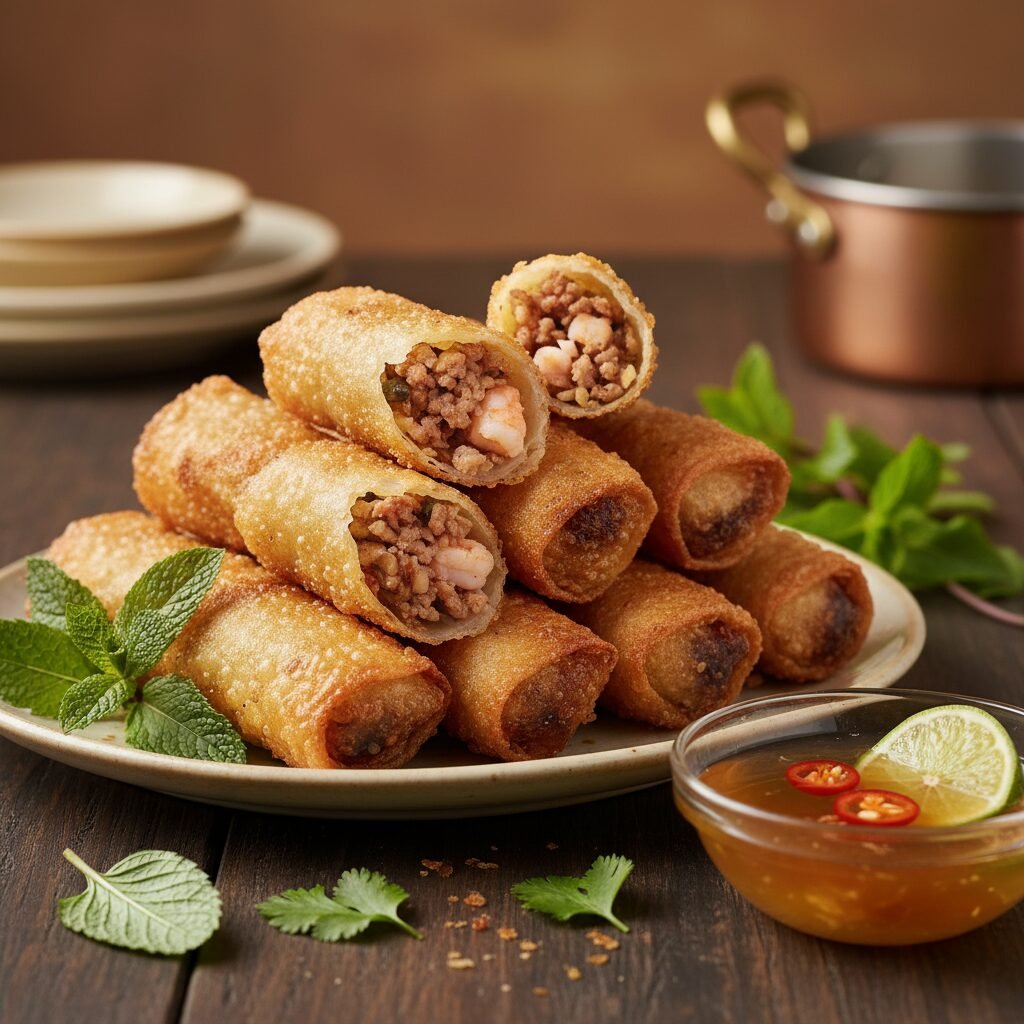
There’s something truly magical about gathering around the table with loved ones, sharing a platter of these golden, crispy delights. Each bite is a symphony of textures and flavors – the delicate, shatteringly crisp wrapper giving way to a juicy, savory filling of pork, shrimp, glass noodles, and earthy mushrooms. It’s not just a meal; it’s an experience, a journey to the vibrant streets of Vietnam, right from your dining room. And let me tell you, these aren’t just any fried rolls; we’re talking about a level of crispiness that will make you forget every egg roll you’ve ever had. They are truly in a league of their own!
I know what you might be thinking: “Fried food? That sounds intimidating!” But trust me, sweet friend, I’ve broken down every single step to make this recipe approachable and fun. We’ll talk about everything from choosing the right wrappers to achieving that perfect golden-brown hue. So, put on your favorite apron, gather your ingredients, and let’s embark on this delicious adventure together. Your taste buds (and your family!) will thank you!
History & Origins
The story of Vietnamese fried spring rolls, known as Chả Giò in the North or Nem Rán in the South, is as rich and flavorful as the rolls themselves! These delightful morsels are a cornerstone of Vietnamese cuisine, deeply intertwined with family gatherings, celebrations, and everyday meals. While often confused with Chinese egg rolls, Vietnamese spring rolls have their own distinct identity, primarily due to their unique rice paper wrappers and the fresh, vibrant fillings.
The tradition of wrapping savory fillings in thin sheets and frying them dates back centuries in various Asian cultures. In Vietnam, the use of delicate rice paper (bánh tráng) is what truly sets Chả Giò apart. This ingenious wrapper, made from rice flour, water, and salt, becomes incredibly crispy and airy when fried, offering a lighter, more delicate crunch compared to the thicker, wheat-based egg roll wrappers. Historically, these rolls were a way to utilize various ingredients, often incorporating whatever fresh produce, meats, and seafood were available, making them a versatile and beloved dish.
Over time, as Vietnamese culture spread globally, so did the love for these fried spring rolls. They’ve become a beloved appetizer and a staple on menus worldwide, a testament to their universal appeal. Every family often has its own cherished recipe, passed down through generations, with slight variations in the filling that make each batch uniquely special. This recipe aims to capture that authentic, homemade essence, bringing a piece of Vietnamese culinary heritage right into your home.
Why This Recipe Works
Alright, my curious cooks, let’s dive into the science behind why these Vietnamese fried spring rolls are so incredibly crispy – even crispier than your average egg roll! It all comes down to a few key elements, and understanding them will make you a spring roll master!
First and foremost, the secret weapon is the rice paper wrapper. Unlike wheat-based egg roll wrappers, rice paper is incredibly thin and delicate. When it hits the hot oil, the moisture within the wrapper rapidly evaporates, creating tiny air pockets. These air pockets expand and crisp up, resulting in that signature light, airy, and shatteringly crisp texture. Wheat wrappers, being thicker and denser, absorb more oil and tend to be chewier.
Secondly, the double-fry method (or frying at two different temperatures) is a game-changer. The initial fry at a lower temperature (around 300-325°F or 150-160°C) cooks the filling through gently and slowly dehydrates the wrapper, preparing it for maximum crispness. It also helps to prevent the rolls from browning too quickly. The second fry at a higher temperature (around 350-375°F or 175-190°C) is where the magic happens! This quick burst of high heat rapidly crisps up the already dehydrated wrapper, giving it that beautiful golden color and incredible crunch without making it greasy.
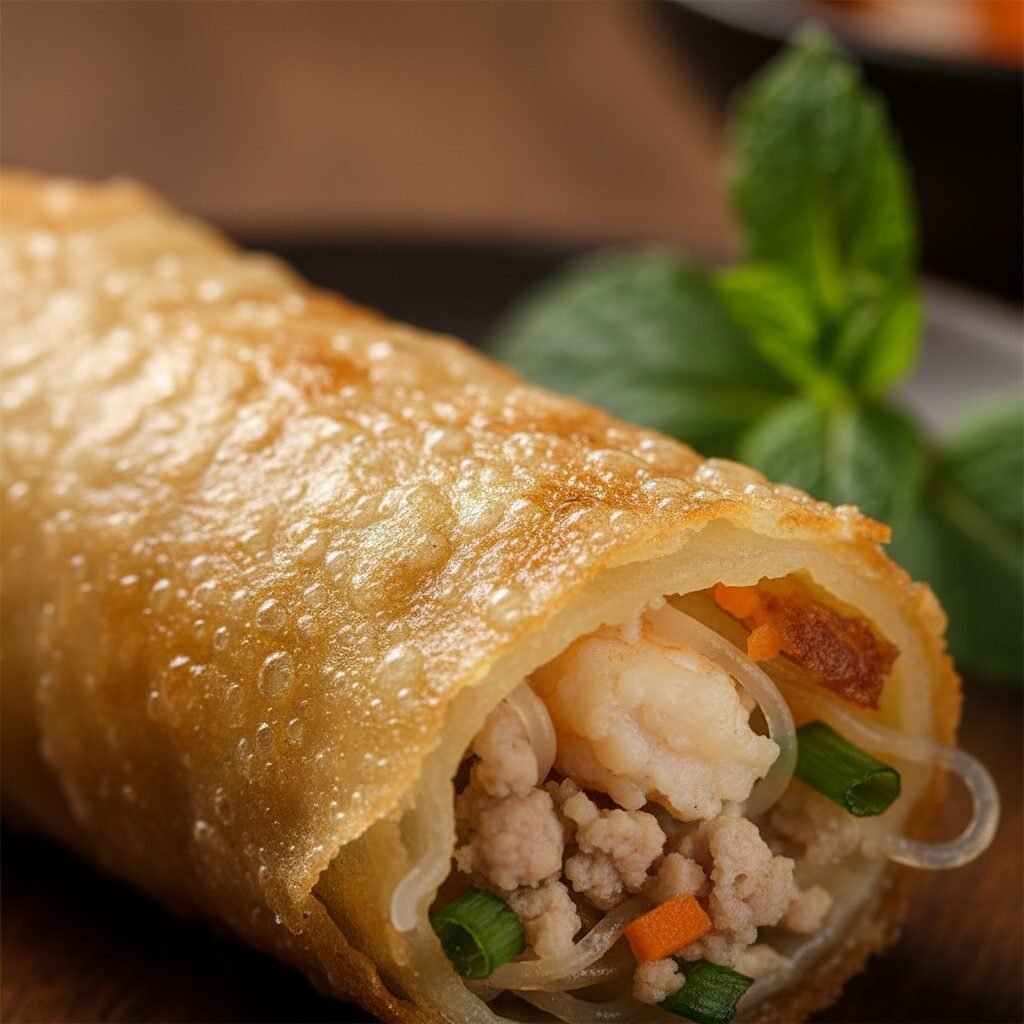
Finally, the filling composition plays a role. A well-balanced filling that isn’t too wet is crucial. Excess moisture can lead to soggy wrappers. The combination of ground pork, shrimp, and rehydrated glass noodles and mushrooms provides a savory, flavorful interior that cooks evenly and doesn’t release too much liquid, allowing the wrapper to achieve its full crispy potential. It’s a delicate dance of ingredients and technique, and when done right, the result is pure culinary bliss!
Why You’ll Love This Recipe
- ✓Achieve unparalleled crispiness with traditional rice paper wrappers.
- ✓Flavorful, savory filling with pork, shrimp, and aromatic vegetables.
- ✓Perfect for entertaining or a special family meal.
- ✓Step-by-step guidance for even beginner fryers.
- ✓A truly authentic taste of Vietnamese cuisine at home.
- ✓Easily customizable to your family’s preferences.
Equipment You’ll Need
- ✓Large mixing bowl
- ✓Cutting board
- ✓Sharp knife
- ✓Large shallow dish or pie plate for wetting wrappers
- ✓Large heavy-bottomed pot or Dutch oven (for frying)
- ✓Spider strainer or slotted spoon
- ✓Wire rack set over a baking sheet
- ✓Paper towels
- ✓Meat thermometer (optional, but recommended)
Ingredients
- ✓For the Filling:
- ✓1 lb (450g) ground pork (preferably 80/20)
- ✓1/2 lb (225g) raw shrimp, peeled, deveined, and finely minced
- ✓1/2 cup (about 2 oz) glass noodles (bean thread vermicelli), rehydrated and chopped
- ✓1/4 cup (about 0.5 oz) dried wood ear mushrooms, rehydrated, stemmed, and finely minced
- ✓1/4 cup (about 0.5 oz) dried shiitake mushrooms, rehydrated, stemmed, and finely minced
- ✓1 small yellow onion, finely minced
- ✓2 cloves garlic, minced
- ✓1 carrot, grated
- ✓2 tablespoons fish sauce
- ✓1 teaspoon sugar
- ✓1/2 teaspoon black pepper
- ✓1 large egg, lightly beaten
- ✓For Rolling:
- ✓1 package (approx. 50 sheets) Vietnamese rice paper wrappers (22cm or 8.5-inch round)
- ✓Warm water (for wetting wrappers)
- ✓For Frying:
- ✓4-6 cups neutral oil for frying (such as canola, vegetable, or peanut oil)
- ✓For Serving (Nuoc Cham Dipping Sauce):
- ✓1/2 cup warm water
- ✓2 tablespoons sugar
- ✓2 tablespoons fish sauce
- ✓2 tablespoons fresh lime juice
- ✓1 clove garlic, minced
- ✓1 small red chili, thinly sliced (optional)
Instructions
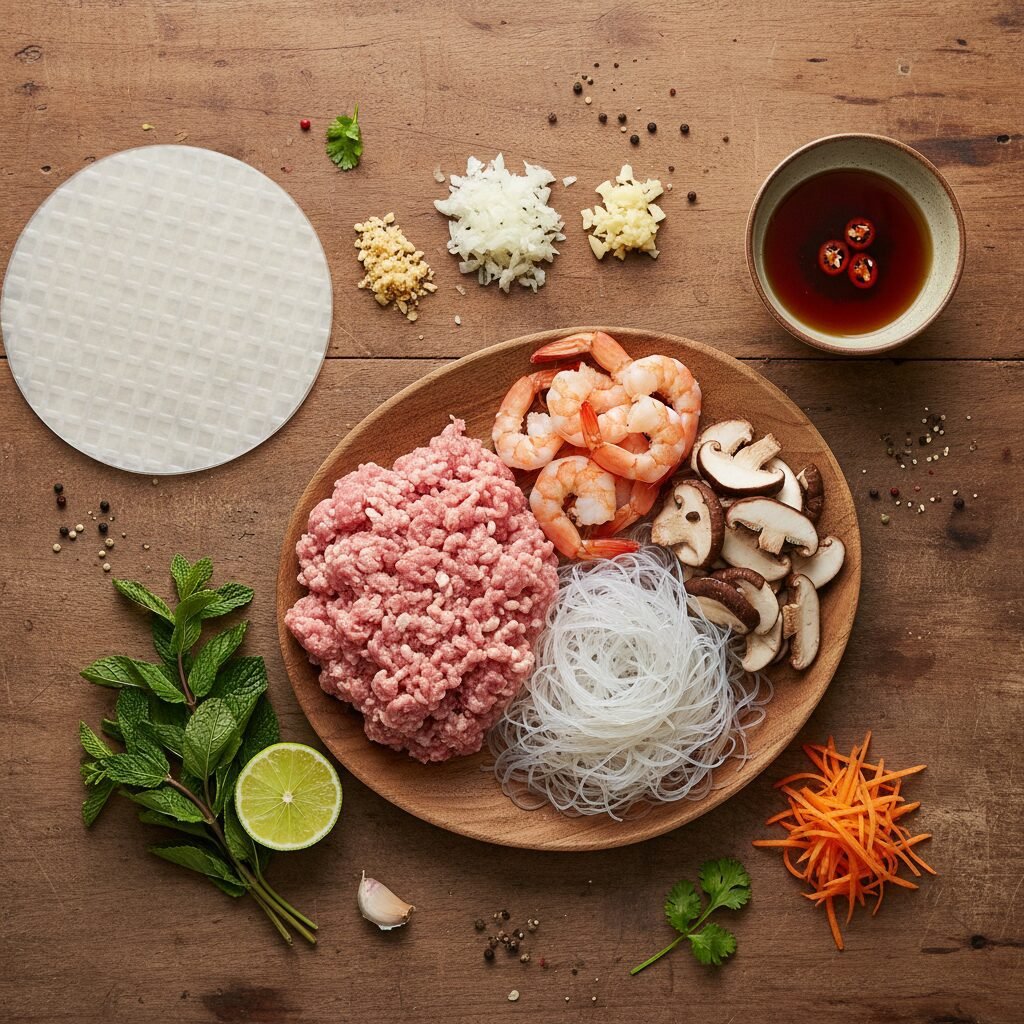
- 1. Prepare the Filling: In a large mixing bowl, combine the ground pork, minced shrimp, chopped glass noodles, minced wood ear mushrooms, minced shiitake mushrooms, minced onion, minced garlic, and grated carrot.
- 2. Add the fish sauce, sugar, black pepper, and beaten egg to the bowl.
- 3. Using your hands (the best tools!), gently but thoroughly mix all the ingredients until well combined. Be careful not to overmix, as this can make the filling tough.
- 4. Prepare the Wrappers: Set up your rolling station. Have your bowl of warm water, a clean damp cloth, your rice paper wrappers, and your filling ready.
- 5. Submerge one rice paper wrapper into the warm water for about 15-20 seconds, or until it’s pliable but not overly soft or sticky. It will continue to soften as you work.
- 6. Carefully lay the softened wrapper flat on your clean damp cloth or a smooth, non-porous surface.
- 7. Roll the Spring Rolls: Place about 1.5 to 2 tablespoons of filling in a log shape near the bottom edge of the wrapper, leaving about an inch of space on each side.
- 8. Fold the bottom edge of the wrapper up over the filling.
- 9. Fold in the left and right sides of the wrapper towards the center.
- 10. Roll the wrapper tightly from the bottom up to create a snug spring roll. Repeat with the remaining filling and wrappers. If you’re not frying immediately, place the rolled spring rolls on a plate, ensuring they don’t touch each other, or they might stick.
- 11. First Fry (Cooking the Filling): Heat 4-6 cups of neutral oil in a large heavy-bottomed pot or Dutch oven over medium heat to 300-325°F (150-160°C).
- 12. Carefully add a few spring rolls to the hot oil, making sure not to overcrowd the pot. Fry for about 5-7 minutes, turning occasionally, until they are lightly golden and the filling is cooked through. The internal temperature should reach 160°F (71°C).
- 13. Remove the rolls with a spider strainer or slotted spoon and place them on a wire rack set over a baking sheet to drain excess oil. Repeat with the remaining rolls. At this stage, they won’t be super crispy, but they will be cooked.
- 14. Second Fry (Achieving Crispiness): Increase the oil temperature to 350-375°F (175-190°C).
- 15. Once the oil is at the higher temperature, carefully return the lightly fried spring rolls to the pot in batches. Fry for another 2-4 minutes, turning frequently, until they are deeply golden brown and wonderfully crispy.
- 16. Remove the rolls and place them back on the wire rack to drain. Serve immediately with Nuoc Cham dipping sauce.
- 17. Make the Nuoc Cham Dipping Sauce: In a small bowl, combine warm water and sugar, stirring until the sugar dissolves. Add fish sauce, lime juice, minced garlic, and sliced chili (if using). Stir well and taste, adjusting to your preference.
Expert Cooking Tips
- ✓Don’t Overfill: Too much filling can make the rolls difficult to seal and prone to bursting during frying.
- ✓Don’t Over-Soak Wrappers: Rice paper softens quickly. A quick dip is all you need. It will continue to soften as you roll.
- ✓Keep Wrappers Moist: If your wrappers are drying out while you roll, keep a damp cloth nearby to lightly dab them.
- ✓Maintain Oil Temperature: Use a thermometer to keep your oil at the correct temperature for both frying stages. This is key for crispiness and even cooking.
- ✓Don’t Crowd the Pot: Frying in batches is essential. Overcrowding lowers the oil temperature and leads to soggy, greasy rolls.
- ✓Drain Properly: Always drain fried rolls on a wire rack, not directly on paper towels, to allow air circulation and prevent sogginess.
- ✓Make Ahead: You can roll the spring rolls a few hours in advance and keep them covered in the fridge. For longer storage, see the storage tips.
Substitutions and Variations
Oh, the beauty of cooking is making it your own, isn’t it? If you’re looking to tweak this recipe a bit, here are some lovely ideas! For a different protein, you can absolutely use ground chicken or turkey instead of pork, or even a mix of ground meat and finely chopped firm tofu for a lighter touch. If shrimp isn’t your jam, feel free to increase the amount of pork or add finely chopped crab meat. For those who prefer a vegetarian option, you can omit the meat and shrimp entirely and increase the amount of mushrooms, add shredded cabbage, mung bean sprouts, and extra glass noodles. Just be sure to adjust the seasoning accordingly! Don’t have wood ear or shiitake mushrooms? Regular button mushrooms, finely diced, will work in a pinch, though they’ll offer a slightly different earthy flavor. And if you’re out of fresh lime for the dipping sauce, rice vinegar can be a good substitute, though lime offers a brighter, more authentic tang.
Common Mistakes to Avoid
Sweet friends, we all make mistakes in the kitchen, and that’s perfectly okay! Learning from them is part of the fun. One of the most common pitfalls with fried spring rolls is over-soaking the rice paper wrappers. If they’re too soft, they’ll be impossible to handle and will tear easily. Remember, just a quick dip until pliable! Another common issue is overfilling the rolls, which can cause them to burst during frying, making a mess and losing that precious filling. Aim for about 1.5-2 tablespoons. Frying at too low a temperature will result in greasy, soggy rolls because they absorb too much oil. Conversely, frying at too high a temperature will brown the outside too quickly before the inside is cooked, or worse, burn them! Always use a thermometer to maintain the correct oil temperature. Lastly, overcrowding the frying pot is a big no-no. It drops the oil temperature significantly, leading to less crispy results. Fry in small batches for the best outcome!
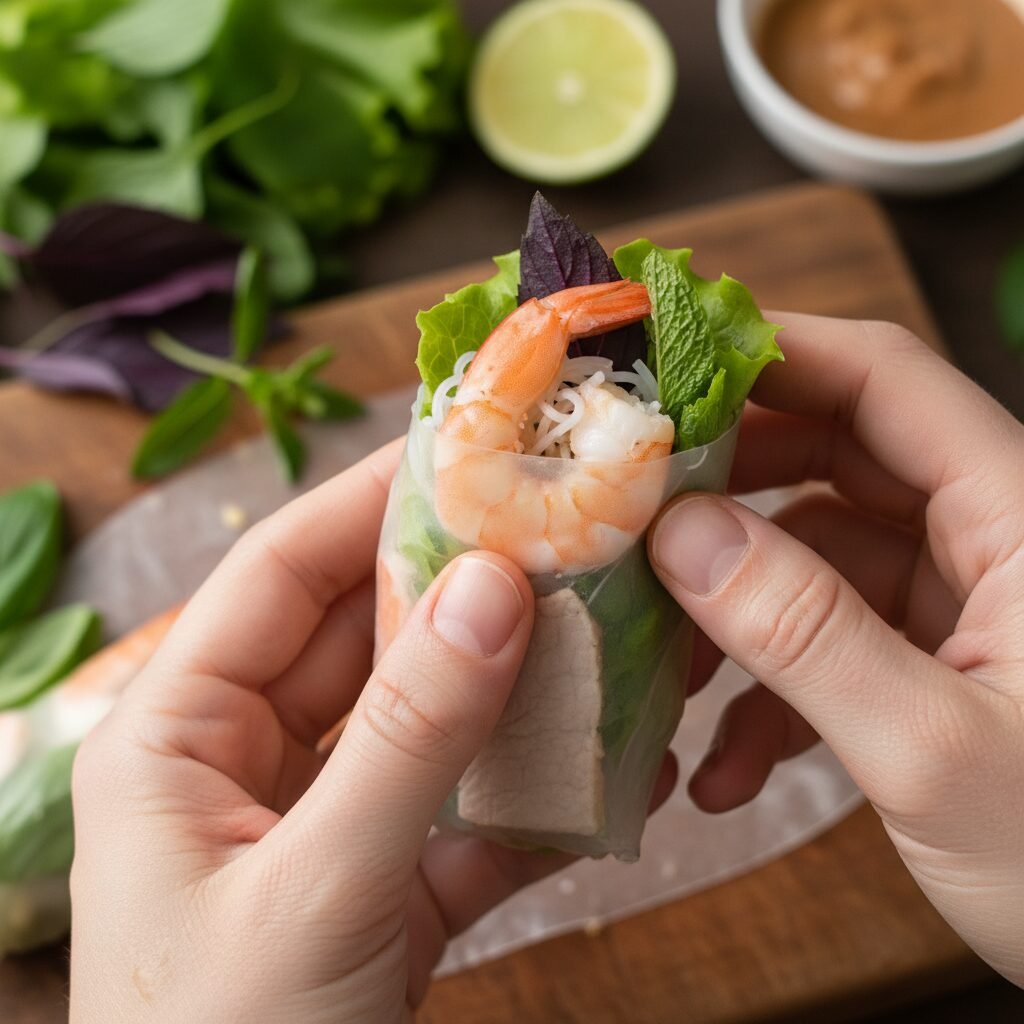
Serving Suggestions
These authentic Vietnamese fried spring rolls are absolutely divine served hot and fresh, straight from the fryer! The classic pairing is with a bowl of vibrant Nuoc Cham dipping sauce – that sweet, sour, salty, and spicy balance is just heavenly. But don’t stop there! I love to serve them alongside a platter of fresh herbs like mint, cilantro, and perilla leaves, and crisp lettuce leaves. The idea is to wrap a warm spring roll in a lettuce leaf with a few fresh herbs, then dip it into the Nuoc Cham. It adds such a refreshing contrast to the richness of the fried roll! They also make a fantastic appetizer for a larger Vietnamese feast, perhaps alongside fresh spring rolls (gỏi cuốn), a big bowl of pho, or a vermicelli noodle salad (bún chả giò). For a simple family dinner, they’re perfect with just a side of steamed jasmine rice and a light cucumber salad. So many delicious ways to enjoy these beauties!
Storage and Reheating Tips
If you happen to have any leftover fried spring rolls (a rare occurrence in my house!), you can store them in an airtight container in the refrigerator for up to 2-3 days. To reheat and bring back some of that glorious crispiness, I highly recommend using an air fryer or an oven. In an air fryer, heat at 350°F (175°C) for 5-8 minutes, flipping halfway, until hot and crispy. In an oven, bake at 375°F (190°C) for 10-15 minutes, or until heated through and re-crisped. Microwaving is generally not recommended as it will make them soggy. You can also prepare the rolls ahead of time and freeze them uncooked! After rolling, place them in a single layer on a baking sheet and freeze until solid. Then transfer them to a freezer-safe bag or container for up to 1 month. When ready to fry, you can fry them directly from frozen, adding a few extra minutes to the first fry time.
Nutrition Facts (Estimated)
| Serving Size | 2 rolls |
| Calories | 280 |
| Fat | 18g |
| Saturated Fat | 6g |
| Unsaturated Fat | 10g |
| Trans Fat | 0g |
| Cholesterol | 70mg |
| Sodium | 450mg |
| Carbohydrates | 18g |
| Fiber | 2g |
| Sugar | 3g |
| Protein | 12g |
Frequently Asked Questions
Can I make these spring rolls vegetarian?
Absolutely! You can omit the pork and shrimp and increase the amount of mushrooms, add shredded cabbage, mung bean sprouts, and finely diced firm tofu for a delicious vegetarian version.
What’s the difference between Vietnamese fried spring rolls and Chinese egg rolls?
The main difference lies in the wrapper! Vietnamese spring rolls (Chả Giò) use delicate rice paper wrappers, which fry up incredibly light and crispy. Chinese egg rolls typically use thicker, wheat-based wrappers that result in a chewier, denser texture.
My spring rolls are soggy, what went wrong?
Soggy rolls are usually due to oil that isn’t hot enough, or overcrowding the pot. Make sure your oil is at the correct temperature (use a thermometer!) and fry in small batches to maintain that heat. Also, ensure your filling isn’t too wet.
Can I bake these instead of frying?
While frying yields the crispiest results, you can bake them! Brush them lightly with oil and bake at 400°F (200°C) for 20-25 minutes, flipping halfway, until golden brown. They won’t be quite as crispy as fried, but still delicious!
Where can I find rice paper wrappers?
Rice paper wrappers are readily available in the international aisle of most large grocery stores, Asian supermarkets, or online. Look for the round, thin, translucent sheets.
Can I prepare the filling in advance?
Yes! You can prepare the filling up to a day in advance and store it in an airtight container in the refrigerator. This makes assembly on the day of serving much quicker.
How do I prevent the rolls from sticking together after rolling?
Place the rolled spring rolls on a plate or baking sheet in a single layer, ensuring they don’t touch each other. You can also lightly dust the plate with a little cornstarch if you’re worried, but usually, a single layer is sufficient.
What kind of oil is best for frying?
A neutral-flavored oil with a high smoke point is best, such as canola oil, vegetable oil, peanut oil, or grapeseed oil.
Conclusion
And there you have it, my sweet friends! A truly authentic and incredibly delicious recipe for Vietnamese Fried Spring Rolls that will have everyone asking for more. This recipe is more than just food; it’s an invitation to create beautiful memories in your kitchen, to share laughter and good conversation around a table laden with these golden treasures. The joy of biting into that perfectly crispy exterior, followed by the savory, aromatic filling, is a culinary experience you won’t soon forget. Don’t be shy about trying something new; I promise, the reward is so worth it! So go ahead, gather your ingredients, put on some happy music, and let’s make some magic. Happy cooking, and enjoy every single crispy, flavorful bite!